Tutorials
Learning loops
In general, the “loop” is usually a sequential selection of several points, edges or polygons of a mesh.
However, there is an element in the mesh structure, which is also called a “loop”. It is a combination of one vertex with one edge of the mesh. Let’s try to learn what these “loops” are for.

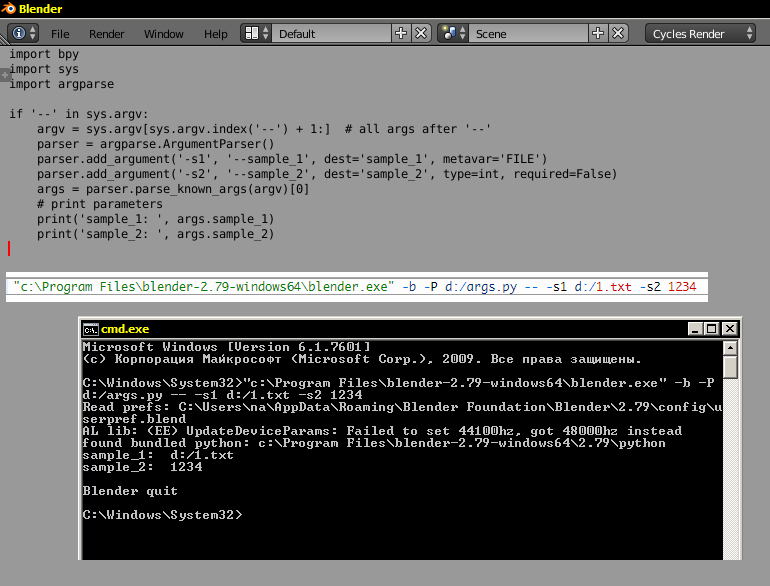
How to pass command line arguments to a Blender python script or add-on
When starting Blender from the console it processes all parameters passed through the command line. However, some scripts and add-ons for proper work may require specifying their unique command line arguments. If you specify such additional parameters in the command line, Blender will also try to process them, which is likely to result in an error. Blender provides a special way to exclude such arguments from own processing.
How to pass command line arguments to a Blender python script or add-onRead More »
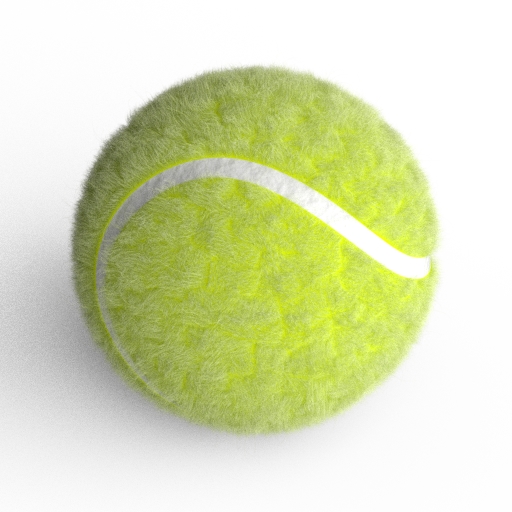
How to render an object with reflections on a white background
The single object visualization most often is performed on a clear white background. It is difficult to achieve this through the common configuring the scene – increasing the illumination of the scene “lights up” the object, decreasing – the background becomes gray instead of white. If the object itself can be simply rendered on a transparent background and then imposed on white, but what about its reflections?

Let’s consider the way how we can render the object and its reflection on a white background.
How to render an object with reflections on a white backgroundRead More »
Debugging multifile Blender add-on by quick reinstall
It is convenient to use the following system for debugging developing multi-file Blender add-ons. But it has one drawback: modules imported in __init__.py file becomes available only after the file running (after the execution of the register() function). This means that any access to the imported modules before they are registered will cause an error. This is not critical in most cases, but it will cause a problem if, for example, in one imported module is used inheritance from the class, described in the other imported module, because the classes descriptions are processed before the add-on registration.
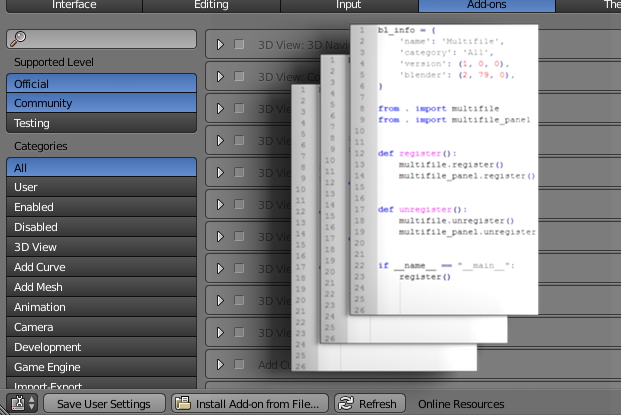
To get more freedom working with imported modules, we can use another way to debug the add-on – do not run the add-on directly from the development directory, but install it in Blender and check its “live” work. However, manual add-on reinstallation requires a set of routine actions, which complicates such sort of debugging. This issue can be solved by reinstalling the add-on in automatic mode.
Debugging multifile Blender add-on by quick reinstallRead More »
Working with UV-Maps through the Blender API
Active (selected) UV-Map:
|
1 |
bpy.context.active_object.data.uv_layers.active |
Access to the active UV-Map by its name:
|
1 |
bpy.context.active_object.data.uv_layers['UVMap'] |
Rotating texture by nodes
In order to achieve the desired texture mapping on the object surface, we need a convenient tool for manipulating the texture coordinates. Especially for procedural textures mapped to the object without using UV-s.
The “Mapping” node combines tools for texture moving, rotating and scaling is suitable for most of the texturing tasks. But sometimes its power is not enough. Its major drawback is that it allows setting adjustment values only in certain fields within the node body. These fields have no inputs and cannot be connected to the other nodes.
However, we can implement the required functionality devoid of the “Mapping” node lack with the help of some other nodes. Let’s consider how to build a node tree to rotate the texture around the Z-axis of the object by a random value.

One more way to create screw in Blender
One of the distinguishing Blender features is that many things can be performed in various ways, choosing the most convenient and fastest for your taste. For example, a screw can be created not only by drawing the profile of its teeth. Let’s try an alternative way:

Creating pop-up panels with user UI in Blender add-on
In addition to common panels (N/T/Properties) and their sub-panels, to display the user interface elements while developing Blender add-ons you can also use pop-up panels appearing on the screen when a user presses a certain key combination or perform any action. The simplest example of such panels is the panel that appears when the f6 key is pressed immediately after adding an object (shift+a) to the scene.
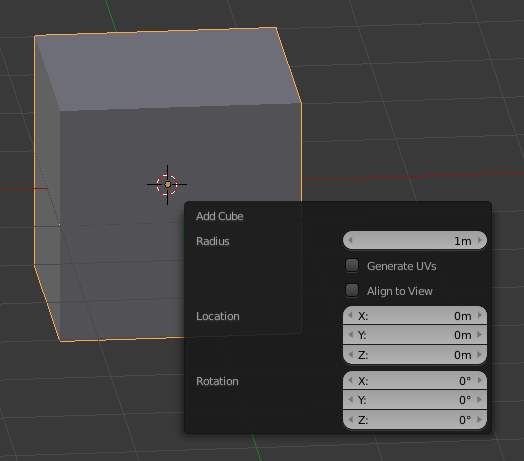
Blender API provides developers the ability to create such panels for their add-ons. Let’s consider the creating of a pop-up panel as an example of the “Message box” window.
Creating pop-up panels with user UI in Blender add-onRead More »
Modeling with curves: wires and pipes
Creating thin long objects like pipes and wires is the often task in the interior, scientific of fantastic scenes. One of the easiest and most convenient ways to create such objects is using curves.

The main curves advantage is the easiest control and editing: any time you can change the shape of the curve, move its points, add new and delete unnecessary ones. You do not have to work with a lot of mesh points, but only with several points of the curve, which is much more convenient. Preprocessing for rendering scene with curves is also performed faster than with meshes.