The single object visualization most often is performed on a clear white background. It is difficult to achieve this through the common configuring the scene – increasing the illumination of the scene “lights up” the object, decreasing – the background becomes gray instead of white. If the object itself can be simply rendered on a transparent background and then imposed on white, but what about its reflections?

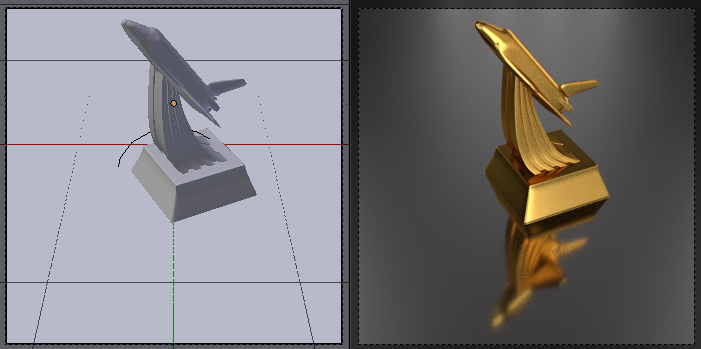
Let’s consider the way how we can render the object and its reflection on a white background.
- First, let’s prepare the scene.
- Create an object and place it on the glossy plane.
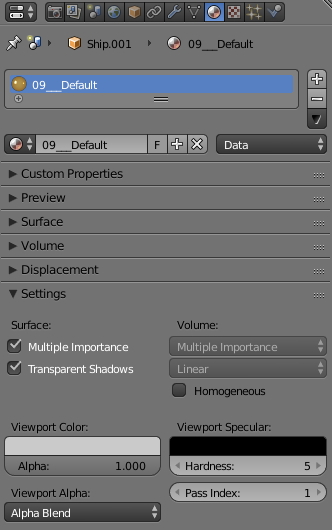
In the “Properties” window on the “Material” tab in the “Settings” panel set the Pass Index to 1 for the object material.
- Now let’s create a mask to separate the object with its reflection from the background plane.
Select the object and the background plane and make their copies:
shift+d – Enter
Move them to the second layer:
m – 2 – Enter
Switch to the second layer. For the object copy that we put here, set the emission material with a strength of 1.

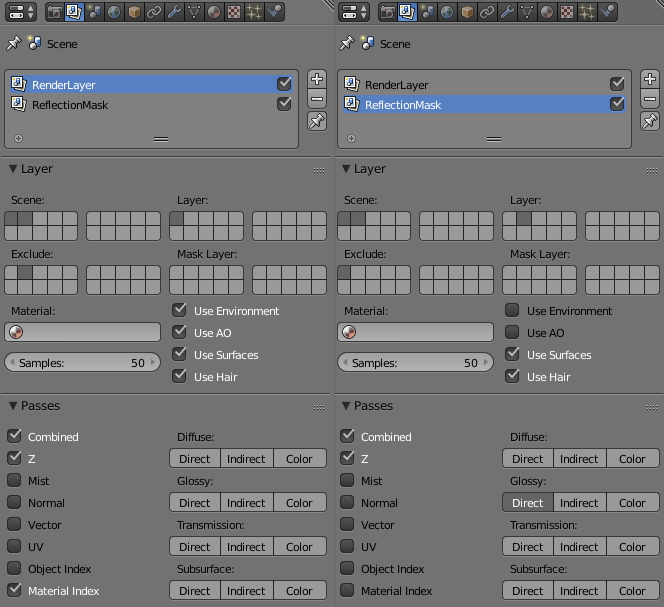
In the “Properties” window of the “Render Layers” tab:
Configure the first renderer layer “RenderLayer”: set only the first scene layer for rendering in “Layer” and exclude the influence of the second scene layer in “Exclude”. Check the “Material Index” checkbox.
Click on the “plus” sign to create a new render layer. Name it “ReflectionMask”. Invert settings for it – in “Layer” mark only the second scene layer for rendering, and in “Exclude” exclude the influence of the first one. Also for the second render layer, off the “Use Environment” checkbox to disable the environment lighting, leaving only the Emission object’s own light. In the “Passes” panel mark the “Glossy – Direct” render pass.
- The scene is ready, switch to the “Compositing” mode.
Let’s render both render layers to control our work through the “Viewer” node visually.
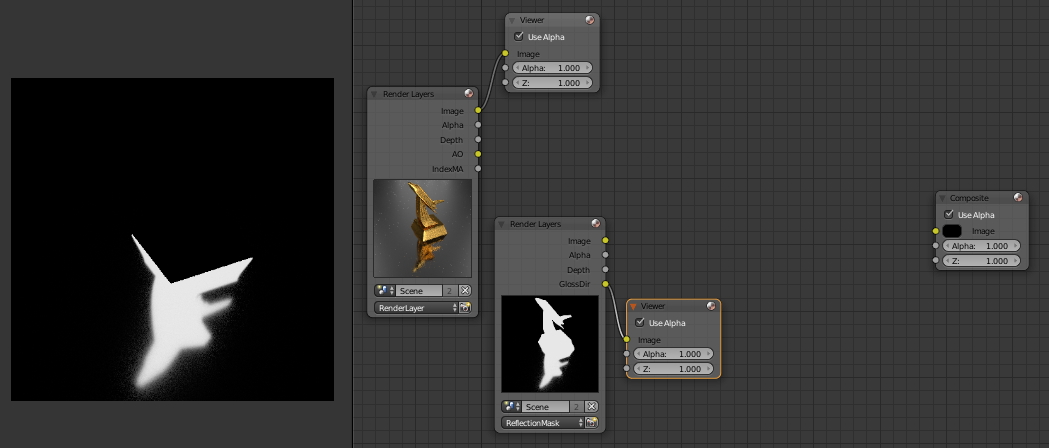
Now we have the image with the object and the background (first render layer) and the black-and-white mask from the GlossyDirect output of the second render layer to separate the reflection of the object from the background.
First, let’s separate the object itself from the background.
Add an “ID Mask” node:
shift+a – Converter – ID Mask
Connect the “IndexMA” output of the Render Layers node (Render Layer) to the “ID Value” input of the “ID Mask” node.
Check the “AntiAliasing” checkbox on the “ID Mask” node and set the “Index material” to 1. This is the same value that we set for the object material in the “Pass Index”.
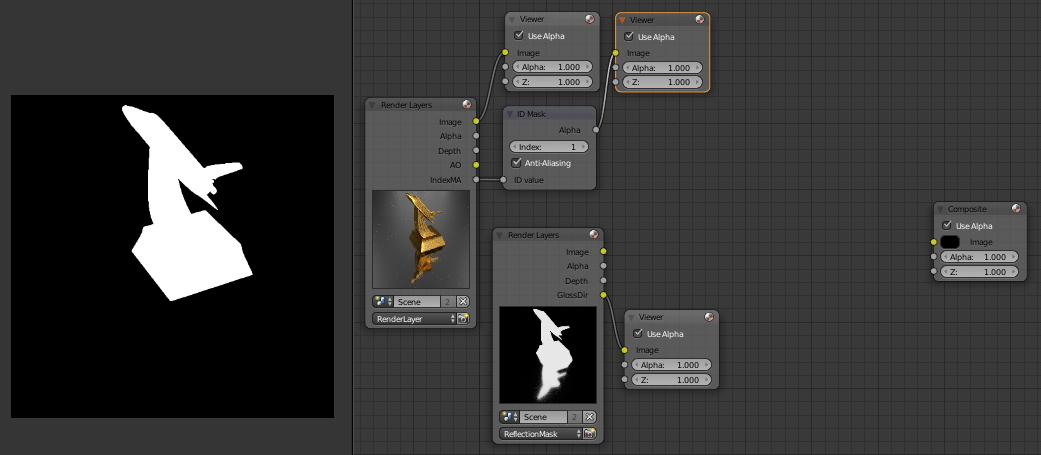
Now we got a black-and-white mask for separating the object from the background.
Combine both masks, for the object and for its reflection, into one.
Add a “Mix Color” node:
shift+a – Color – Mix
Connect the “Alpha” output of the “ID Mask” node to the “Fac” input of the “Mix” node and to the lower “Color” input of the same “Mix” node.
Connect the “Glossy Direct” output of the “Render Layers” node (ReflectionMask) to the top “Color” input of the “Mix” node.
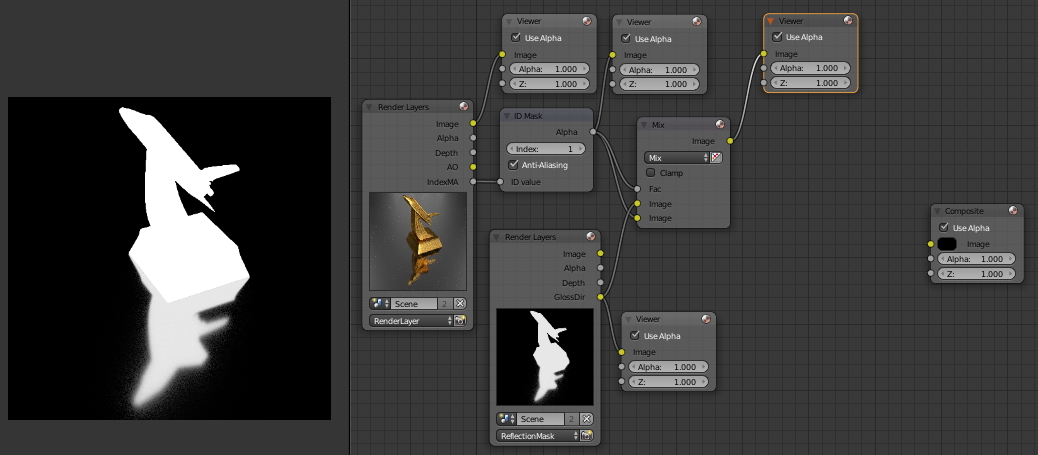
It seems that this was a “monkey work” because we already have a black-and-white mask obtained from the “Image” output of the “Render Layers” node from the “ReflectionMask” render layer. However, it was not. The mask obtained directly from the emission material is not clearly white, so, when further using this mask, the result would be muddy. It looks good for reflections, but bad for the object itself. After our manipulations, we have a clear white mask for the object and blurred mask for its reflection, which will give us a good result.
Invert the mask – the mask color to cut the object from the background must match the black one.
Add an “Invert” node:
shift+a – Color – Invert
Connect the “Image” output of the “Mix” node to the “Color” input of the “Invert” node.
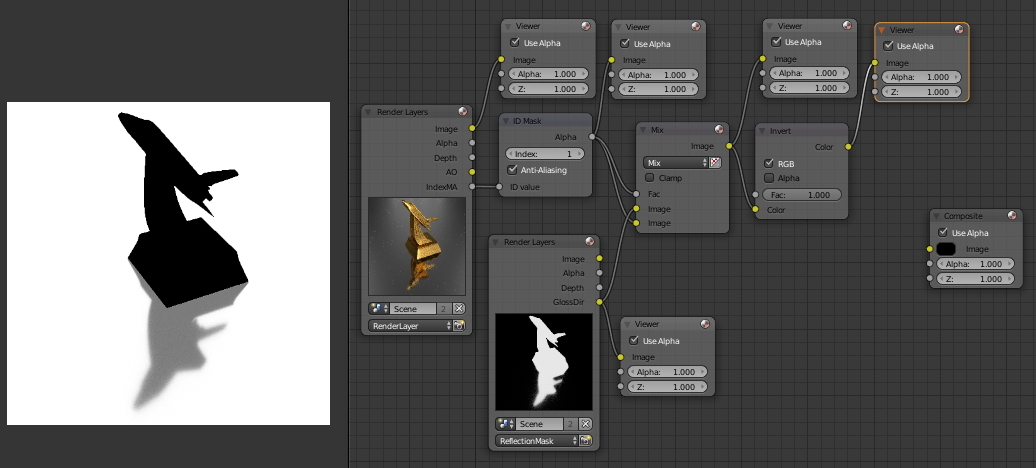
Now we have the proper mask and can separate the object with its reflection from the background.
Add a “Set Alpa” node:
shift+a – Converter – Set Alpha
Connect the “Color” output of the “Invert” node to the “Image” input of the “Set Alpha” node.
Add an “Alpha Over” node:
shift+a – Color – Alpha Over
Connect the “Image” output of the “Set Alpha” node to the “Fac” input of the “Alpha Over” node.
Connect the “Image” output of the “Render Layers” node (“Render Layer”) to the upper “Image” input of the “Alpa Over” node.
Set the white color alpha value to 0 in the bottom “Image” input of the “Alpha Color” node.
These two nodes combination adds a transparency factor (“Set Alpha” node) to our mask and blends it with the object and its reflection image (through the “Alpha Over” node) replacing the background with white color.
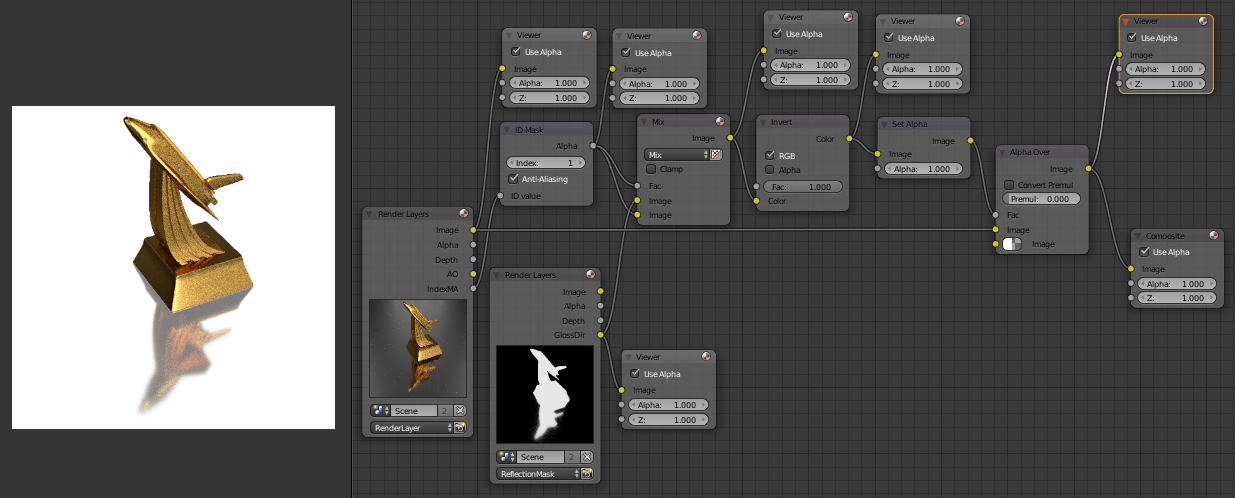
Connect the “Image” output of the “Alpha Over” node to the “Image” input of the “Composite” node to obtain the final rendering result.