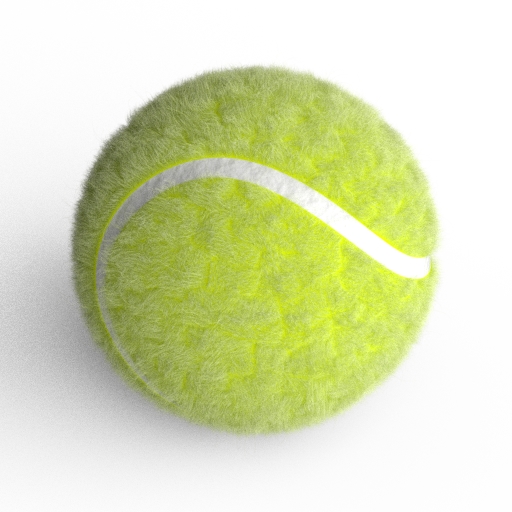
Creating a tennis ball in Blender:
It’s easiest to start modeling a tennis ball in Blender from the default cube. If you deleted it, add a new one:
shift+a – Mesh – Cube
Switch to the “Edit mode”:
tab
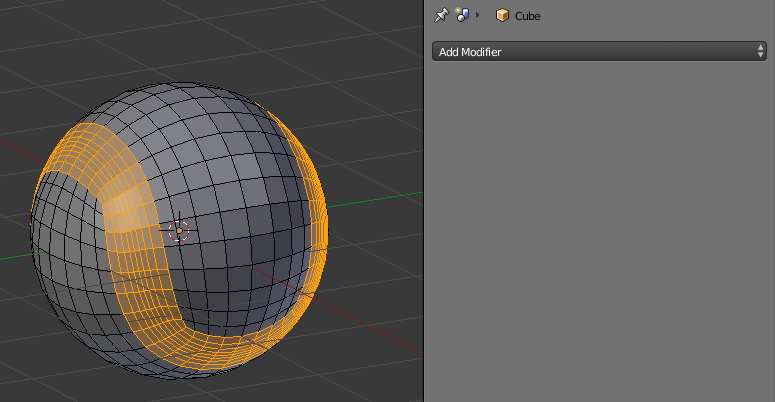
Enable the “Edge select” mode and select the edges of the cube with a closed loop:
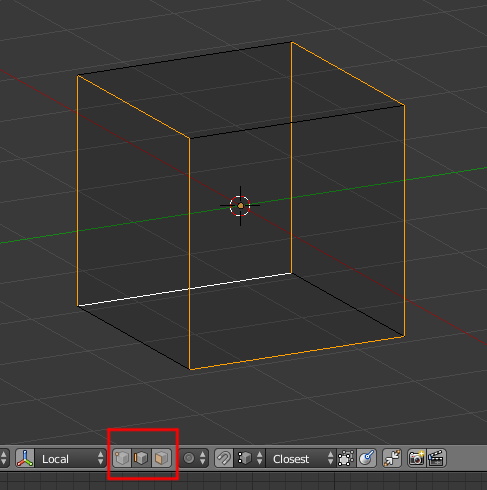
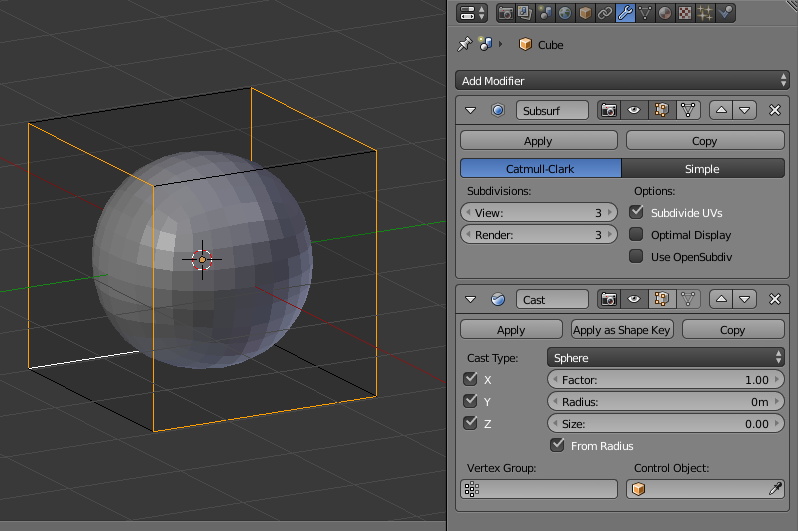
Add the Subdivision Surface modifier with:
Subdivisions: View = 3
Add the Cast modifier with:
Cast type: Sphere
Factor = 1.00
For the selected edges let’s create a chamfer by pressing:
ctrl + b
and slightly moving the mouse, then pressing “enter”.

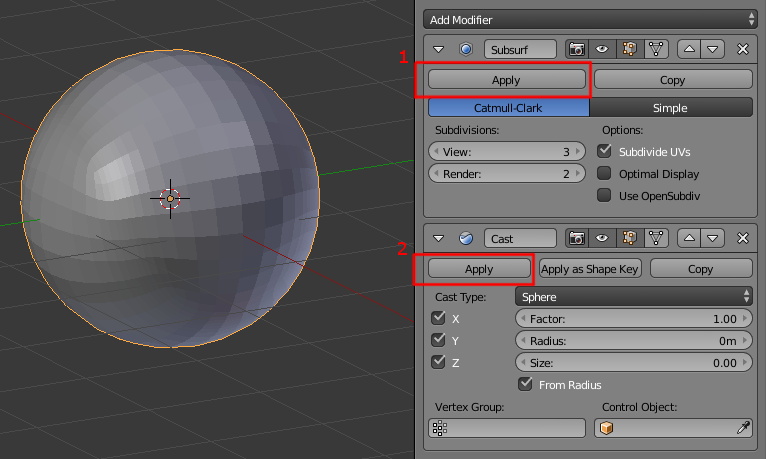
Switch to the “Object mode”:
tab
and apply both modifiers, starting with the top.
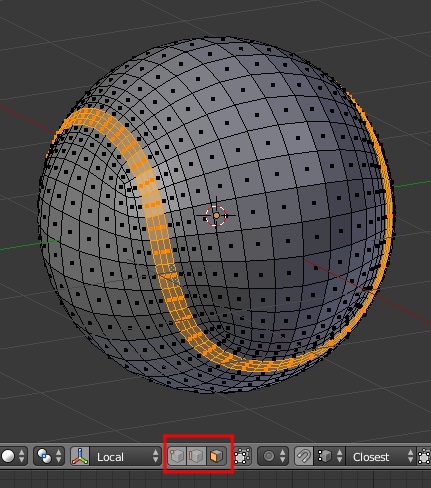
Switch to the “Edit mode” again (tab).
Enable the “Face select” mode and make selected only 3 central tracks from the previous selection. It is convenient to do this by clicking on the polygon borders with the “alt” key pressed.
Let’s create a groove by extruding the selected polygons inside the ball. Press:
e – s
and move the polygons slightly in the desired direction by the mouse. Then press “enter”.
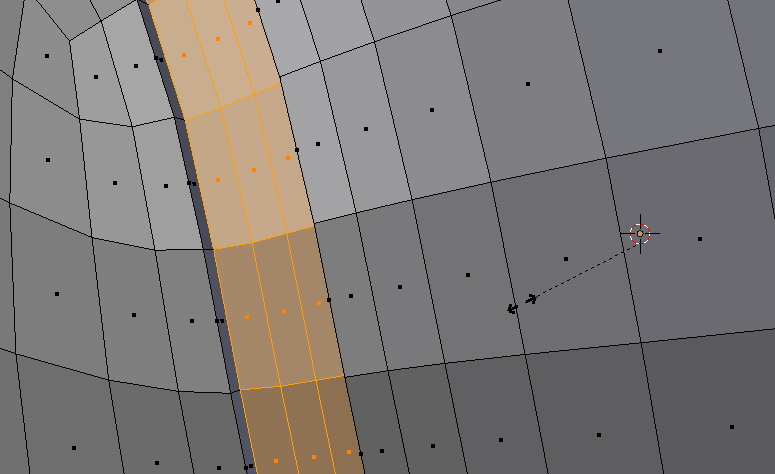
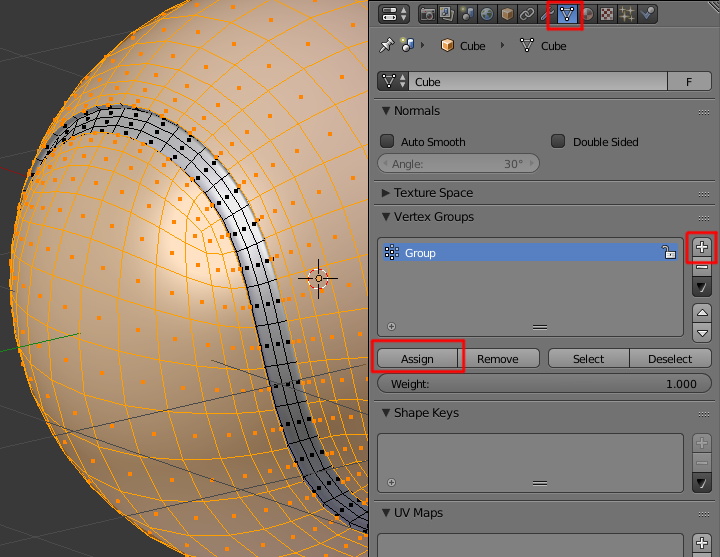
Add the side walls of the resulting groove to the selection.
In the “Vertex Groups” section of the “Data” panel, click “+” to add a new vertex group. Invert selection
ctrl + i
and by pressing the “Assign” button let’s save the selected polygons to the created group.
Switch to the “Object mode” (tab) and add the Subdivision Surface modifier again with:
Subdivisions: View = 1
Subdivisions: Render = 1
If necessary, the values can be changed at any time.
Turn on the smooth shading mode by pressing the “Smooth” button in the T-panel.

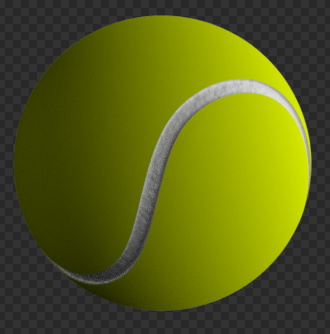
The tennis ball shape is ready. Let’s create a soft cover for it.
Switch to the second layer by pressing the 2 key.
Add the Bezier curve:
shift+a – Curve – Bezier
In the “Edit mode” (tab), move the left endpoint of the curve to its origin and others curve points to follow the X-axis direction. Slightly change the shape of the curve.
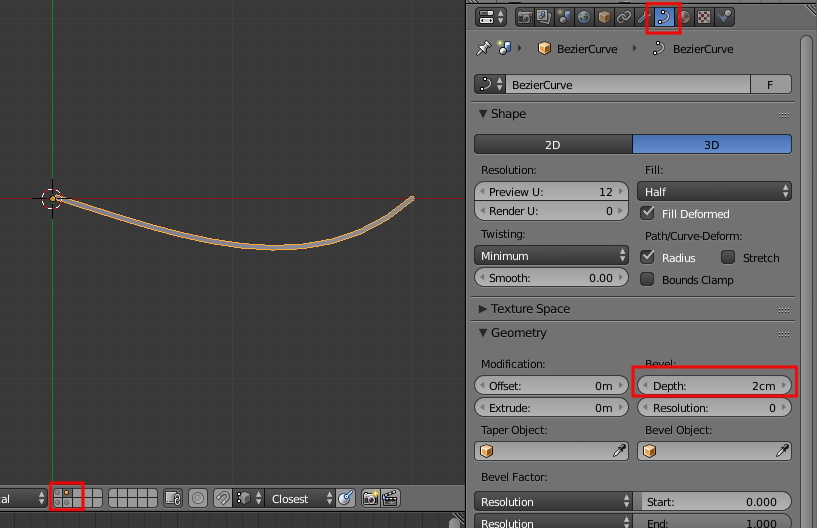
In the curve parameters, set:
Bevel: Depth = 0.02
Add the material to the curve by clicking the “New” button in the Node Editor window:

Add the following nodes to the material:
- Mix Shader (shift+a – Shader – Mix Shader)
- Transparent BSDF (shift+a – Shader – Transparent BSDF)
- ColorRamp (shift+a – Converter – ColorRamp)
- SeparateXYZ (shift+a – Converter – SeparateXYZ)
- Texture Coordinate (shift+a – Input – Texture Coordinate)
and link them as shown:

In this node tree we use the “Texture Coordinate” and the “SeparateXYZ” nodes to take the direction of our curve (along with the X-axis) and with the “ColorRamp” node make the color transition along this direction from light-green to white, and also add the transparency. We assigned a light-green opaque color to the left checker of the “ColorRamp” node, and white with full transparency – to the right one.
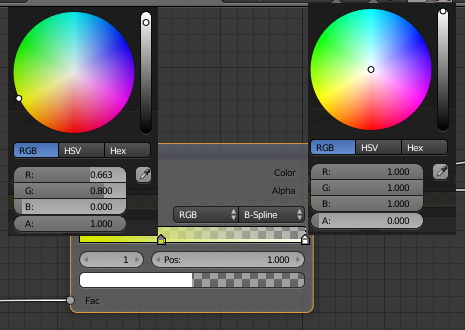
It makes the color gradient and the transparency between the “ColorRamp” checkers. To make the curve transparent we mix the diffuse color, the “Diffuse BSDF” node, with the transparent (“Transparent BSDF” node) by the “Mix Shader” node takes the “ColorRamp” node Alpha as a “Factor” value.
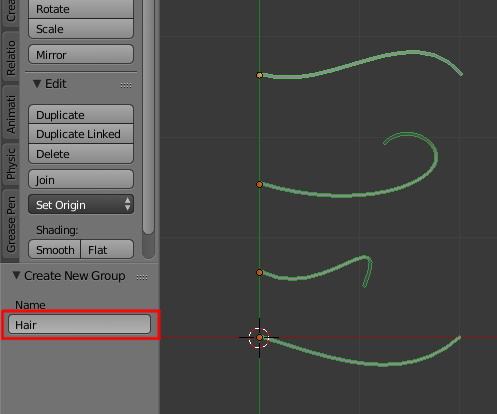
Let’s create several copies of the curve by clicking:
shift+d
and moving. For each copy in the “Edit mode”, slightly change the shape.
Select all the curve copies and merge them into the group:
ctrl+g
Name it “Hair”.
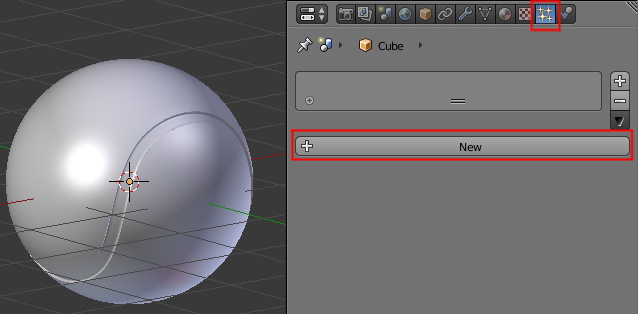
Return to the first layer by pressing the 1 key and select the tennis ball mesh.
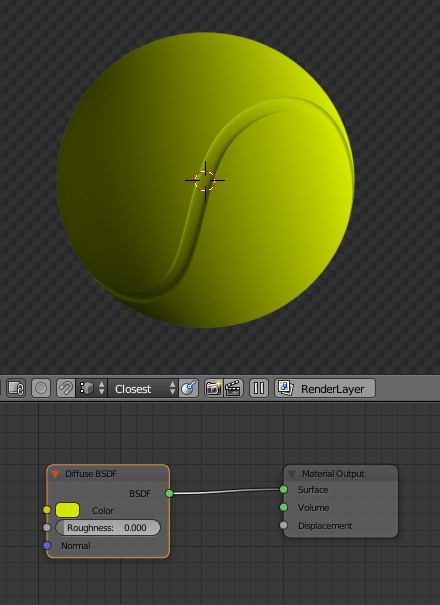
By clicking the “New” button in the “Node Editor” window create a new material. In the “Diffuse BSDF” node set a light-green color, the same as we used for coverage.
Let’s make a separate material for the groove.
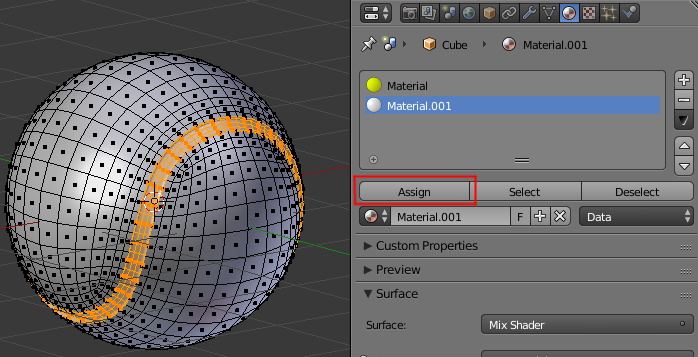
Switch to the “Edit Mode” and select the groove. In the “Material” panel of the “Properties” window click the “+” and then the “New” button to add new material.
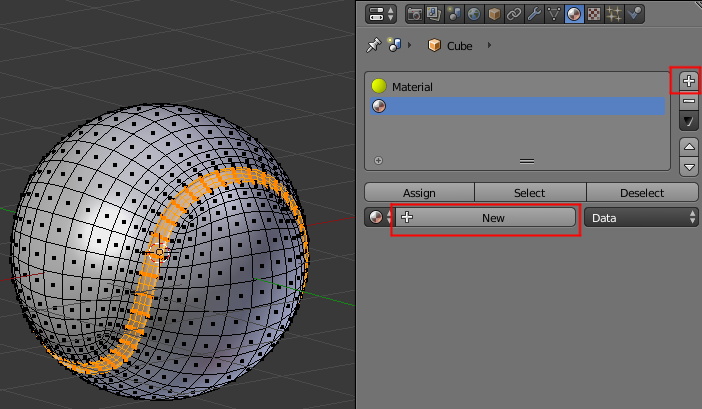
Assign the new material to the selected polygons by pressing the “Assign” button.
Switch to the “Object mode”. In the “Node Editor” window correct the material by adding the following nodes:
- Mix Shader (shift+a – Shader – Mix Shader)
- Multiply (shift+a – Converter – Math – select “Multiply” in the nodes drop-down list)
- below Value = 0.2
- Layer Weight (shift+a – Input – Layer Weight)
- Glossy BSDF (shift+a – Shader – Glossy BSDF)
- Noise Texture (shift+a – Texture – Noise Texture)
- Scale = 33
- Detail = 15
and link them as shown:

Using the “Noise Texture” node and the “Multiply” node, we got a rough white and a bit glossy (mixing “Diffuse” and “Glossy” nodes) color.
It remains to put a soft coating to the tennis ball.
In the “Particles” tab of the “Properties” window add a new particle system by clicking the “New” button.
Name it “Short” and set the following parameters:
- Type = Hair
- Advanced (check)
- Emission
- Number = 2000
- Hair Length = 1.2
- Rotation (check)
- Initial Orientation = Normal/Tangent
- Random = 0.25
- Phase – Random = 2
- Render
- Group (select this)
- Set the previously created curves group “Hair”
- Rotation (check)
- Children
- Interpolated (select this)
- Render = 400
- Random = 0.5
- Vertex Groups
- Density – set the previously created polygons group “Group”
The “Hair Length” parameter adjusts the length of the coating hairs. When we set the group of polygons in “Vertex Groups” – “Density” we create a cover only on the polygons included in this group – the whole surface of the ball, except the groove.

Click on “+” once again to create another particle system. Name it “Long”.
Set parameters of this system the same as for “Short”, except for the “Children” section (leave it with “None”). Set he Emission – Number parameter to 300 and the “Hair Length” to 2.2.
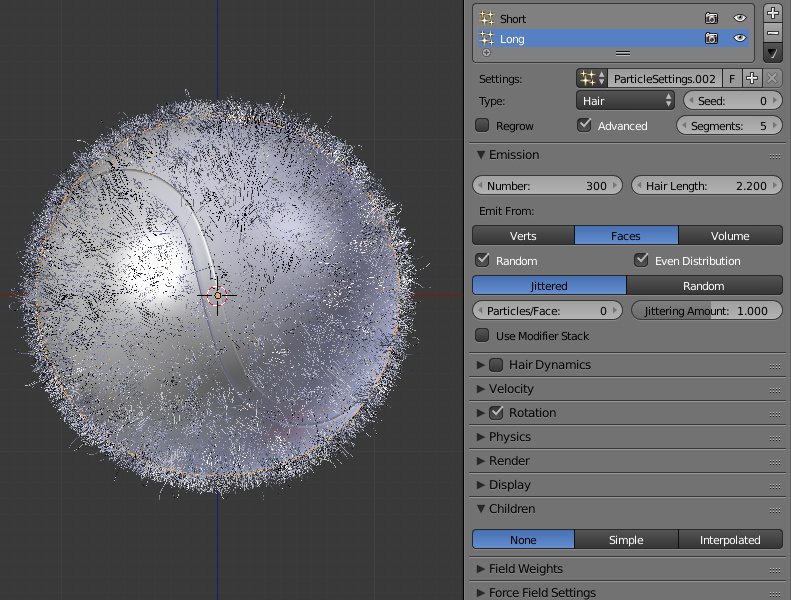
The coating is finished.
The particle systems parameters for covering the ball (number of hairs, their length, randomization, number of children) depends on the size of the curves created earlier. To get a good result, you need to experiment and find the appropriate values. Then send your scene to render.
hi can you tell me what version of blender you are useing for the tennis ball thanks
Hi!
This tutorial is for 2.79. You can see the Blender version for the tutorial in the top of the post. But the base modelling steps are the same and I think it can be useful in lastest Blender versions too.