4.1

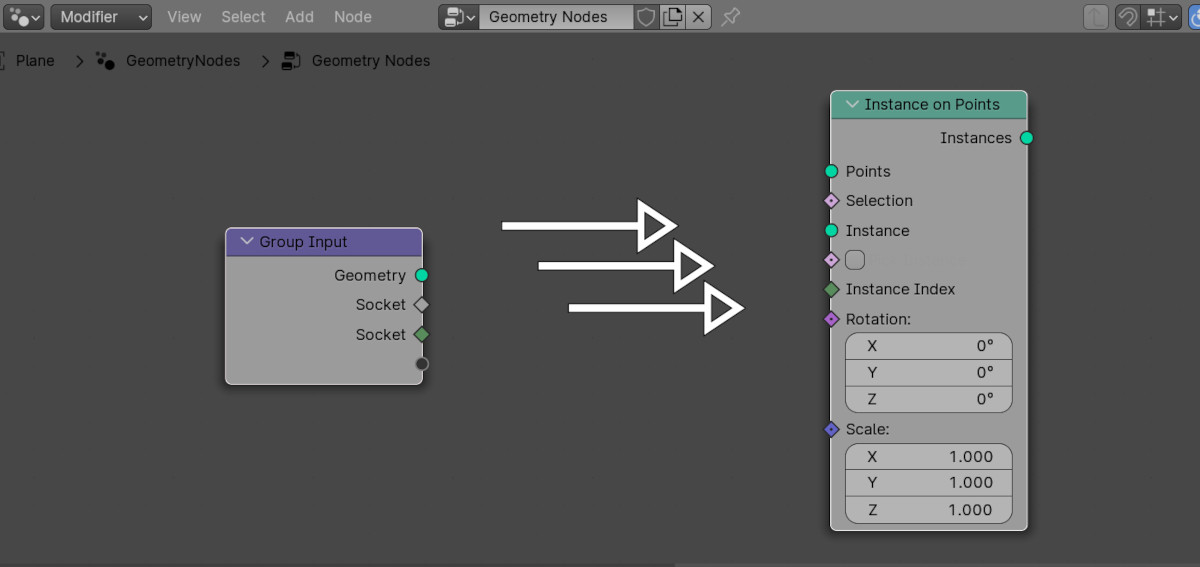
Changing the order of sockets in Blender Geometry Nodes groups

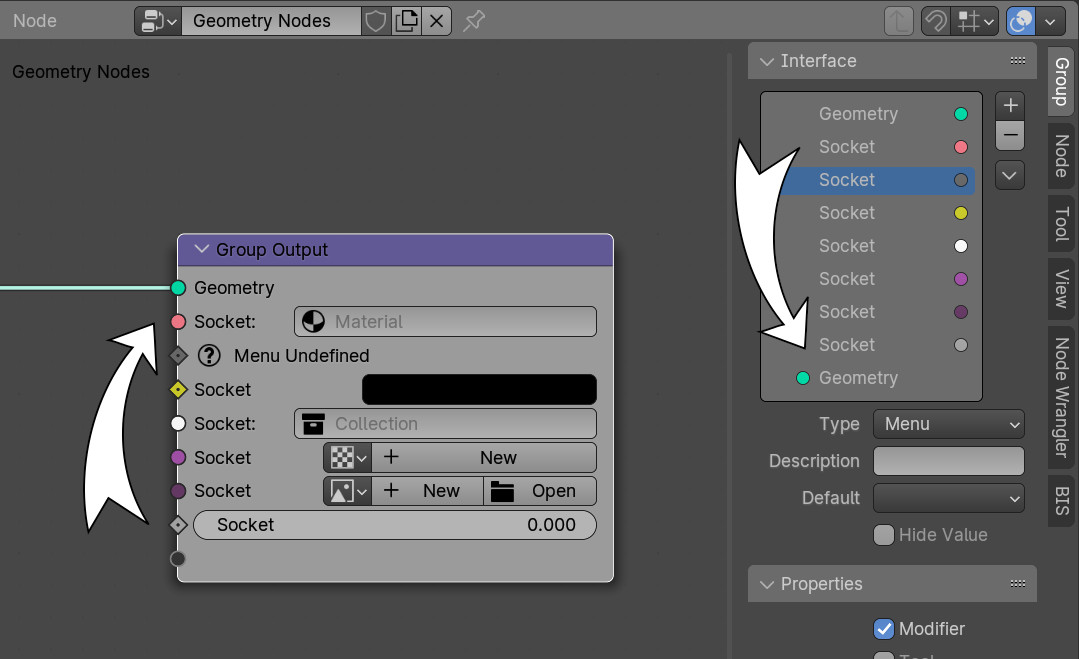
We can change the order of sockets in a Blender Geometry Nodes node group manually by simply dragging it – in the N-panel in the Group – Interface tab, hold down the desired socket and drag it with the mouse to the desired place. We can move a socket in a group node to a new location using the Blender Python API with the move() function of the “interface” object.

Fast connection of nodes

Usually we create links between two nodes by left-clicking the desired socket on the first node and drag-and-drop the link to the desired socket on the second node. This is not always convenient, especially if the nodes are located far from each other. However, in Blender it is possible to quickly connect two nodes with links based on the socket type, simply by pressing the “f” key.

Labels for Reroute nodes in Blender Geometry Nodes

Did you know that you can set your own text labels for Reroute nodes in Blender Geometry Nodes? Since Reroute nodes are most often used to simplify and improve the readability of node trees in Geometry Nodes, marking such nodes with a label with a short informational inscription can be very convenient – you will not need to remember or scroll through the tree of nodes every time to find out where this Reroute data comes from.

Applying Geometry Nodes to all objects in the collection

Typically, the Geometry Nodes tree in Blender is built differently for each mesh. This makes it possible to apply different effects to different objects. However, when we need to apply one effect to many objects in the scene, assigning a separate Geometry Nodes modifier to each of them and duplicating the nodes may be counterproductive. It is much easier to create a collection in which, when an object is placed in it, the desired effect will be applied to it.

Quickly setting the point at which the light sources in the scene should be directed

When we set up lighting in a scene in Blender, we usually set the direction of the light to the desired point manually for each light source. However, this process can be simplified and we can specify the point to which all selected light sources in the scene will be directed at once.

Moving the Auto Smooth modifier to the end of the modifier list

Since version 4.1, the normal smoothing operator in Blender has been completely replaced by a modifier implemented on the Geometry Nodes mechanism. This is convenient for solving a number of problems, but if the Auto Smooth modifier is not located on the last place in the modifier stack, before other modifiers that change the mesh geometry, this leads to the appearance of artifacts. To quickly move the Auto Smooth modifier to the end of the stack, we can use a simple script.