Blender has its own built-in text editor for writing scripts and add-ons, but it’s much convenient to develop them in external IDEs that provide the user with more features such as autocomplete, syntax highlighting, integration with version control systems and other tools that make development faster and easier.
One of these IDEs is Visual Studio Code from Microsoft. This is a free universal environment that supports development with various programming languages, including the Blender API language – Python.

To start developing with Visual Studio Code, you need:
Install Visual Studio Code IDE itself
From the official website, you can download the distribution for Windows or Linux operating systems: https://code.visualstudio.com/Download.
After downloading, you need to install the IDE.
To work with an external IDE you need to install a separate Python interpreter
Download the Python interpreter distribution from the official website: https://www.python.org/downloads/.
Download the same Python interpreter version with the version used in Blender. For Blender 2.79b, this is Python version 3.5.3. For Blender 2.80 – Python 3.7.0.
After downloading, install the Python interpreter.
Install the Visual Studio Code extension for working with Python
Run Visual Studio Code.
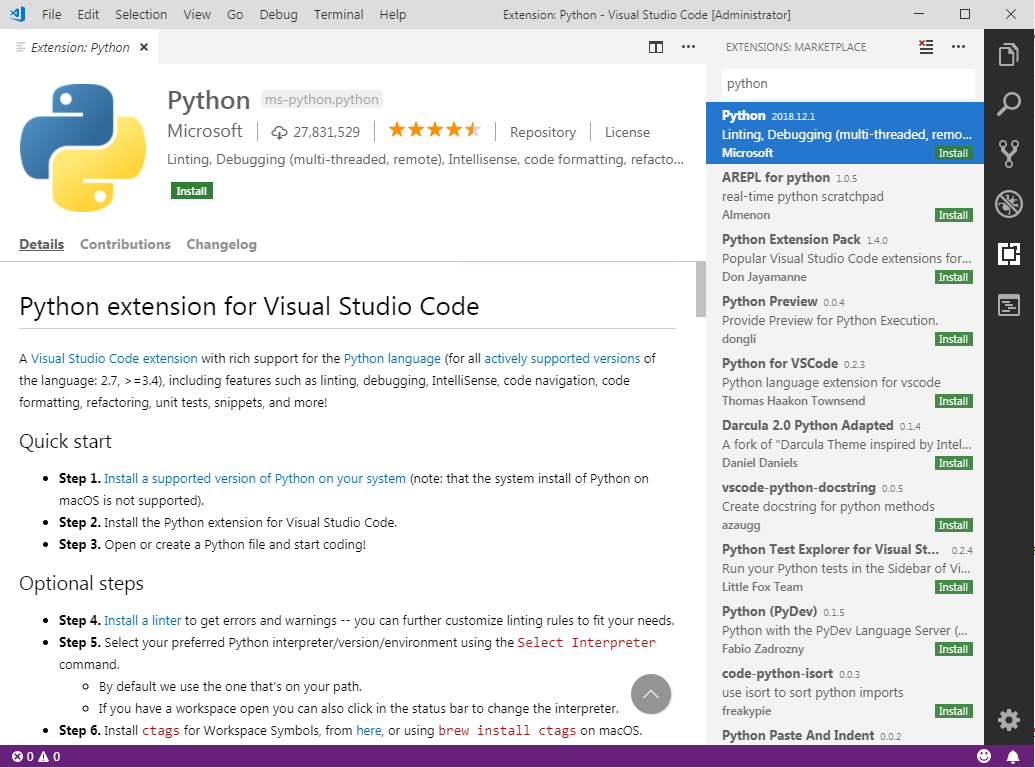
Open the extensions panel. Type “python” in the search field. Select the “Python” extension from the extensions list and install it by clicking “Install”. Click “Reload” to launch the extension.
Writing a script for Blender in Visual Studio Code
After installing all the necessary program modules we can write the code.
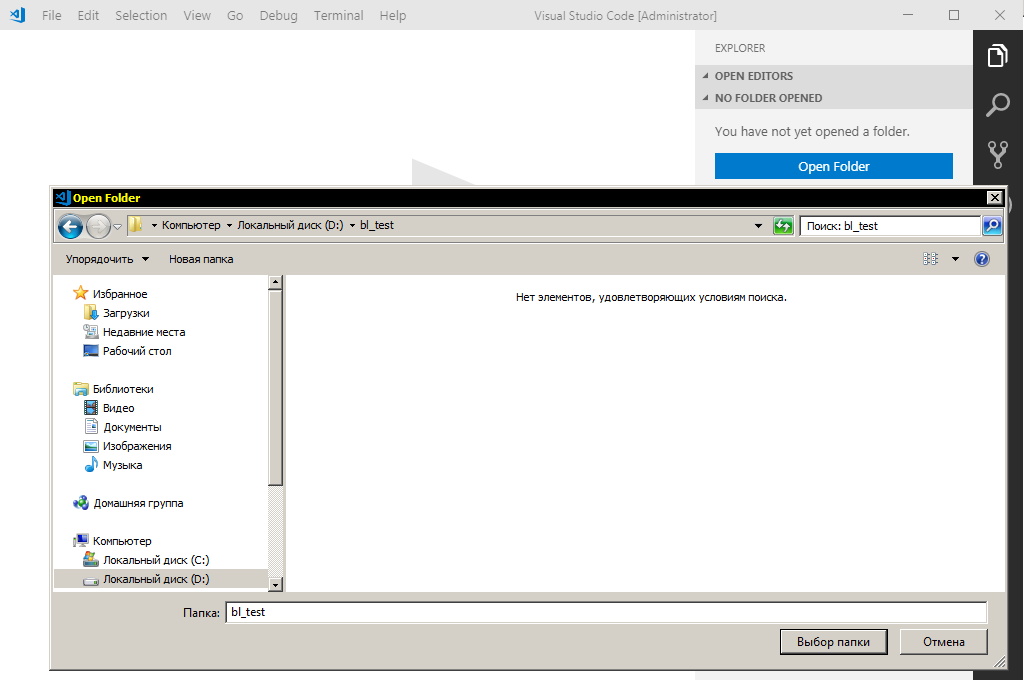
Visual Studio Code works with projects from the directories. Create the “bl_test” directory on the D:/ hard drive and open it in Visual Studio Code. This will be our current project. All further settings will be applied only for this project.
Add a new bl_test.py file to your project. We will write the script code in this file.
Configuring a Visual Studio Code project to work with Blender Python
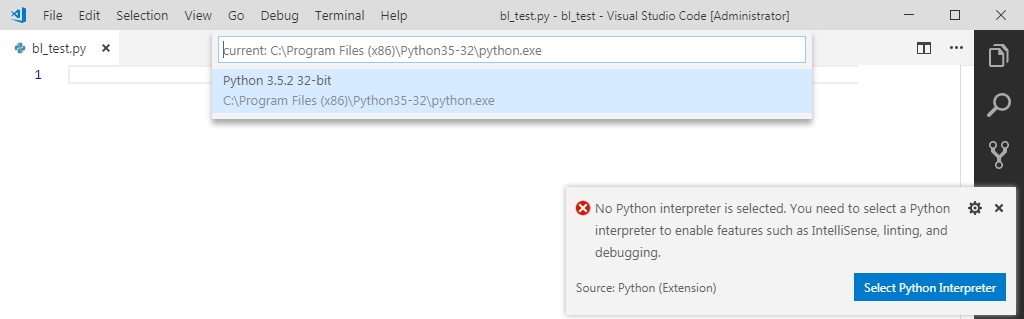
Press F1 (or ctrl+shift+p) to open a command prompt. Enter “python select interpreter” to specify the Python interpreter for the project.

From the next drop-down list, select the installed Python interpreter.
Press F1. Type “python select linter” to select/install Python linter. Linter is required for dynamically check the code, indicating errors and typos. Also, the linter checks the code to fit the PEP specification.
Select “Python: Select Linter” from the drop-down list.

and then select”pep8″. This is the current Python specification.

Linter becomes active when saving files. To activate it save the current file. Visual Studio Code may prompt you to install a selected linter.

Install it by clicking “Install”. Installation is once required, it does not need to do this in next projects.
You can check the linter work by entering some code and saving it.

How to enable the autocomplete for Blender API in Visual Studio Code
When we start coding we will see that autocomplete works only for standard Python data types and does not work with Blender API data types. To fix this, we need to download the library with Blender data types and connect it to our project.
You can download this library from the GitHub at https://github.com/Korchy/blender_autocomplete by clicking “Clone or download” – “Download ZIP” buttons.
Files we need are placed in the downloaded archive in subdirectories with the names corresponding to the Blender versions for which they are intended. If we are working with the latest stable version of Blender 2.79b, we need the subdirectory: 2.79.
This autocomplete library can be useful not only for the current project. Copy it to the accessible place, from where it can be connected to any project. Create a D:/autocomplete/ directory and copy the entire 2.79 folder from the downloaded archive to it.
Now connect it to the current project. To do this, open the Visual Studio Code project settings: “File – Preferences – Settings” and switch to the “Workspace Settings”.

Click on the double curly brackets “{}” in the right upper corner to switch to the text (JSON) display mode.
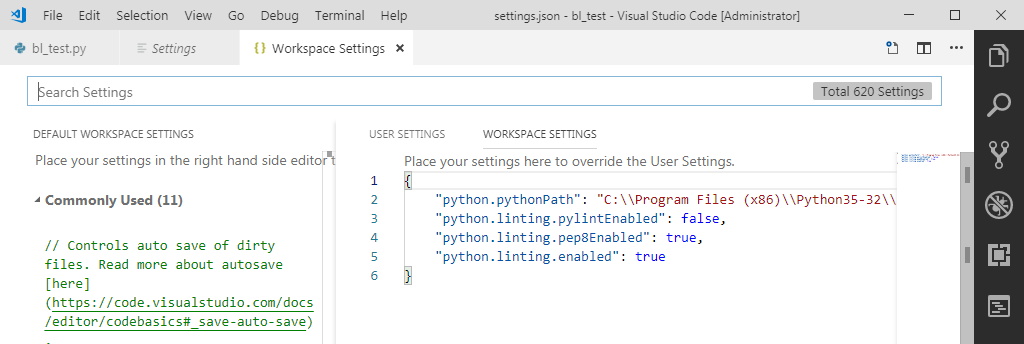
In the “User settings – Workspace settings” window add some directives with the path to enable the Blender API autocomplete. The path is to the 2.79 directory with the autocomplete library.
|
1 2 3 4 5 6 7 |
"python.autoComplete.extraPaths": [ "d:/autocomplete/2.79" ], "python.linting.pylintArgs": [ "--init-hook", "import sys; sys.path.append('d:/autocomplete/2.79')" ], |

Save the settings and close the settings tabs.
Now, when we typing code, the Blender API autocomplete works correctly.
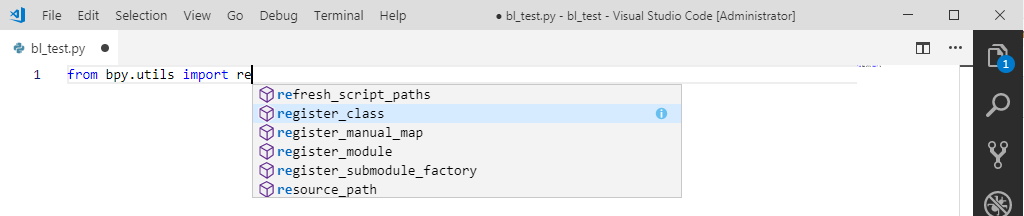
We can write our code.
Executing the external script in Blender (2.79 and 2.80)
After the script is written in Visual Studio Code, it needs to be executed in Blender.
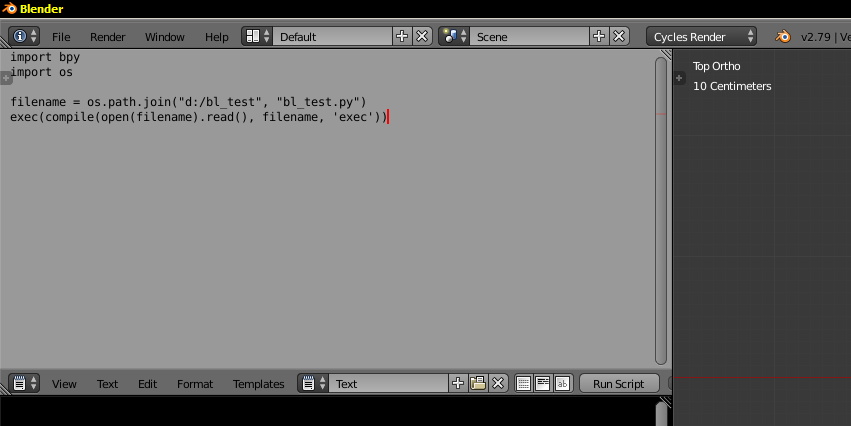
Start Blender, open the built-in text editor and type the following code:
|
1 2 3 4 5 |
import bpy import os filename = os.path.join("_PATH_", "_FILE_NAME_.py") exec(compile(open(filename).read(), filename, 'exec')) |
Where the _PATH_ is the path to the directory with our project, and the _FILE_NAME_ is the name of the script file with our code.
This is the universal code to execute external scripts in Blender. Save it as a template and use to execute in Blender any scripts written in external IDEs. For more complex multi-file projects and add-ons, you should use the code with the dynamic add-on reinstallation.
Dynamic code execution bridge from Visual Studio Code to Blender (2.80 only)
You can install the “Blender Development” extension by Jacques Lucke in Visual Studio Code to dynamically execute scripts and add-ons directly from the IDE.
Open the extensions panel in Visual Studio Code and type “blender development” in the search field.

Install the extension and click “Reload” to launch it.
Press F1 to open the command line and type “blender start”. Select “Blender: Start”.

press “Choose a new Blender executable …”

and specify the path to the blender.exe file (your Blender 2.80 installation directory).

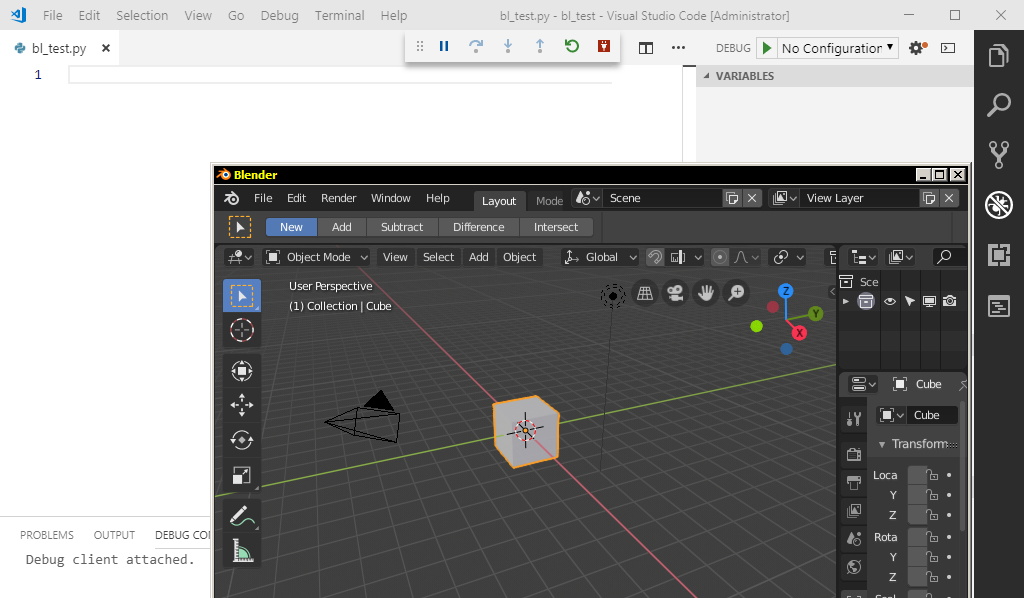
Blender connected to Visual Studio Code by the bridge starts.
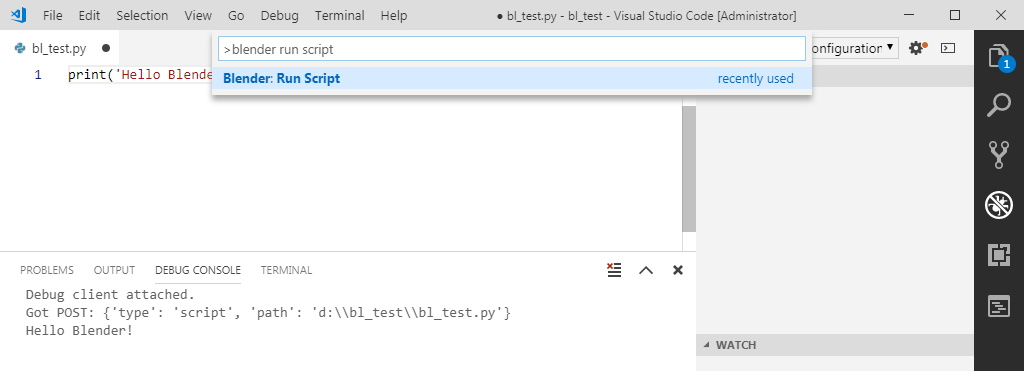
To execute the script press F1 and in the command prompt type “blender run script” and select “Blender: Run Script”.
This extension provides many convenient features for Blender add-ons developers, but it also has some problems – it works only with Blender version 2.80 and sometimes can’t find the right window context definition in Blender when executing scripts. For example, the script below can not execute through this extension.
Script example
Type the following code in your bl_test.py file and run the external script (using code in the Blender built-in text editor).
|
1 2 3 4 5 6 7 8 9 10 11 12 13 14 15 16 17 |
import bpy bpy.ops.mesh.primitive_cube_add(location=(0, 0, 0)) bpy.ops.object.mode_set(mode='EDIT') bpy.ops.transform.rotate(value=0.785398, axis=(0, 0, 1)) bpy.ops.object.mode_set(mode='OBJECT') Obj = bpy.context.active_object mod = Obj.modifiers.new("Bevel", 'BEVEL') mod.segments = 3 bpy.ops.object.shade_smooth() mod1 = Obj.modifiers.new("Array", 'ARRAY') mod1.count = 10 mod2 = Obj.modifiers.new("Array", 'ARRAY') mod2.relative_offset_displace[0] = 0.05 mod2.relative_offset_displace[1] = 0.5 mod2.relative_offset_displace[2] = 0.9 mod2.count = 10 |
This code adds the cube to the scene, rotates it on the 45 degrees, adds a chamfer to it, and multiplies it with an array of 10×10 with some offset. As a result, you can render a trendy abstract background.

> To work with an external IDE you need to install a separate Python interpreter
Can you explain why we should not use the Python interpreter which comes with Blender?
Yes, you can use. This way, you need to manually configure all the python environment to properly detecting the right interpreter by PyCharm (or other IDE).
In my linder list does not appear pep8 what can I do? My blender release is 2.82
In the last specifications, pep8 was renamed to pycodestyle, use it.
Hi, Nice tutorial thanks, spoilt by the last sentence.. “Type the following code in your bl_test.py file and run the external script (using code in the Blender built-in text editor).!”
what?
Hi!
You type all the code you need to be executed in the external text editor. In the Blender Text Editor, you need only the following code (with the right path).
When you press the “run script” button in the Blender Text Editor – your code from the external file will be executed.