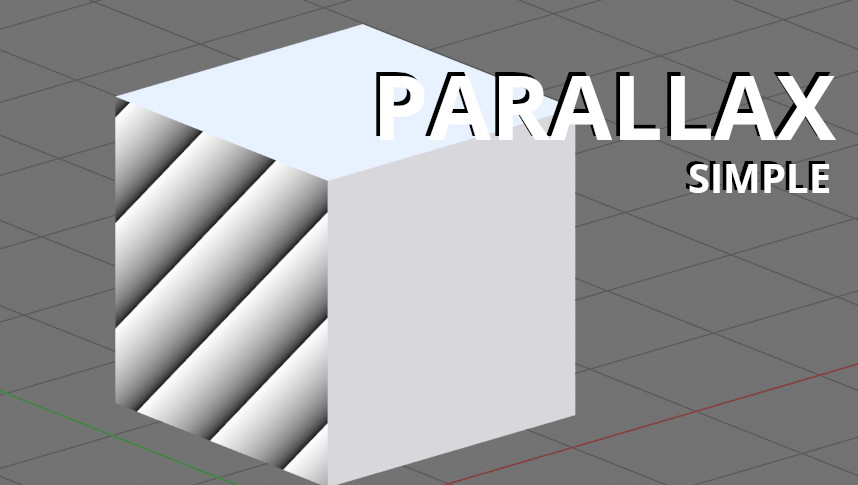
It doesn’t need to assemble a large and complex shader node tree to make a parallax shader in Blender. The simplest parallax effect can be achieved by connecting just 3 nodes.
 .blend file on Patreon
Add a “Texture Coordinate” node (shift+a – Input – Texture Coordinate) to the shader node tree and connect two outputs of this node: “UV” and “Reflection” with the “MixRGB” node (shift+a – Color – MixRGB). The “MixRGB” node mode should be “Add”.
Link the “MixRGB” node output to the “Vector” input of the texture node that needs to be with a parallax effect.

The parallax strength can be controlled through the “Factor” field of the “MixRBG” node.
These nodes work both in the Cycles render engine and in the EEVEE.