Nodes

Tiling procedural textures in Blender

Creating separate elements of procedural textures in Blender is quite simply – find the desired formula, rebuilt it using mathematical nodes, and as a result, get the desired shape. However, textures created this way have one feature – no tiling. Tiling – a cyclic texture duplication, most time is considered harmful, and professional 3D artists try to avoid texture tiling. But sometimes tiling is necessary, for example, when creating patterns or ornaments.

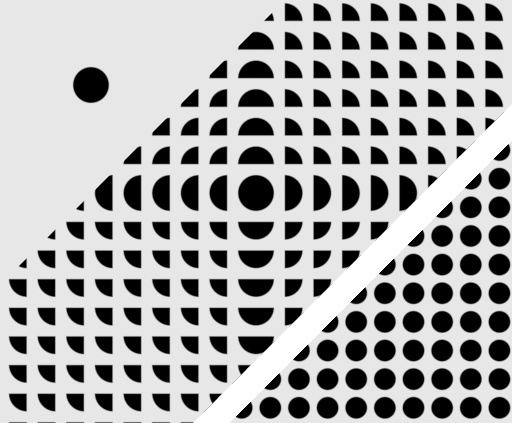
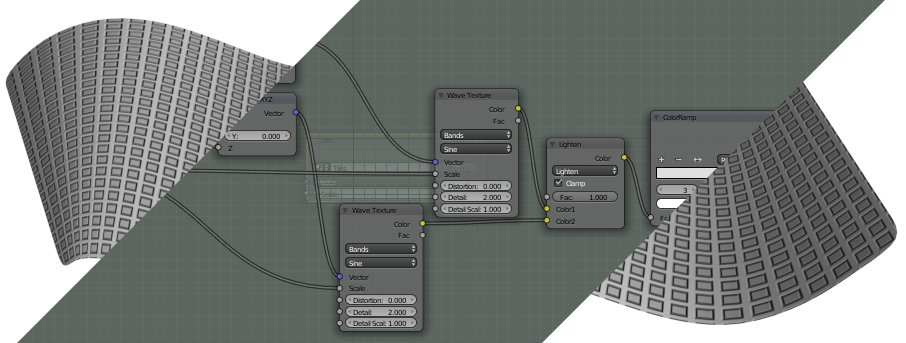
The procedural texture element is always created in a single instance. This is because all the mathematics that forms the actual procedural image is based on the initial data – coordinates that start from 0, spread out to infinity and not repeat. However, the same mathematics helps us to solve this problem.

Creating procedural textures in Blender

All procedural textures in Blender are based on math. Even such irregular structures as “Voronoi” and “Noise” are actually generated according to the mathematical formulas. An exact mathematical algorithm is sewed up into each base material node to obtain the desired image as a result.

We can not specify such algorithms in Blender in the usual mathematical format. However, among other nodes, Blender provides us the “Math” nodes – the wrap over simple mathematical operations. Using these nodes we can build complex mathematical algorithms yourself, generating interesting textures.

How to render an object with reflections on a white background

The single object visualization most often is performed on a clear white background. It is difficult to achieve this through the common configuring the scene – increasing the illumination of the scene “lights up” the object, decreasing – the background becomes gray instead of white. If the object itself can be simply rendered on a transparent background and then imposed on white, but what about its reflections?

Let’s consider the way how we can render the object and its reflection on a white background.

Rotating texture by nodes

In order to achieve the desired texture mapping on the object surface, we need a convenient tool for manipulating the texture coordinates. Especially for procedural textures mapped to the object without using UV-s.

The “Mapping” node combines tools for texture moving, rotating and scaling is suitable for most of the texturing tasks. But sometimes its power is not enough. Its major drawback is that it allows setting adjustment values only in certain fields within the node body. These fields have no inputs and cannot be connected to the other nodes.

However, we can implement the required functionality devoid of the “Mapping” node lack with the help of some other nodes. Let’s consider how to build a node tree to rotate the texture around the Z-axis of the object by a random value.

Fast intermediate nodes view in compositing

Creating a node tree in the compositing window, sometimes it is necessary to see the intermediate result given by some parts of the node tree. For fast viewing click left mouse button on the desired node with the “ctrl” and “shift” keys pressed. Blender adds a new View node (or uses one of the existing) and connects the output of the selected node to it. The result is displayed on the backdrop (if the corresponding checkbox checked) or in the UV/Image Editor window in “Viewer Node” mode.

If the clicked node has several outputs, each subsequent click on that node switches the view to its next output.