Blender
Blender add-on: BIS v. 1.11.3
BIS (Blender Interplanety Storage) updated to v.1.11.3.
- Fixed some compatibility problems when loading old materials (saved before Blender version 4.0).
Creating procedural bronze material in Blender
Creating procedural bronze material in Blender by Ryan King Art.
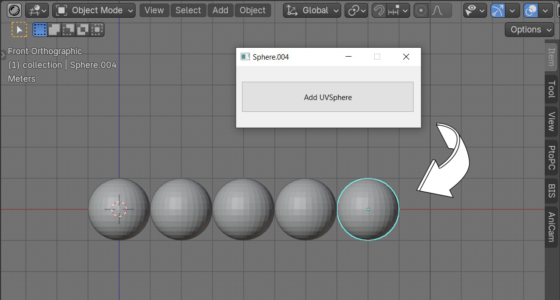
Creating a custom UI window in Blender using PySide
The Blender Python API provides add-on developers with quite a wide range of options for designing a user interface. However, sometimes the built-in capabilities of the Blender API may not be enough. We can create a window with a UI that is completely independent of the built-in API by connecting and using the PySide module.
Creating a custom UI window in Blender using PySideRead More »
Installing PySide to Blender
PySide is a Python module that extends the capabilities of graphical user interface (UI) development. The license allows its use in both open and closed and commercial projects. The PySide module is not included in the basic Blender distribution, but it is not difficult to install it manually.
Creating procedural abstract honeycomb sphere animation in Blender using Geometry Nodes
Creating procedural abstract honeycomb sphere animation in Blender using Geometry Nodes by Ryan King Art.
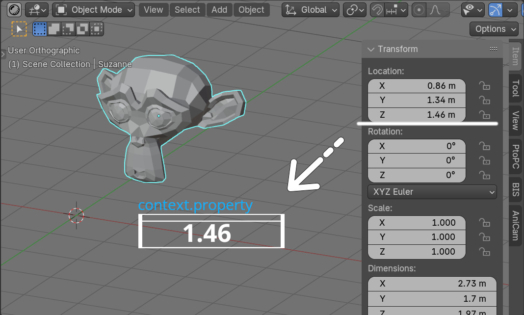
Getting the active property value in Blender using context
To get the current active object in a Blender scene, we usually use the context and its context.object (or context.active_object) property. Similarly, when working with the interface, we can access the context to get the currently active property – the value of the field in the Blender UI over which we hover the cursor or on which we clicked with the mouse. The context.property value is used for this.
Getting the active property value in Blender using contextRead More »
 Buy on Blender Market
 Buy on Gumroad
 Get on Patreon