UV coordinates can be used for mixing materials directly on the mesh. This can be useful if, for example, the shape of the mesh is cylindrical or closed or the UV boundaries correspond to the boundaries of the mesh.

 Content on Patreon
Let’s see how this works.
Add a toroidal mesh to the scene (shift+a – Mesh – Torus). For this mesh, the UV is automatically generated like it has two seams: one across the torus, the other – along. The upper and lower boundaries of the UV correspond to the longitudinal seam, the right and left ones correspond to the transverse seam.
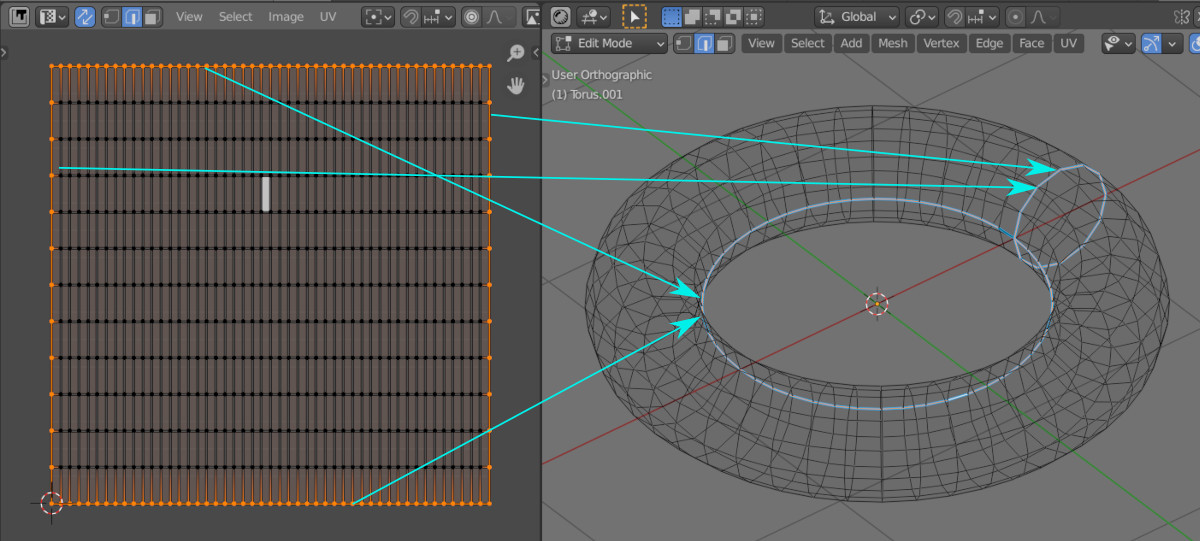
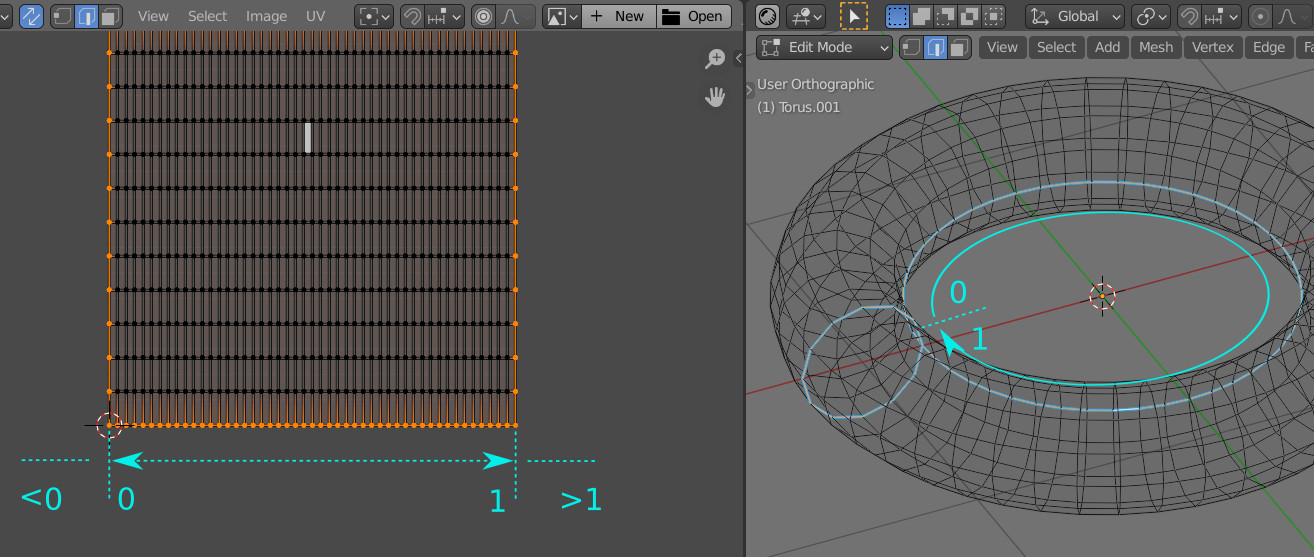
The UV coordinates used the normalized space in the range from 0.0 at the bottom left to 1.0 at the top right corner.
For the mesh, the normalized coordinates of the boundary points will also change from 0 to 1.
And we can use this when building the material node tree.
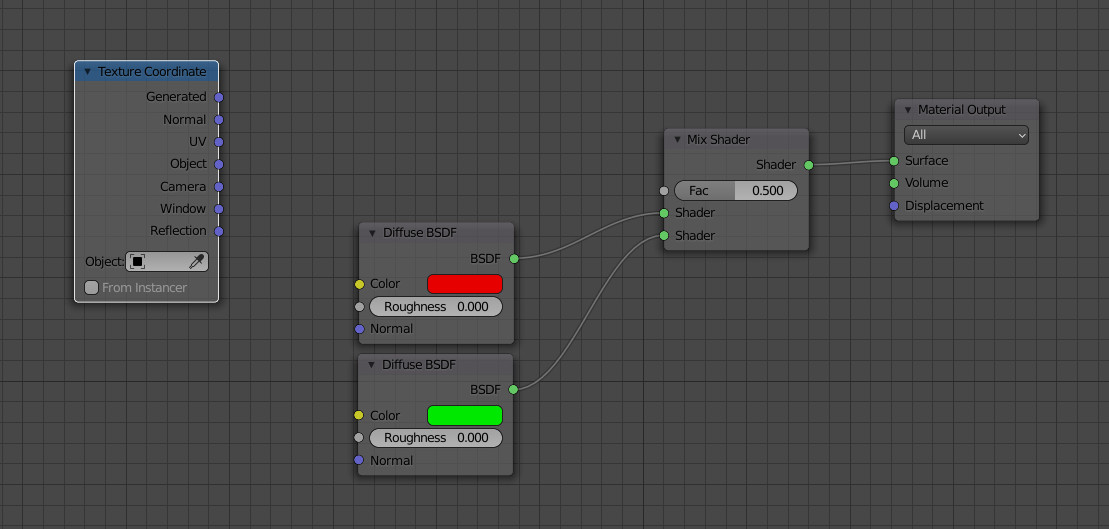
Let’s switch to the “Shader Editor”, and add to the mesh material the common nodes for mixing two colors: two “Diffuse BSDF” nodes, one “Shader Mix” node, and connect them together. Also, add a “Texture Coordinate” node.
We can get texture coordinates from the “UV” output of the “Texture Coordinate” node. To get separated coordinates by the X and Y axes, add a “Separate XYZ” node and connect it to the “UV” output of the “Texture Coordinate” node. Now, from its X and Y outputs, we will get normalized coordinates ranging from 0 to 1 along the corresponding axes.
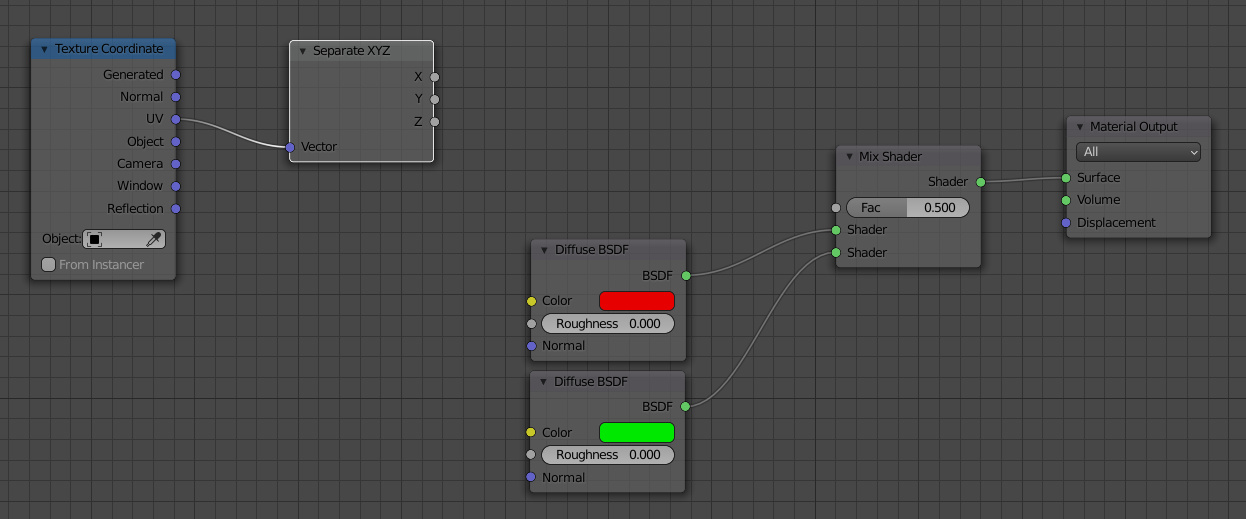
It remains only to connect the coordinates from the desired axis to the “Factor” input of the “Shader Mix” node to mix materials from the “Diffuse BSDF” nodes along with them. As a result, we will get a smooth gradient blending of materials along with the entire mesh.
To control the mixing boundary, add the “Math” node to the node tree, switching it to “Less Than” mode.
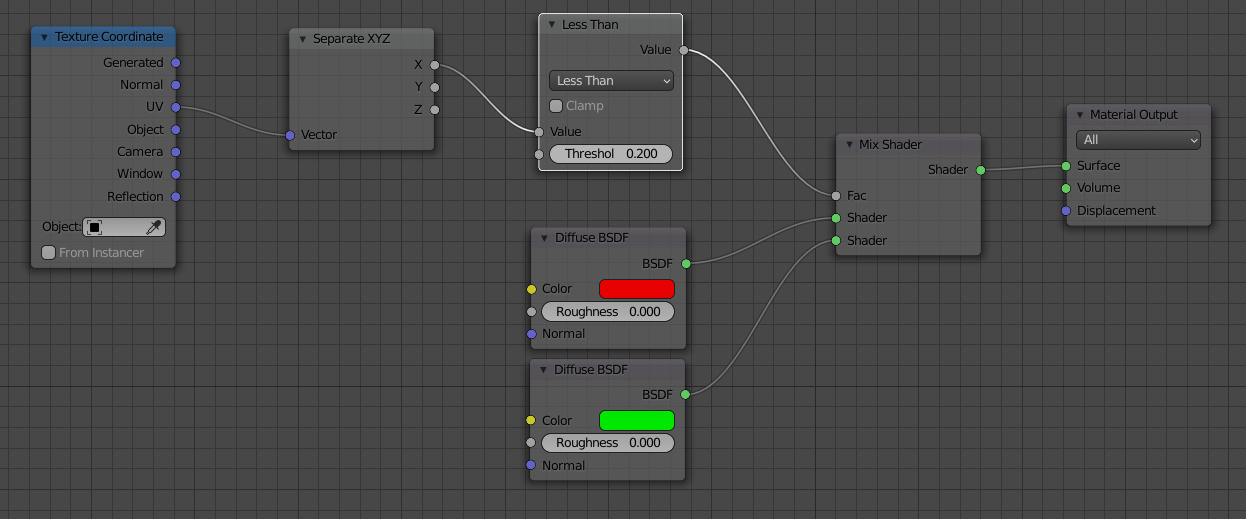
Now we can change the value in the second input of this node from 0 to 1, to move the material blend border along the entire mesh.
We can obtain here an interesting effect by replacing one of the “Diffuse BSDF” nodes with the “Transparent BSDF” node. Do not forget to set the “Blend Mode” of the material to “Alpha Clip” if you are using the “EEVEE” render engine.