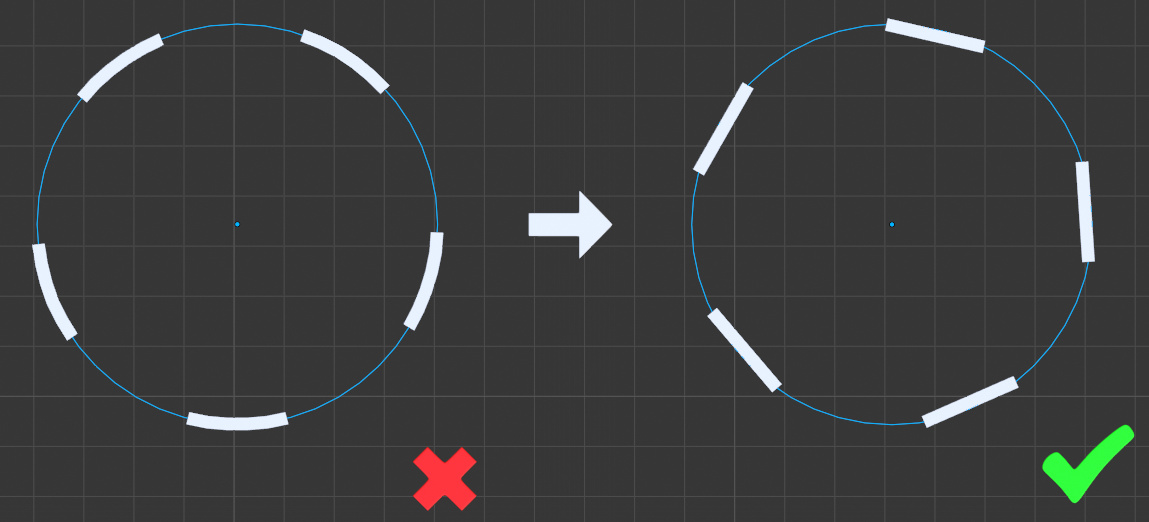
The simplest way to arrange objects along a curve in Blender is to use two modifiers: “Array” and “Curve”. However, in this case, the object is distorted – its shape adjusts to the shape of the curve. In some cases, for example, when designing curbs or tank tracks, this is undesirable.
 Content on Patreon
There are several ways to arrange objects along a curve without distortion. One of them is to use an intermediate mesh.
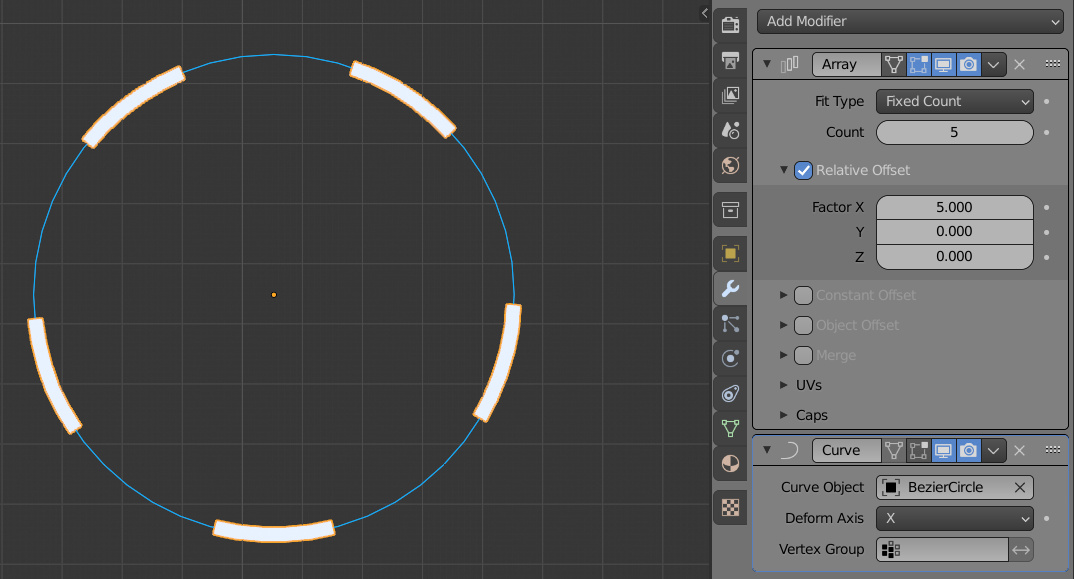
In general, to arrange an object along a curve, we add two modifiers to this object: “Array” – to increase the number of object instances, and “Curve” – to arrange them along the specified curve.
To prevent the object’s instances from taking the shape of a curve, let’s use an intermediate mesh – Plane.
Add a plane to the scene: shift+a – Mesh – Plane.
And assign it the same “Array” and “Curve” modifiers.
Now the plane is arranged along a curve, again with distortion.
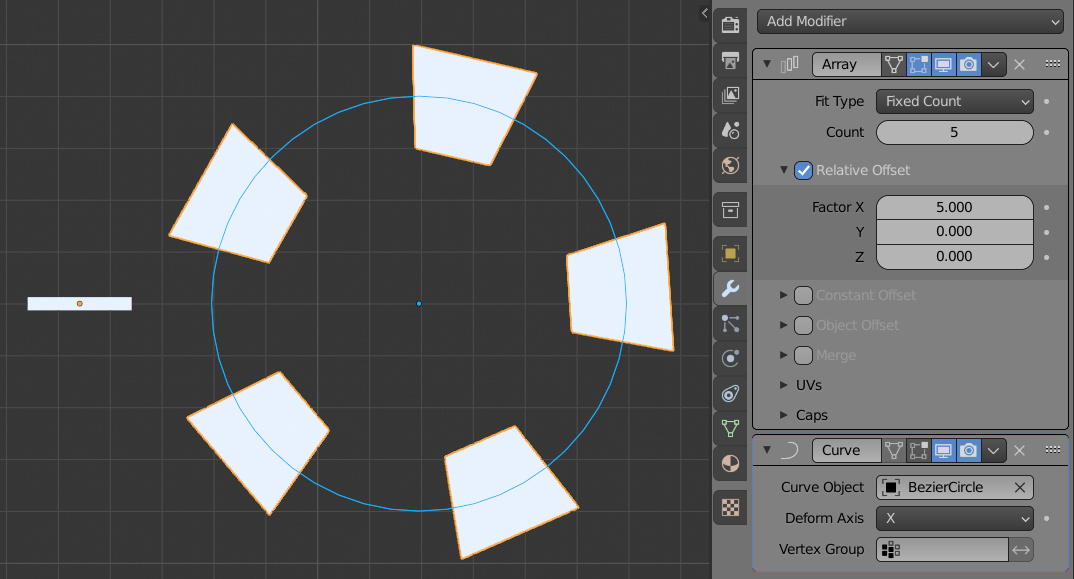
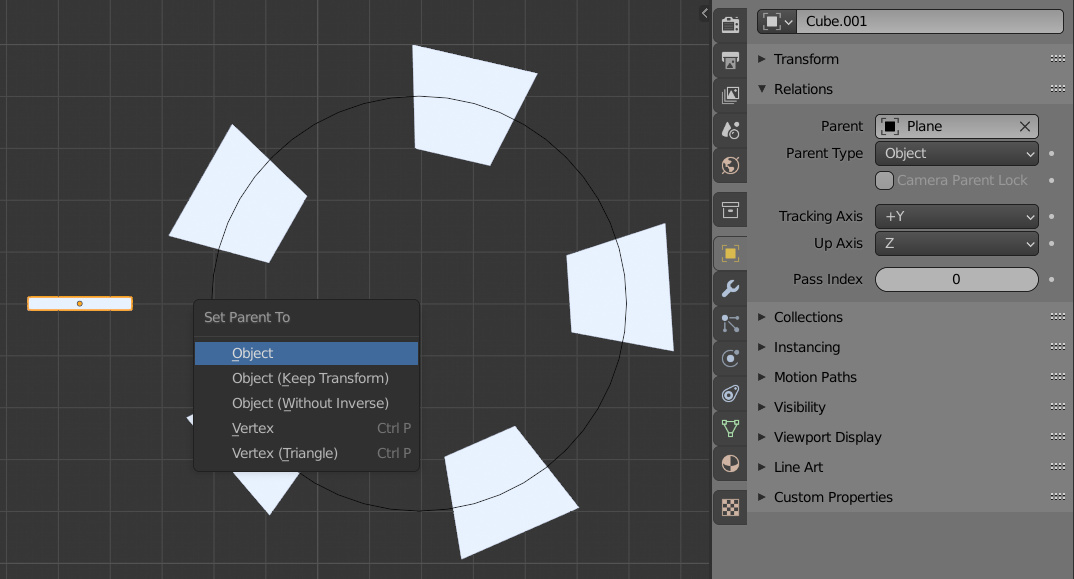
To arrange the desired object instead of the plane along the curve, we will parent it to the plane.
Select the object and press the keycode: ctrl+p. In the popup menu select “Object”.
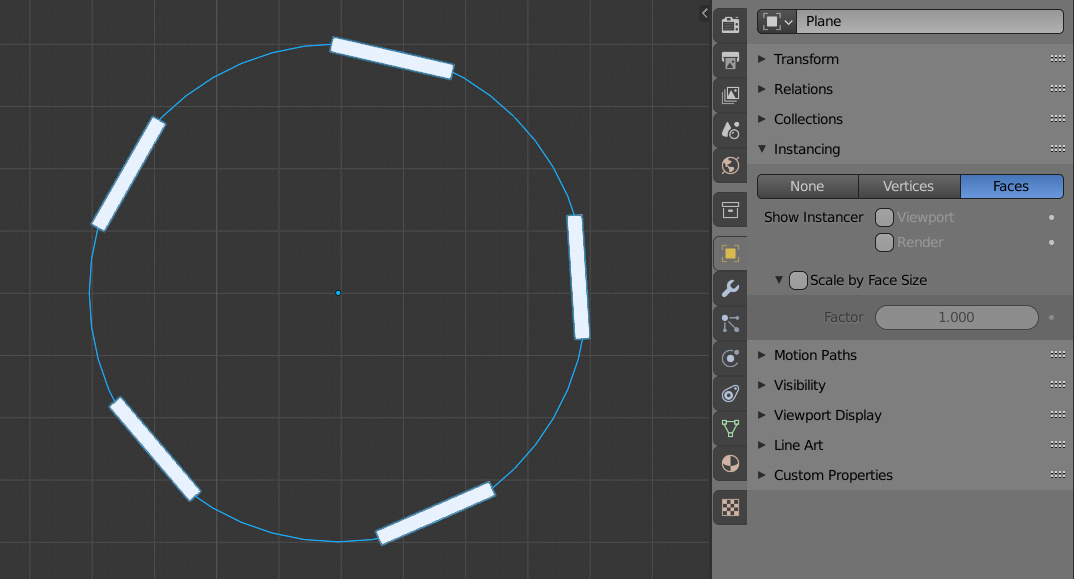
Now. when the object is parented to the plane, switch to it. In the “Properties” window in the “Object Properties” tab in the “Instancing” section, set “Faces” mode.

As a result, we got an instance of our object on each plane. And the object does not inherit the distortion of the plane, it looks as it should.
Here, uncheck the “Viewport” and “Render” checkboxes to disable the plane displaying and rendering.
The original copy of the object can also be hidden by selecting it and pressing the “h” key.
As a result, we got an object arranged along the curve without distortion.