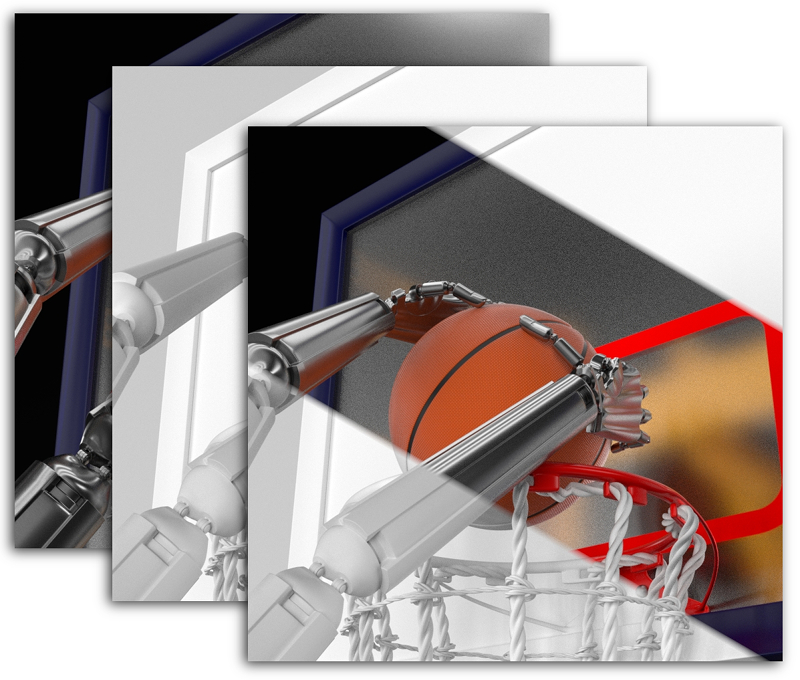
For an effective portfolio demonstration, there is a good practice to show together with the color render the clay render to emphasize scene volume, lighting, models topology, as well as, in the case of photo-realistic rendering, showing scene “3D-essence”. The overlaying of these two renders in the same image could be an even more spectacular trick.
To combine the clay and the color render:
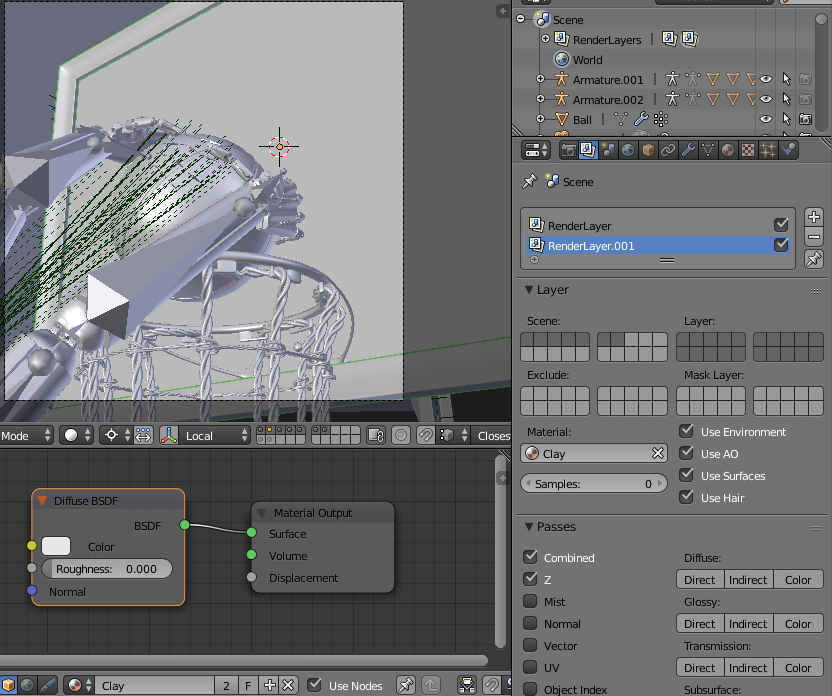
- Create a clay render on a separate render layer:
- In the Node Editor window create a new material, leaving the default nodes (Diffuse, Color = 0.8). Don’t assign this material to any object. Name this material “Clay”.
- In the Properties window in the Render Layers tab:
- Press the Add Render Layer button to create a new layer.
- In the Layer panel:
- Set the Material parameter to the created material “Clay”. With these settings, the whole scene will be rendered like this material is assigned to all objects, as required for the clay render.
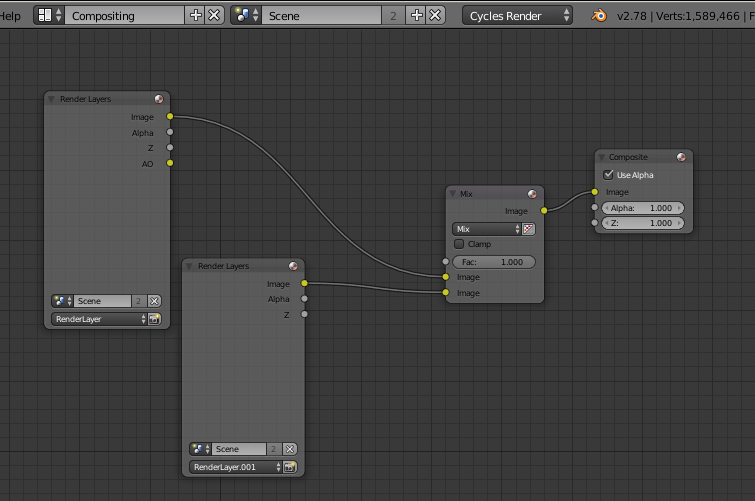
- Switch to the Compositing Mode.
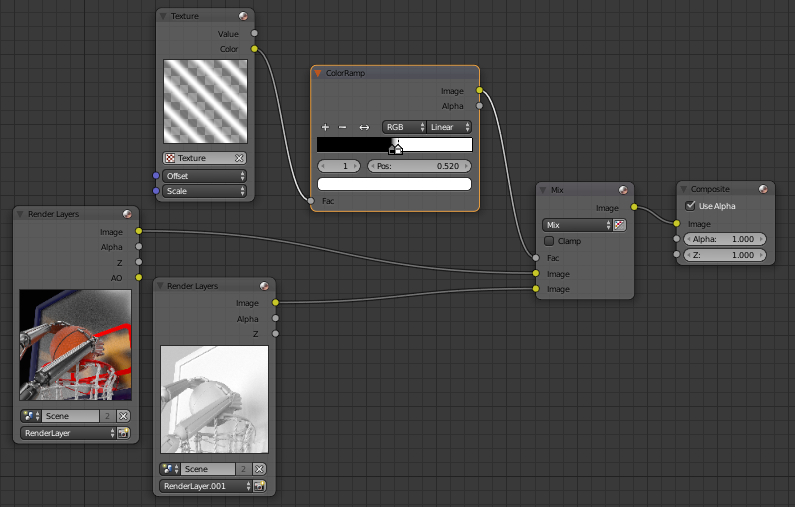
- Add the Render Layers node to the nodes tree:
- shift+a – Input – Render Layers
- Specify the created in p. 1.2.1 RenderLayer.001 layer in its render layer parameter.
- shift+a – Input – Render Layers
- Add a node for mixing colors:
- shift+a – Color – Mix.
- Connect the Image outputs from both Render layers nodes to Image inputs of the Mix node.
- Connect Image output of the Mix node to Image input of the Compositing node.
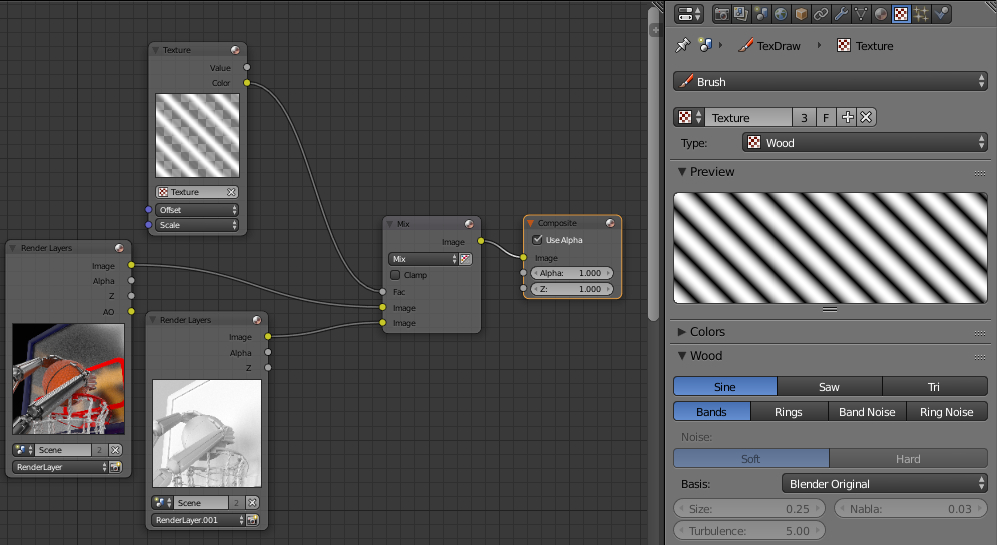
- In the Properties window switch to the Texture tab.
- In the drop-down menu, select the Brush item.
- By pressing the New button create a new texture.
- Set the parameter Type = Wood for it, the other parameters can be left unchanged.
- Add new Texture node to the nodes tree:
- shift+a – Input – Texture.
- Specify the created in p.9 texture for it.
- Connect Color output of the Texture node to the Factor input of the Mix node.
- Start Render.
The similar result will be obtained:

- To make the border between the layers sharper add the ColorRamp node:
- shift+a – Converter – ColorRamp,
- Connect the Color output of the Texture node to the Factor input of the ColorRamp node.
- Connect the Image output of the ColorRamp node to the Factor input of the Mix node.
- Move the ColorRamp node sliders to the middle of the scale.

- To adjust the size and position of color and clay render areas, let’s consequentially add Scale, Translate and Rotate nodes to the nodes tree:
- shift+a – Distort – Scale,
- shift+a – Distort – Translate,
- shift+a – Distort – Rotate,
- Successively connect Image inputs and outputs in added nodes branch.
- Connect Image output of the ColorRamp node to the Image input of added nodes branch.
- Connect Image output of added nodes branch to the Factor input of the Mix node.
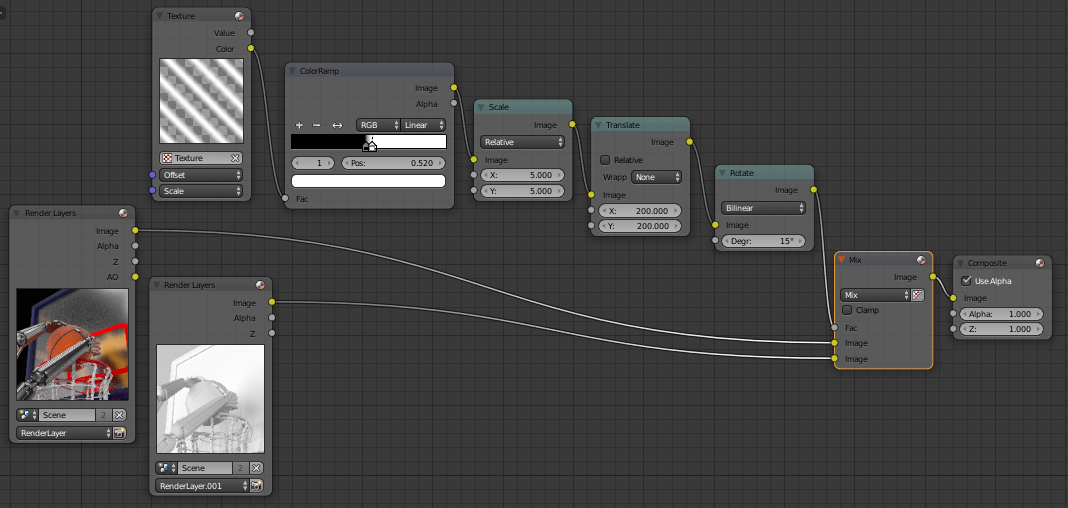
By changing the parameter values of Scale, Translate and Rotate nodes you can achieve a felicitous layers overlay. The result – interesting image, combined from color and clay renders:

Similarly, you can create spectacular renders with different overlay types. For example, you can combine the color render with the wireframe render:
