Detailed relief means a lot for high-quality render. You can model a beautiful basketball, cut stylish grooves and set up good material shader, but with no relief this basketball would be similar with real only from high distance. That kind of basketball may be useful for general plans, but any closeup render reveal deficiencies immediately.
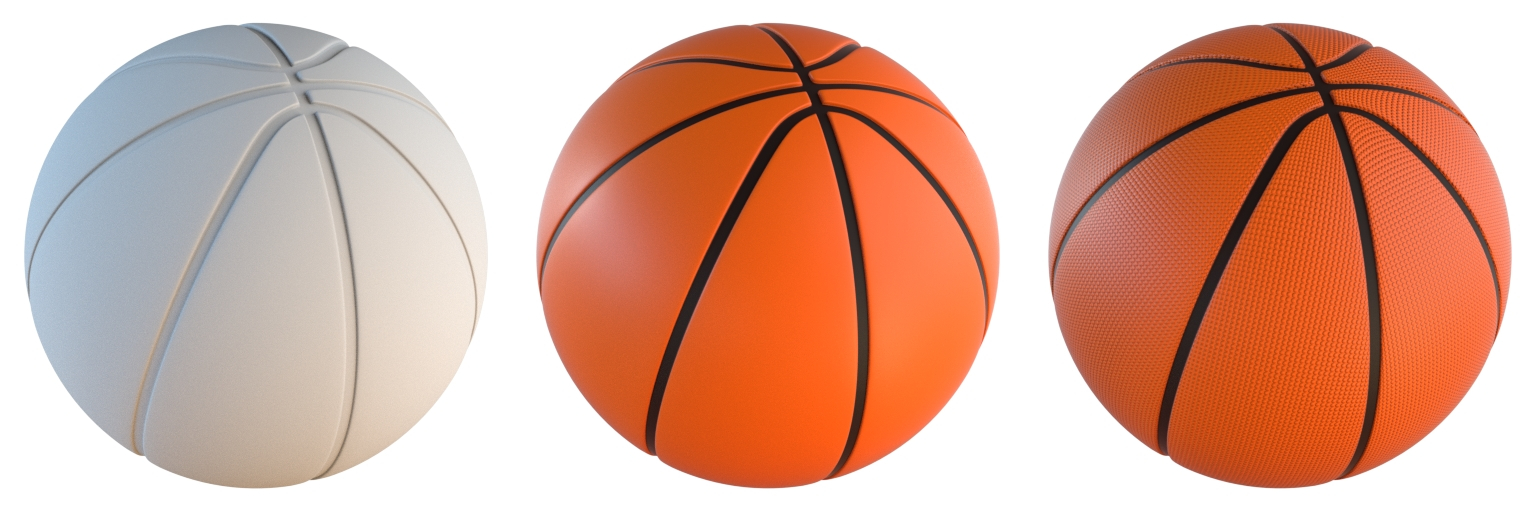
There are differen ways to apply a relief to the ball. The most reliable – exactly follow the real ball geometry. However, there are from 10 to 35 thousands of small protrusions on the basketball surface, formed its relief. It is possible to model all of that, but the final model gains heavy weigh and needs more system resources while rendering.
Relief imitation with displace and normal maps wold be the best solution. But where to get the required textures? It is possible to model a small fragment of the basketball surface with relief in detail, and then bake it to displace map for the further applying to the whole model.
Follow next steps to create displace map:
- Switch to Blender Render (Cycles render can not baked displace yet).
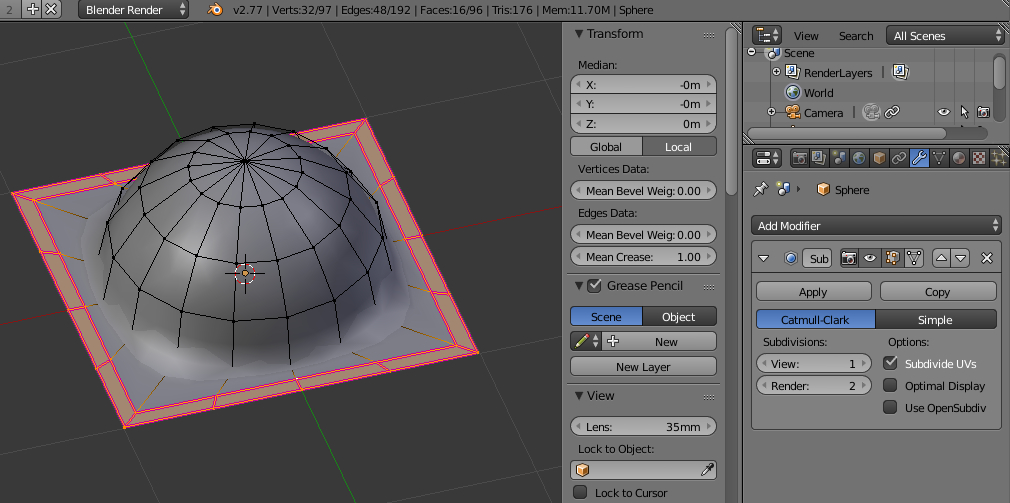
- Add sphere (shift+a – Mesh – UV Sphere) to the scene.
- Segments = 16
- Rings = 8
- In T-panel (t) set the type of shading: Shading = Smooth.
- Add modifier Subdivision Surface to the sphere.
- Slightly reduce the scope: s – 0.8 – enter.
- Enter Edit mode (tab):
- Delete the bottom half of the sphere.
- Add a plane (shift+a – Plane)
- Remove the main plane face (keep only edges): change to faces selection mode (Face select), select the face – del – Only Faces.
- Back to the vertes selection mode (Vertex select), select keeped four edges, w – Subdivide, set Number of cuts = 3.
- Add the lower points loop of the sphere to selection (select it with clamped alt+shift).
- Fill the gap: ctrl+e – Bride Edge Loops.
- To correct smoothed corners:
- Select the outer loop of the square.
- s – 0.9 – enter.
- e – s – 1.1 – enter.
- Select two outer square loops.
- In N-panel (n) set Man Crease = 1 to them.
- Off Edit mode (tab).
- Add Array modifier to hemisphere. Count = 10, set Merge checkbox on.
- Add another Array modifier, with the same parameters but for Y axis.
- Up both Array modifiers above Subdivision Surface modifier.
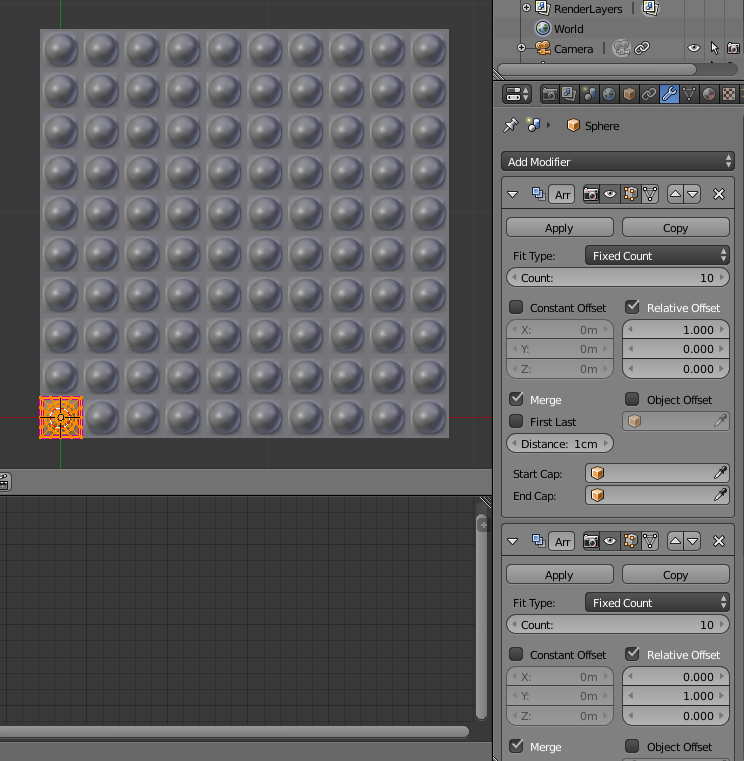
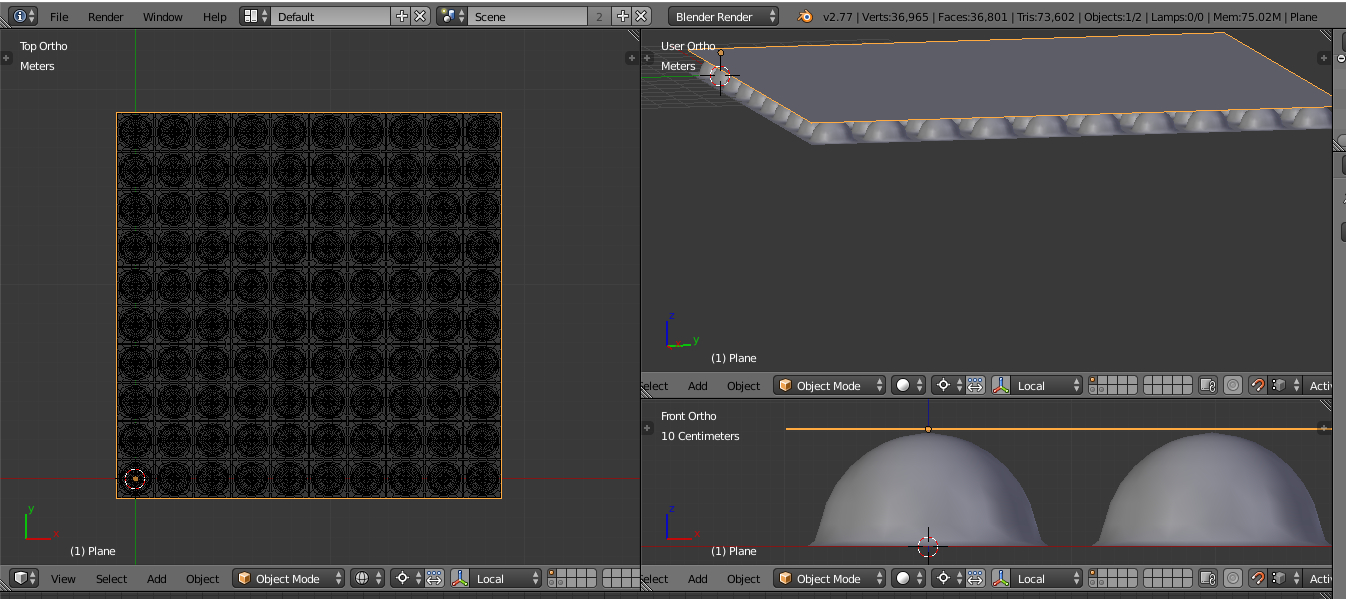
- Apply both Array modifiers. So the small fragment of basketball surface with relief is created.
- Open the UV/Image Editor, create new image (Image – New Image) with the desired resolution for baking displace map. Set Alpha checkbox on.
- Unwrap the basketball surface fragment with relief created on step 11 to this image with the top projection type:
- Enter Edit mode (tab), select top view projection (num7) – select all (a) – u – Project From View (Bounds).
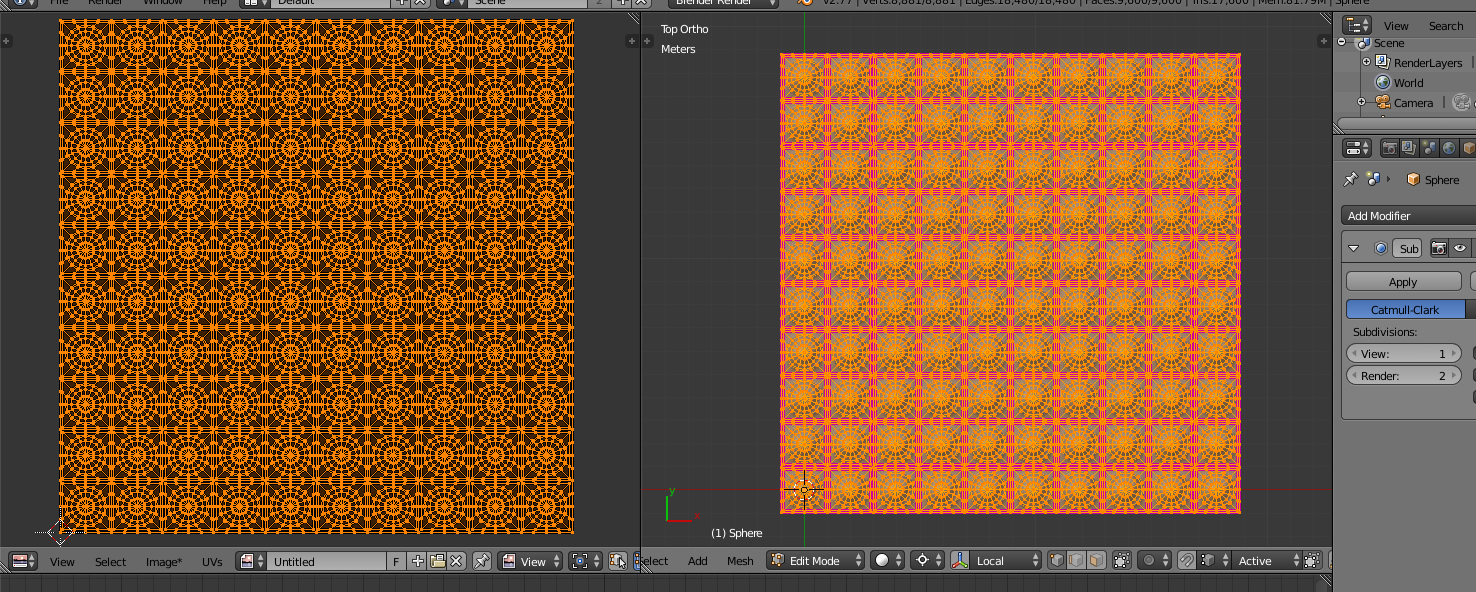
- Off Edit mode (tab).
- Add a plane to the scene: shift+a – Mesh – Plane.
- Scale the plane to the basketball surface fragment size. Move it up until it was just above the upper points of the hemispheres.
- Unwrap the plane to created in step 12 image: tab – Select all (a) – u – unwrap.
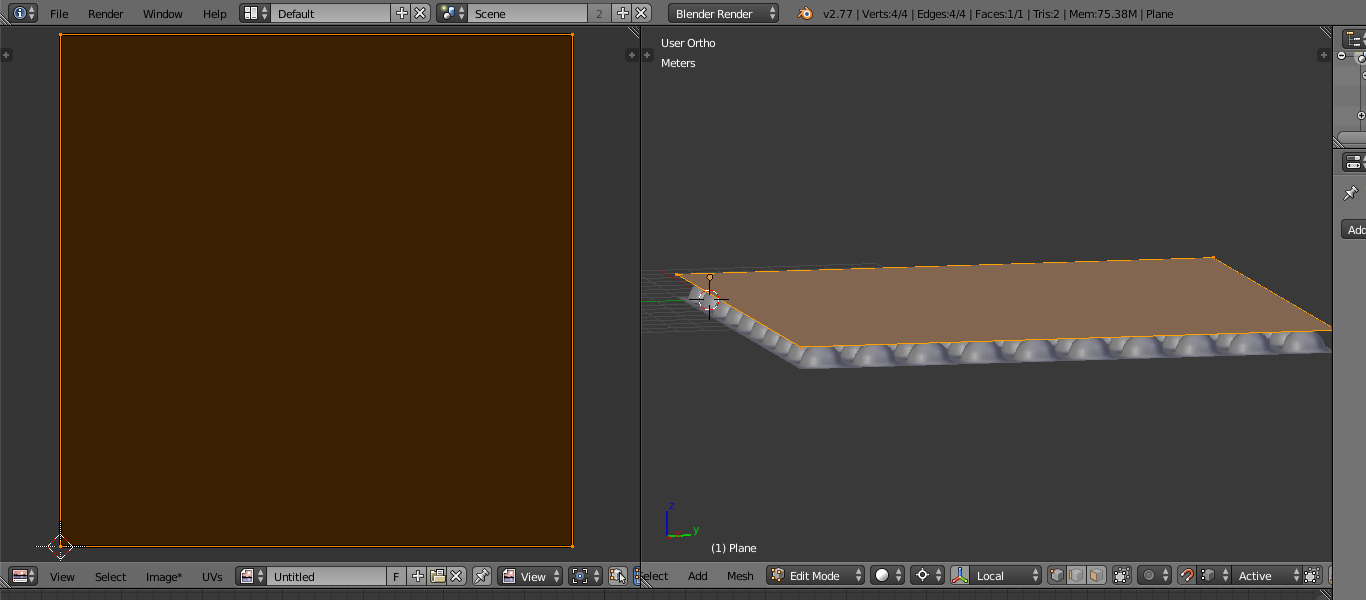
- Off Edit mode (tab).
- In the Render tab – Bake:
- Set Bake Mode = Displacement.
- On Selected to Active checkbox.
- First select basketball surface fragment, then select plane clamped with shift.
- Press Bake.
- After finishing baking process displacement map from the basketball surface fragment will be mapped to created in step 12 texture.
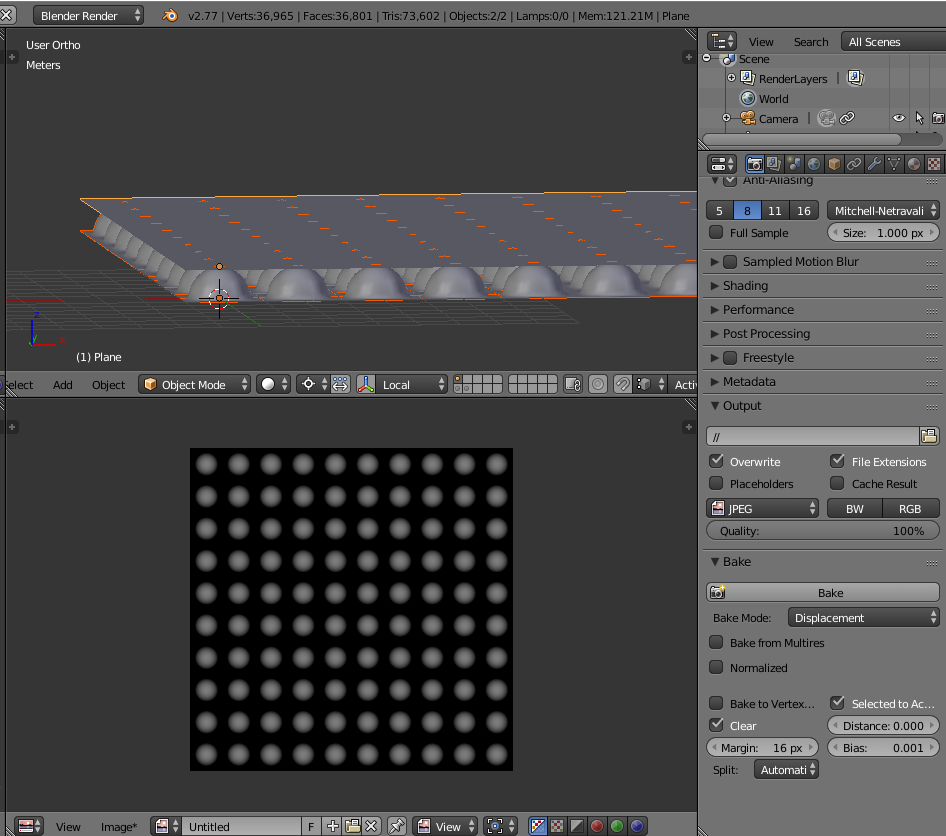
- Save baked displacement map to file (f3).
- Switch baking mode to Normals: Bake Mode = Normals, and once again press Bake – it will bake the normal map.
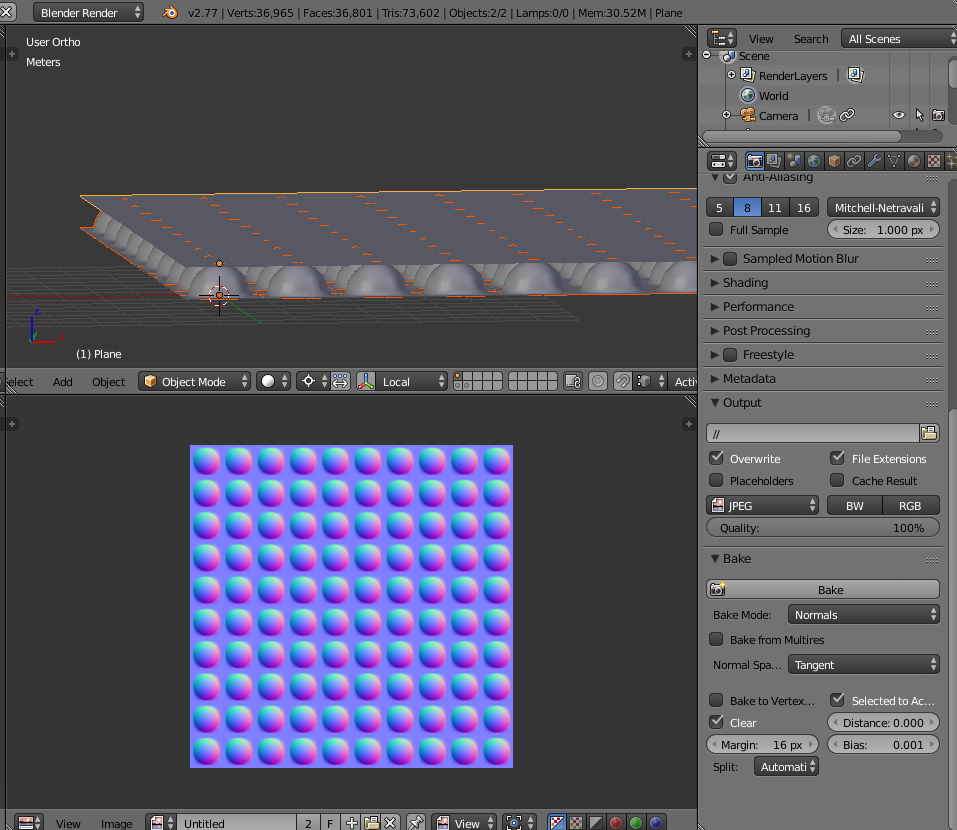
- Save baked normal map to another file (f3).
Now, having baked displace and normal maps, return to the basketball and configure the material by connecting the relief:
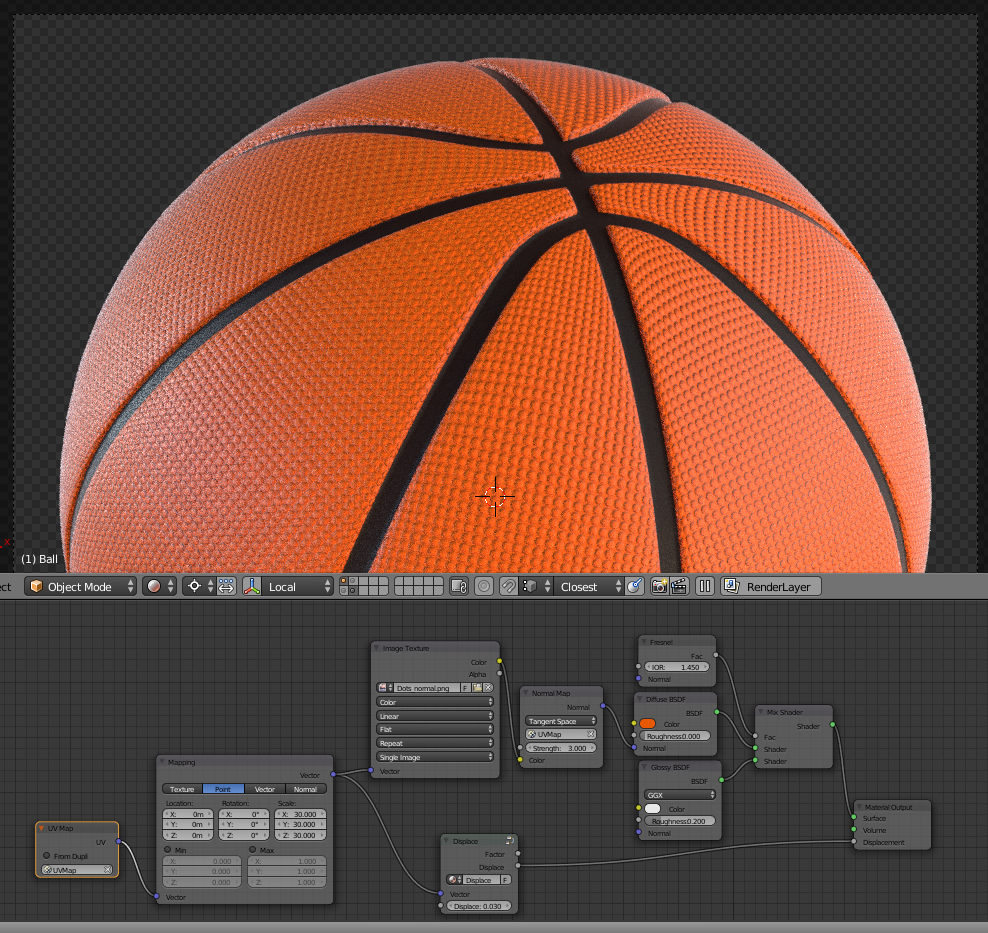
The normal map and the displace map are not commonly used at the same time in same material. To obtain a good result it is sufficient to use only one of them. The material shown in this example with two maps is redundant.
Sometimes durng baking (steps 19.4 and 21) Blender can error with «No objects or images found to bake to». It means that the basketball surface fragment or plane loose link to image created in step 12. To resolve this problem select basketball surface fragment, enter Edit mode (tab), and in UV/Imaga Editor window select the image created in step 12, then off Edit mode (tab). Do the same with the plane. Then press Bake again.