After the decision to improve render with HDRI lighting, the question immediately raises – where to get it? We can certainly ask Google-pictures for help, but not all founded images allows their authors for free use. What can we do? The solution is simple – make your own HDRI. Blender has all capabilities for this.
Creating studio HDRI process:
- Add a cube (shift+a – Mesh – Cube). Yes, this is the very rare case where you can use the default cube ). So this will be our “studio” – room 2 by 2 by 2 meters.
- Enter Edit mode (tab).
- Move up studios lower boundary (g – z – 1).
- Flip normals (w – Flip Normals). Normals should look inside, because render of our HDRI will take place from the inside of studio room.
- Off Edit mode (tab).
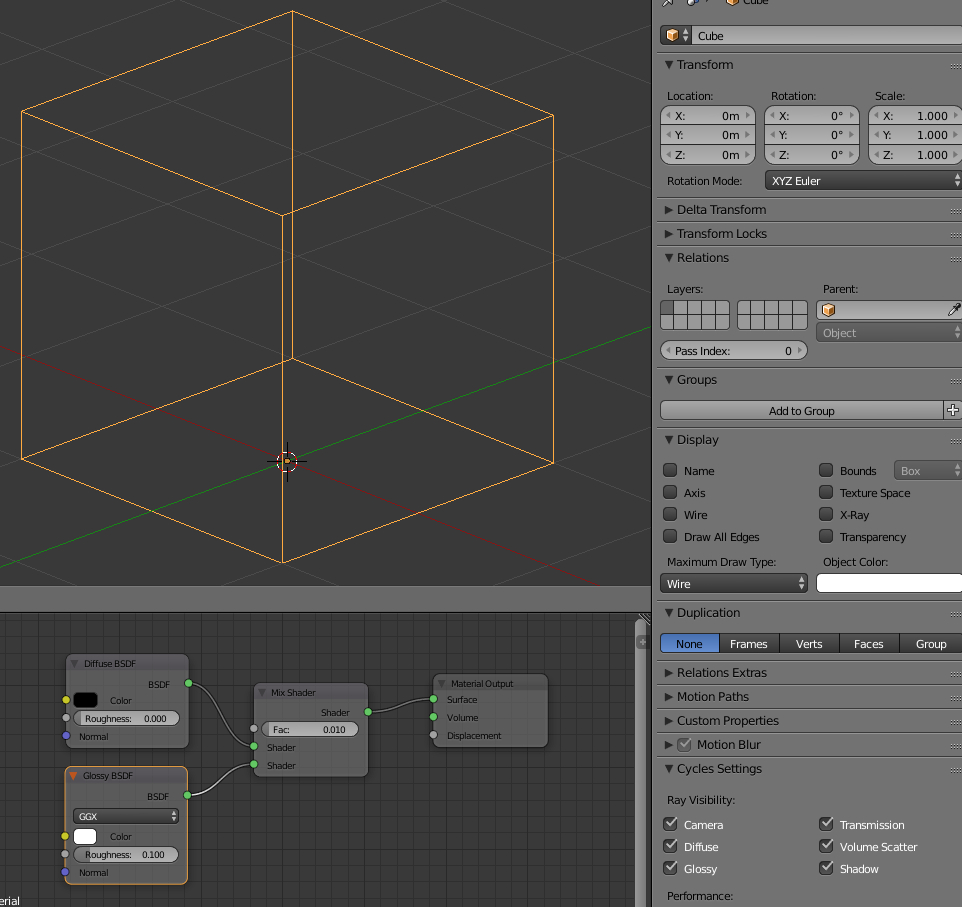
- Hide studio cube polygons for better look, leaving only grid lines. In the Object tab set:
- Display
- Maximum Draw Type = Wire
- Display
- Create material for studio based on black Diffuse (0,0,0) with a bit Glossy reflection:
To get the result properly configured camera needs to be placed in the center of the studio to shoot its 360 degree panorama.
- Add camera (shift+a – Camera).
- Make it active (Select it – ctrl+num0).
- Align camera to the center of the studio (g – z – 1).
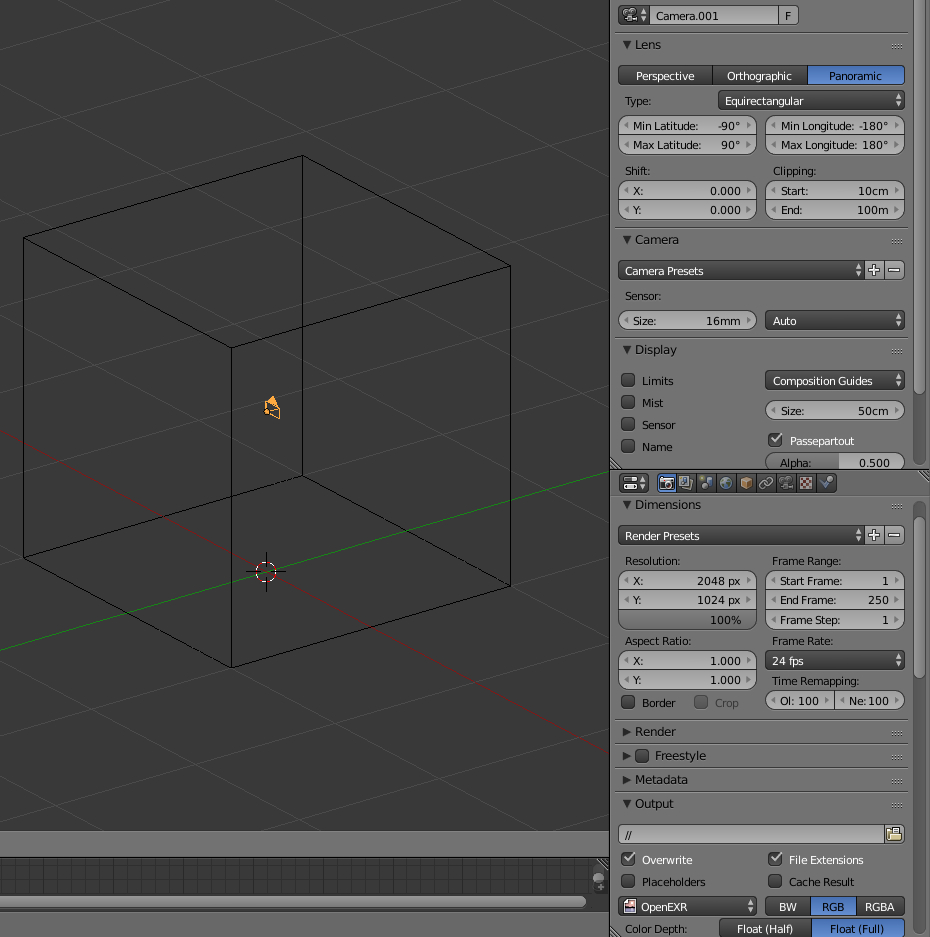
- In the camera Data tab set:
- In Perspective mode:
- Lens
- Focal Lens = 5 mm
- Lens
- Switch to Panoramic mode:
- Lens
- Type = Equirectangular
- Display
- Size = 50 cm
- Camera
- Size = 16 mm
- Lens
- In Perspective mode:
Also configure render settinds. The resulted image dimensions should scale to 2 : 1 horizontally (for example 2048 x 1024 px). Image format must support the extended brightness range mode (HDRI), so familiar jpg is not usable. The most convenient way is to use the Open EXR format, which has the necessary capabilities.
- In the Render tab:
- Dimensions
- Resolution
- X = 2048
- Y = 1024
- Output
- Set the OpenEXR format
- Resolution
- Dimensions
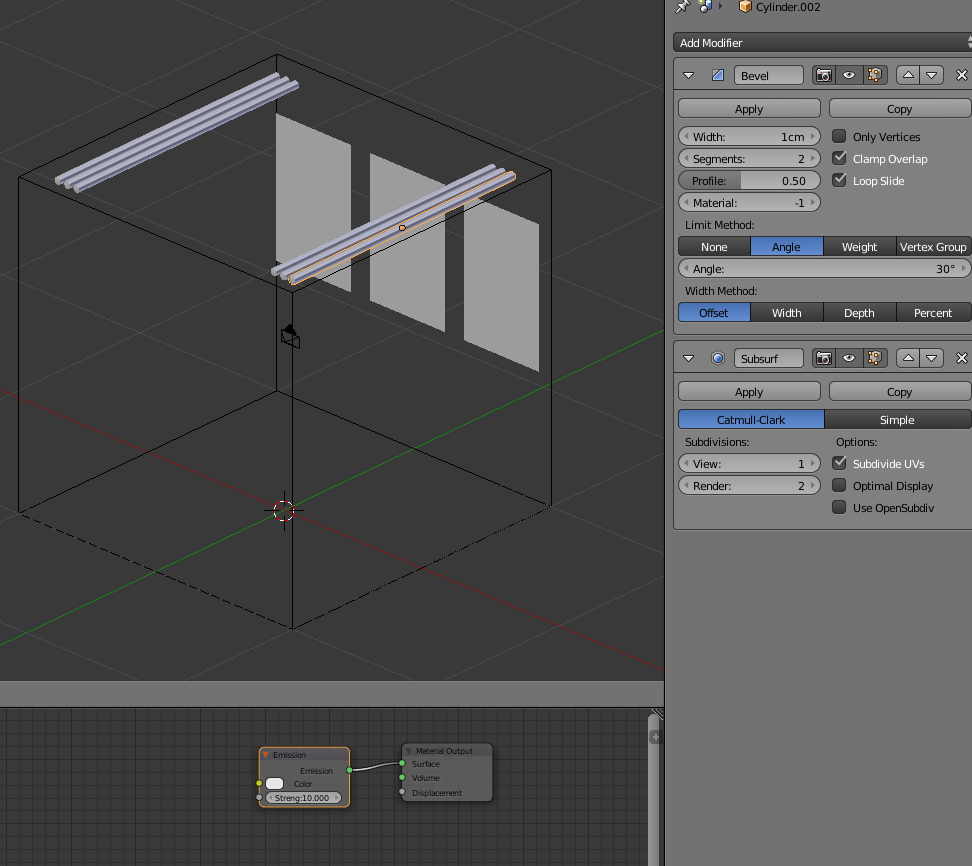
Immediately render results only black rectangle. The studio lacks the main thing – light sources. Lets simulate three segments window with light emission planes and a couple of fluorescent lights on the ceiling with emission cylinders.
- Add a plane (shift+a – Mesh – Plane).
- Decrease its size (tab – s – 0.2 – enter – tab). Place it on the wall of the studio cube.
- Add emission material (Emission) with Strength = 10 to the plane.
- Make 2 copies (shift+d) and place them abreast.
- Add cylinder (shift+a – Mesh – Cylinder).
- Edit it: add Bevel and Subdivision Surface modifiers, reduce in size. Assign the same emission material (from step 15). Locate it on the studio ceiling.
- Make multiple copies of it (shift+d) and place them in two rows.
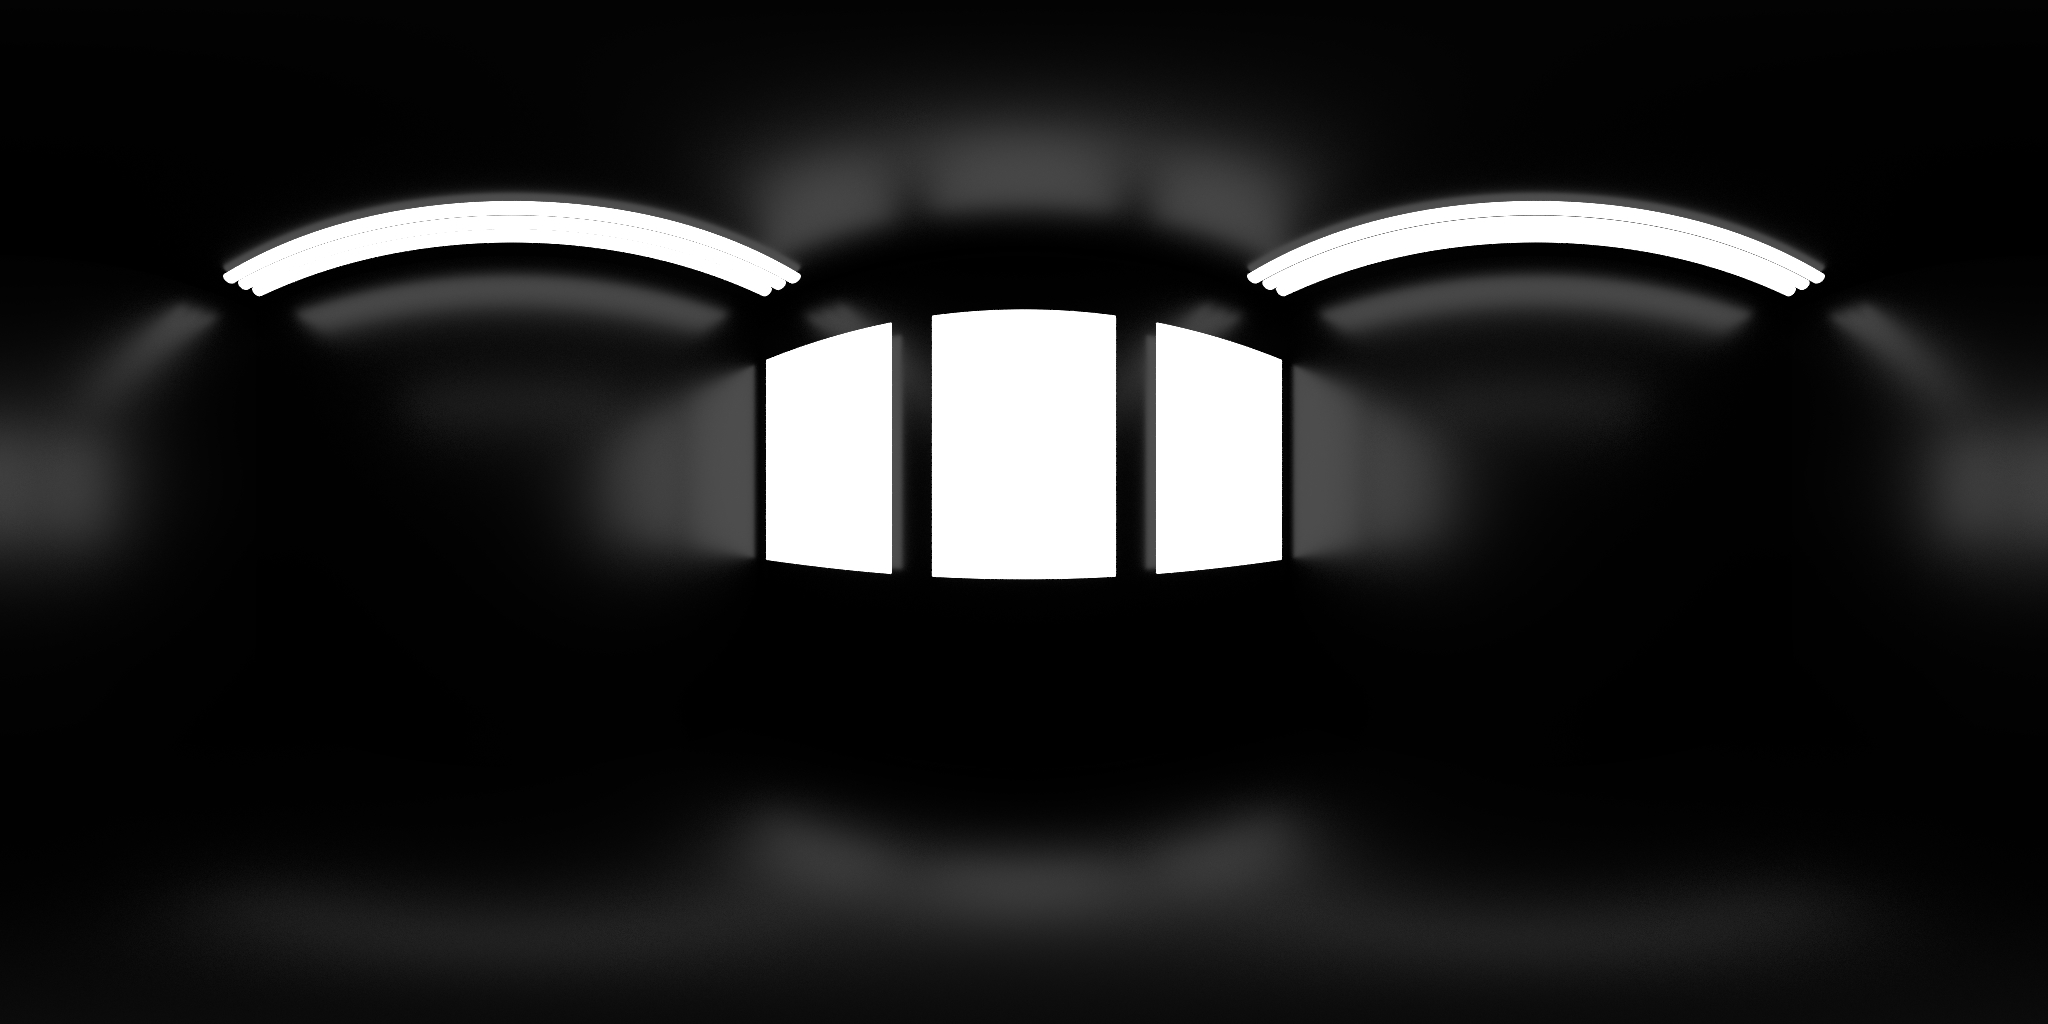
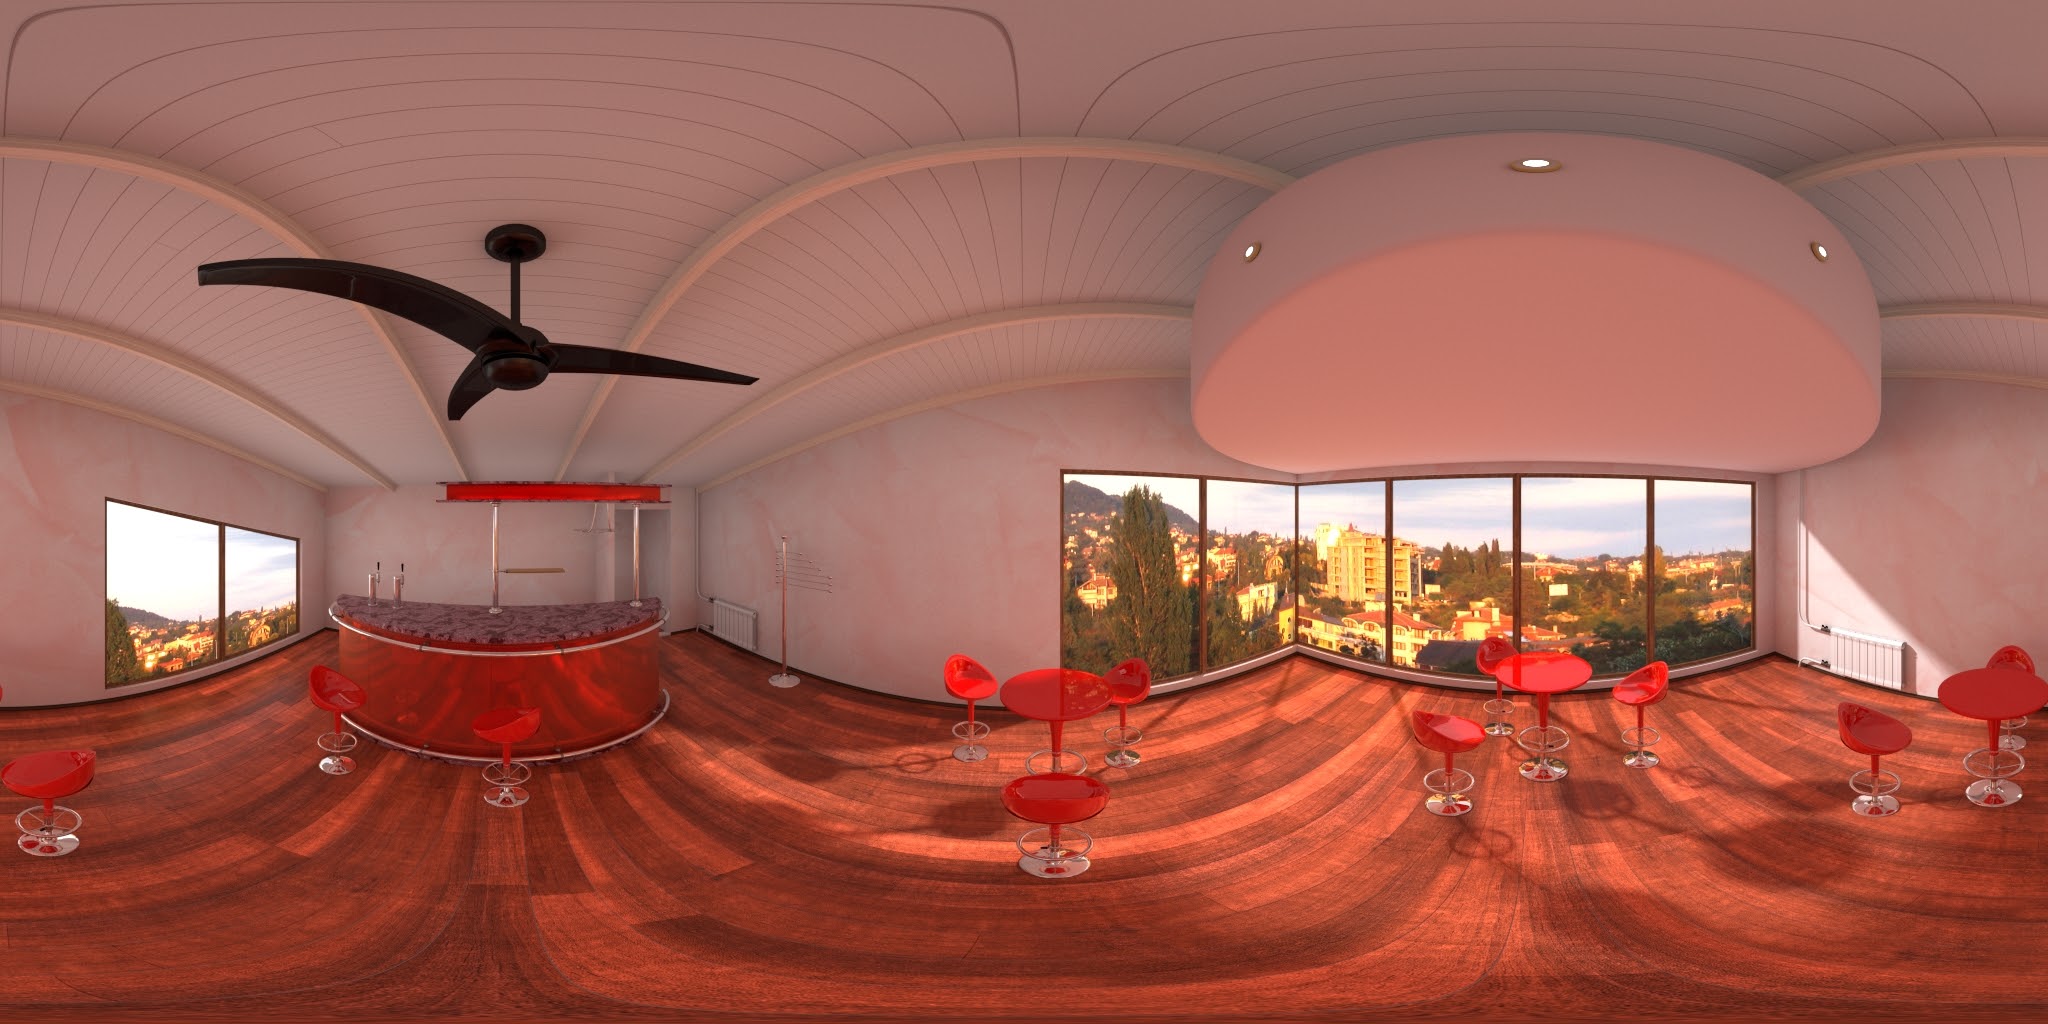
Everything is ready to start render. This will creates HDRI, an example of which was shown at the beginning of this article. Save it to * .exr file.
The resulting HDRI can be directly used for lighting in scene:
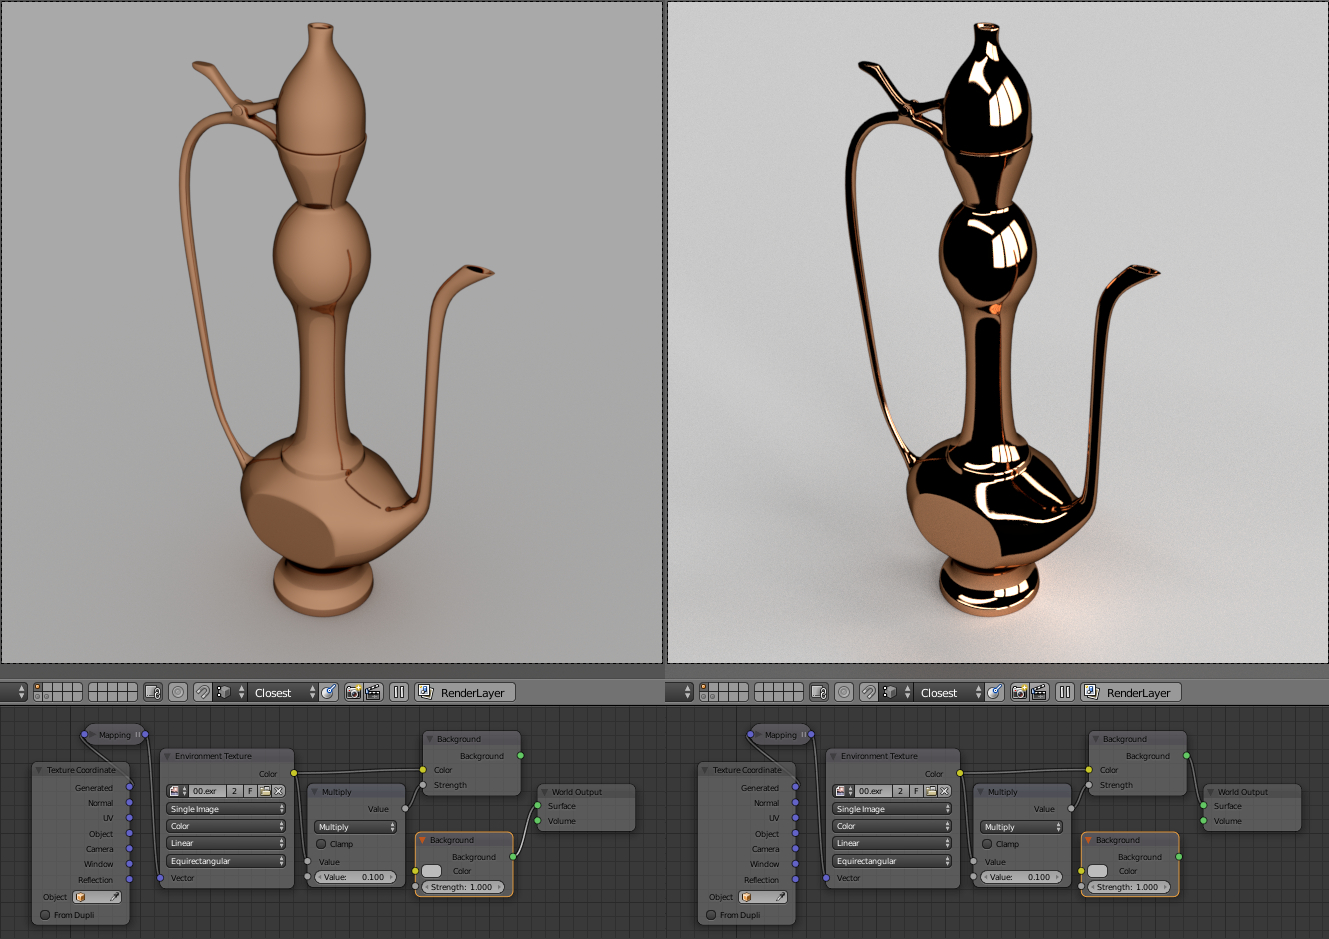
Studio HDRIs, usually quite simple, mainly used for the subject renders, the main task of them is to emphasize the contours of objects and give them a high contrast. However, using the same Blender tools, you can make much more exciting interior HDRI, which will give a very realistic lighting and glare maps.
Hey! Can we use this simple image for game? Thank you 🙂
Hi! Yes, of course.
What the game, if it is no secret?
Thank you 🙂 I’m doing a car game. HDRI is awesome for car lighting! Have a nice day.
Good luck in developing your game!
Oh thank you 🙂 Good luck to you, too!
Yeah! It really works! You can use the result image for lighting, but it also works well as a 360deg virtual panorama. And it can be used to show the concept of a interior design to your customers.
Yes, awesome thing!
Great guide! Thank you. Having good lighting is really important for any shiny materials and having HDRI images ready to use is super useful.
Thanks!