To improve the speed and convenience of developing Blender add-ons with Microsoft Visual Studio Code, this IDE can show the code auto-completion for common Blender API types.

This way of adding autocomplete is by Zen3515.
- Make a Git repository for your add-on project, for example on GitHub, and clone it to your local machine.
- In the Git console switch to the created repository.
|
1 |
cd 'D:/my_project' |
- Add a repository with autocomplete files as a git submodule.
|
1 |
git submodule add https://github.com/Korchy/blender_autocomplete.git |
- In your project directory create a “.vscode” folder and create a “settings.json” file in it.
|
1 |
mkdir .vscode && touch settings.json |
- Open the generated JSON file and fill it as follows:
|
1 2 3 4 |
"python.autoComplete.extraPaths": [ "d:\\my_project\\blender_autocomplete\\2.90", "_PATH_TO_BLENDER_\\2.90\\scripts\\modules", ] |
The first line contains the path to the required version of the autocomplete directory from the downloaded submodule.
In the second line specify the path to the “modules” folder for the Blender installed on your computer. For example:
|
1 |
"c:\\Program Files\\blender2.90\\2.90\\scripts\\modules" |
- Start Visual Studio Code and open your project.
- Install Blender as an interpreter.
First, install the “Python” Visual Studio Code extension if you do not have it installed.
Press F1 (or ctrl + shift + p). Type the “Python: Select Interpreter” and specify the path to the “python.exe” file in the currently used Blender directory. For example:
|
1 |
"c:\\Program Files\\blender2.90\\2.90\\python\\bin\\python.exe" |
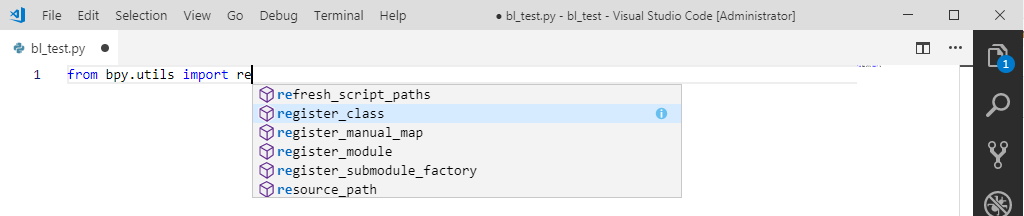
Now everything is ready, when you type the code in your project files in Visual Studio Code, auto-completion tips will be displayed automatically.