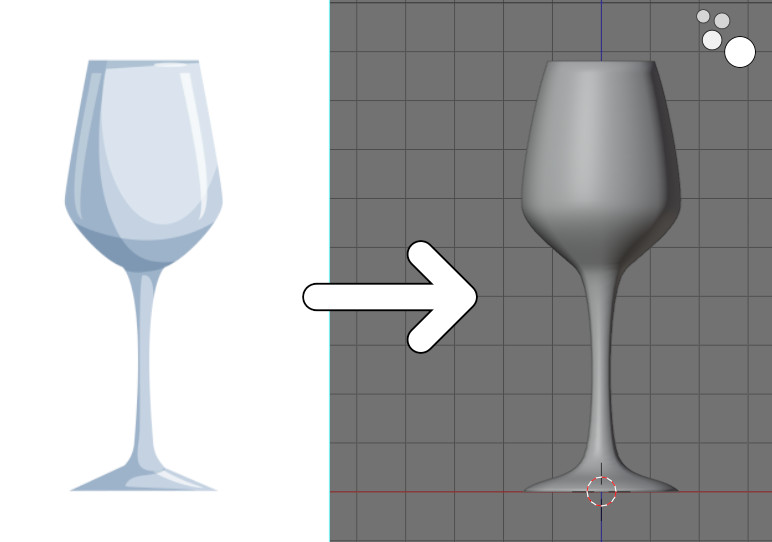
Using Geometry Nodes in Blender, we can create simple bodies of revolution – objects which shape is determined by the rotation of the surrounding profile around the coordinate axe.
 .blend file on Patreon
At first, we will create a profile curve.
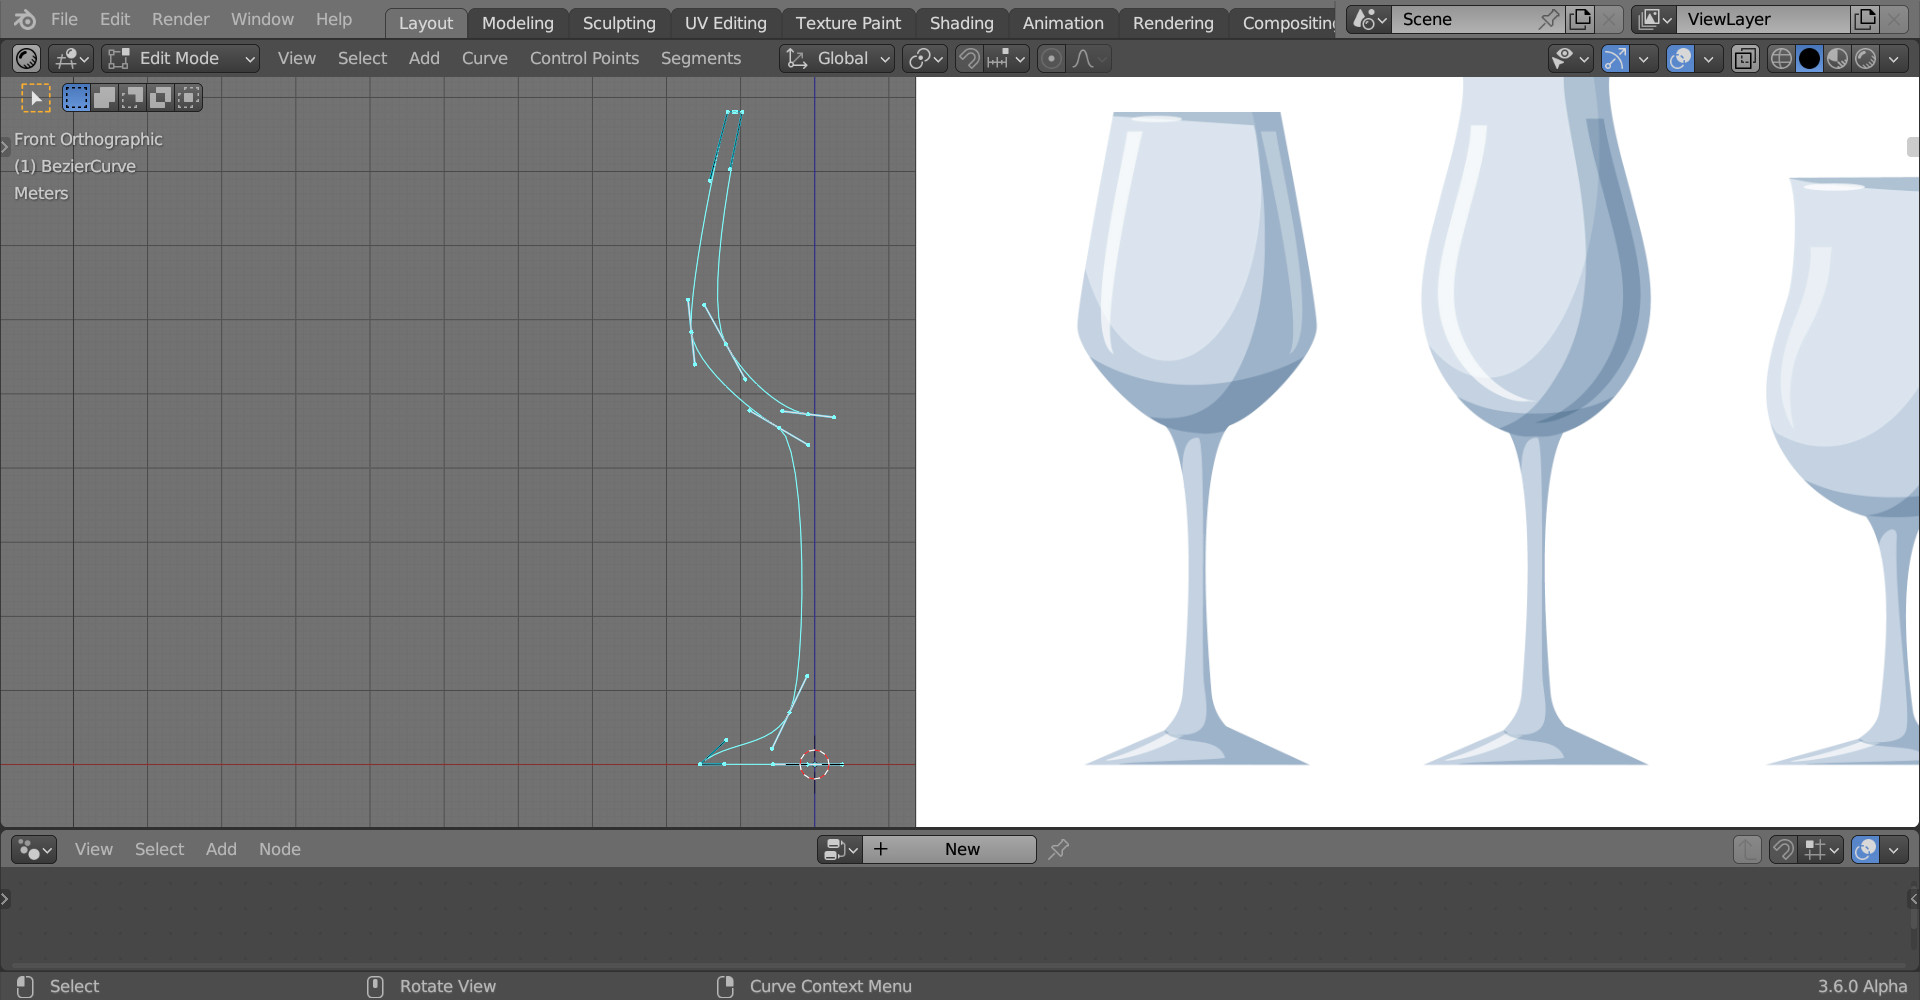
As an example, let’s take an image with a profile of a wine glass (free image from www.freepik.com) and drag it into the 3D viewport area in Blender.
Add a curve (shift + a – Curve – Bezier) and make the profile of the glass out of it, correlating it with the original image. For our purposes, it is enough to make a half of the profile.
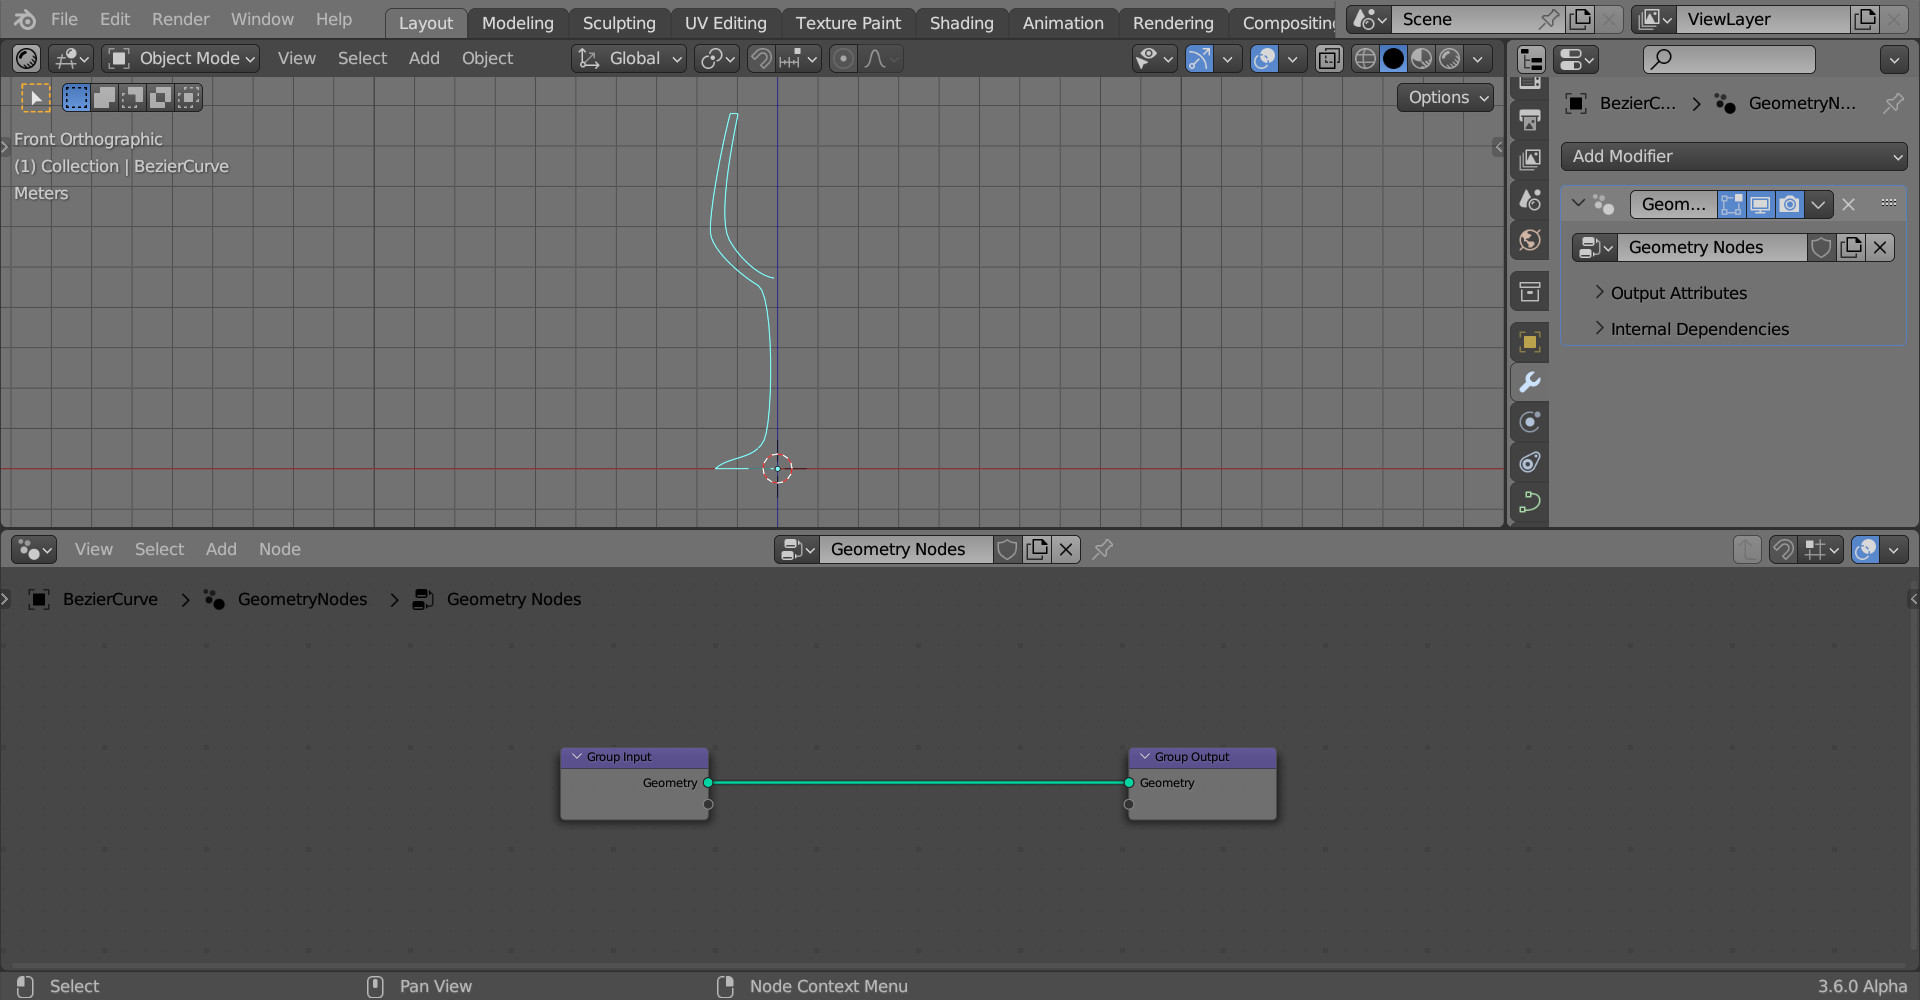
Add the Geometry Nodes modifier to the curve and create the initial node tree by pressing the “New” button.
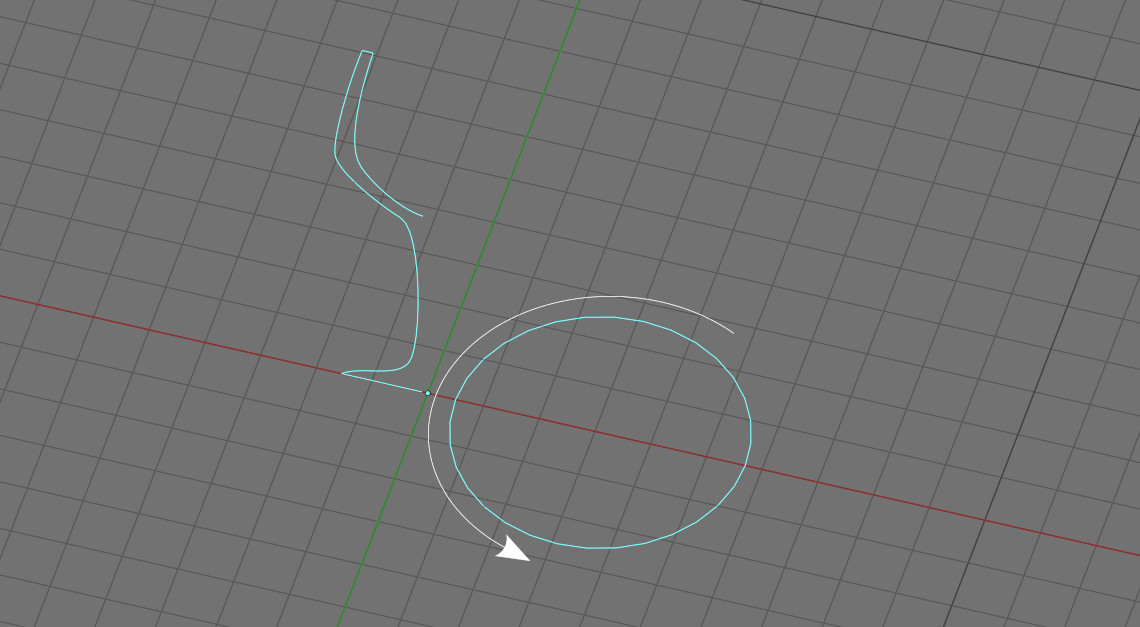
Now we need to make a full rotation body from the profile. To do this, we need to rotate it around the Z axis.
Add a Curve Circle node to the node tree (shift + a – Curve – Primitives – Curve Circle). This ring will serve as a path along which we will rotate the previously created glass profile.
The Curve to Mesh node will help us to carry out the rotation process itself (shift + a – Curve – Operations – Curve to Mesh). Add it to the main branch of the node tree. Move the input geometry to the “Profile Curve” input, and link the “Curve” input with the “Curve” output of the Curve Circle node.
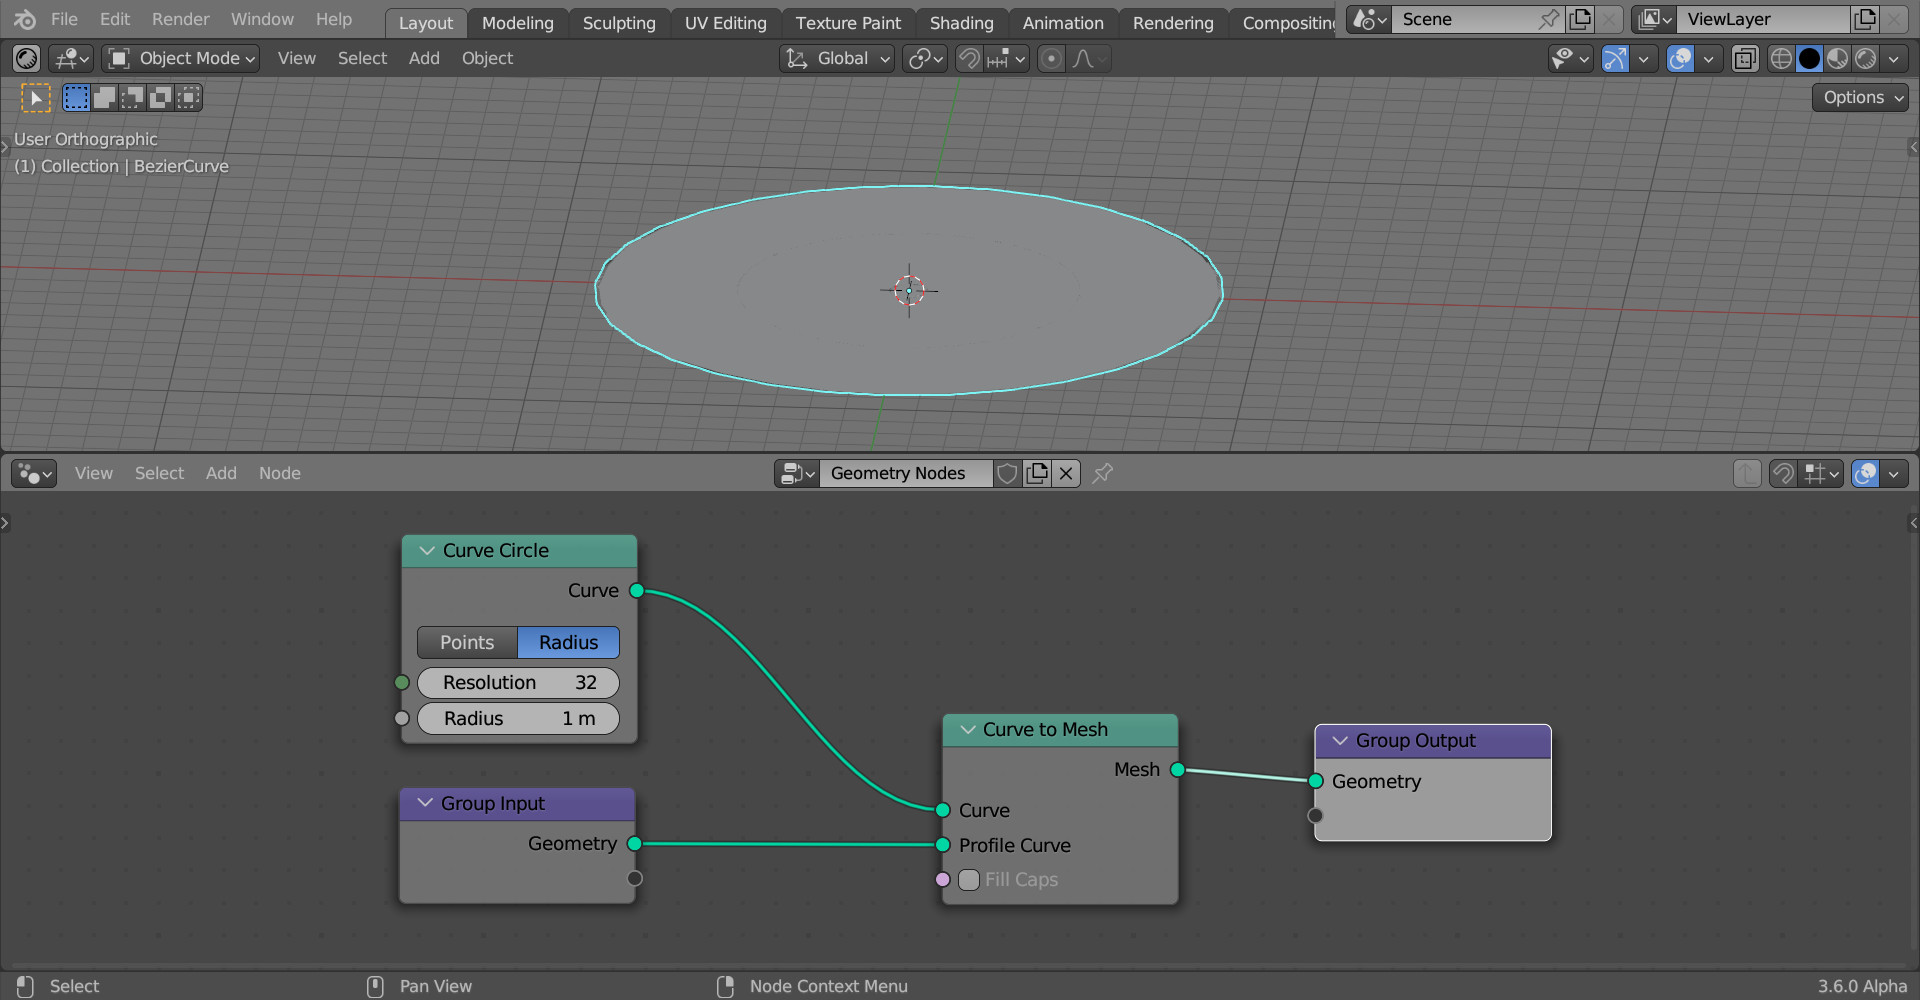
We have not yet got the required form. This happened because the Curve to Mesh node requires both the profile and the path to lie in the same plane, and now we have the path (circle) lying in the XY plane, and the profile in the XZ plane, which was convenient for modeling.
Rotate the profile using the Transform Geometry node (shift + a – Geometry – Operations – Transform Geometry). Add it to the note tree branch after the Group Input node, and set the rotation value along the X-axis to 90 degrees.
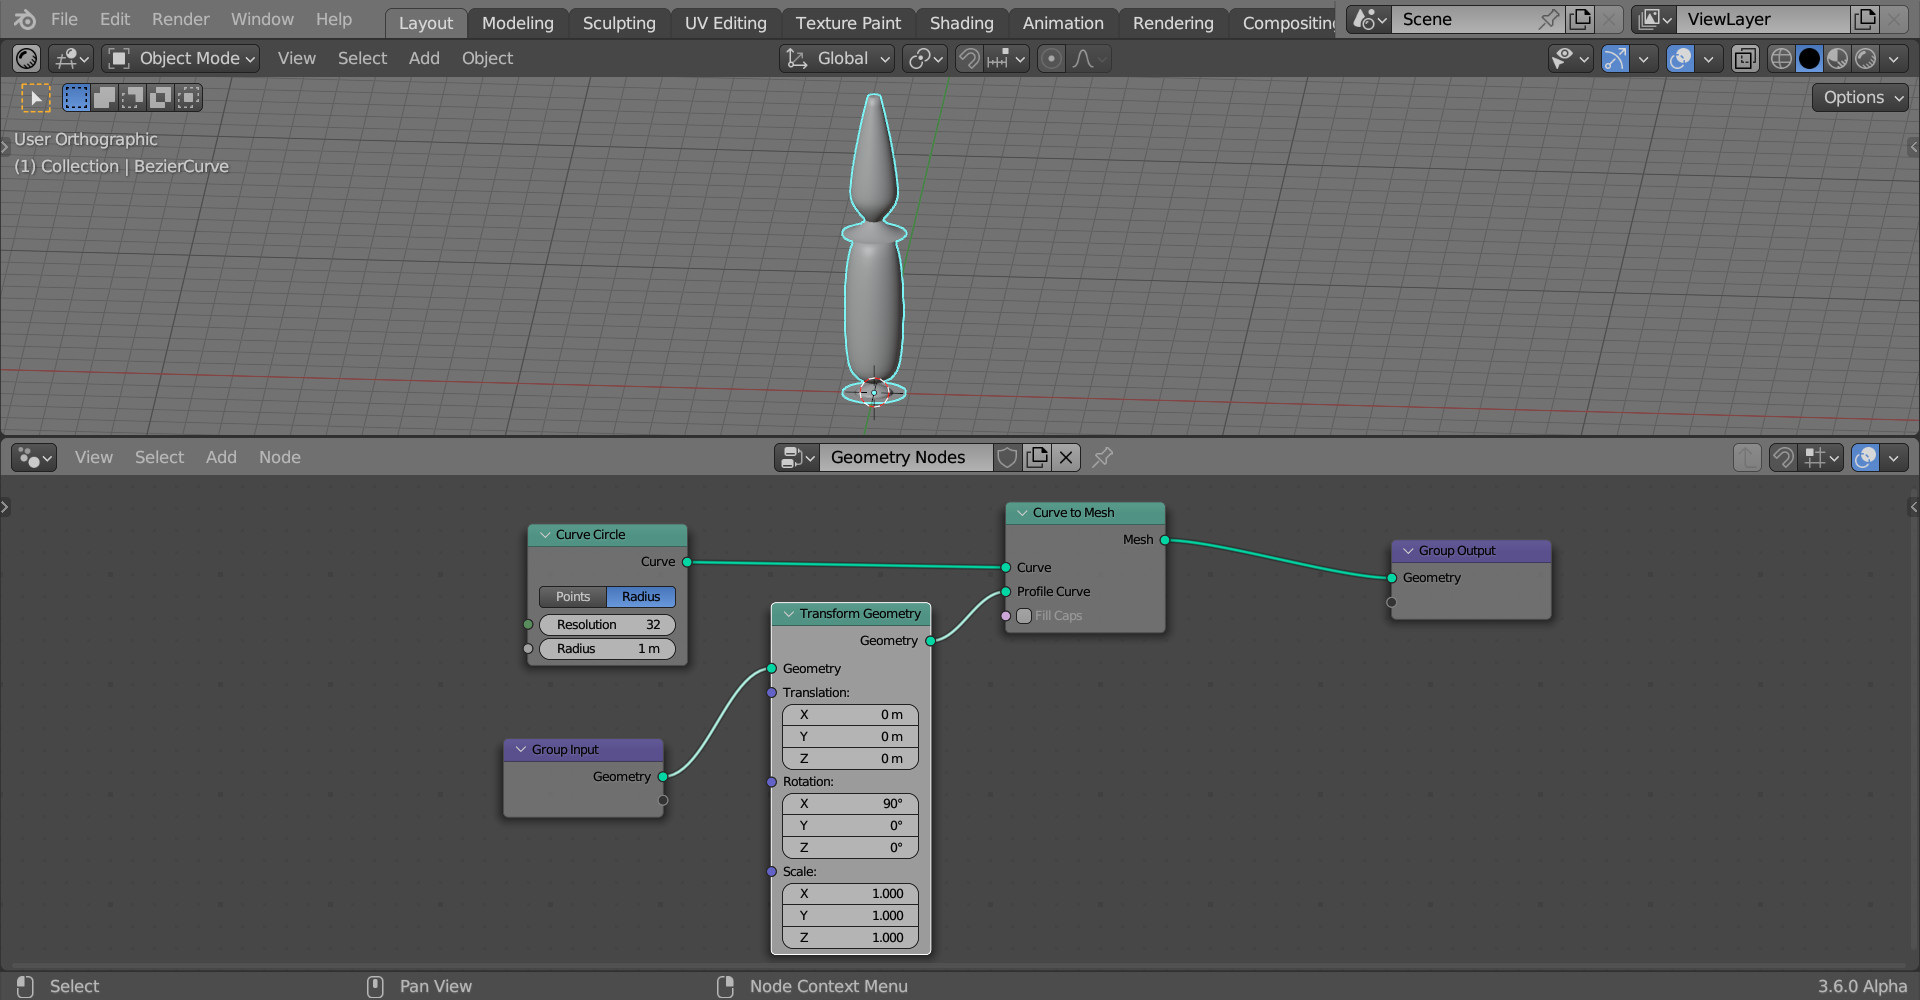
Better, but still not what we need. Such a strange shape is obtained due to the fact that the rotation occurs around the circumference of the croup, and not around its center. The easiest way to fix this is by setting the radius of the circle to be very small.
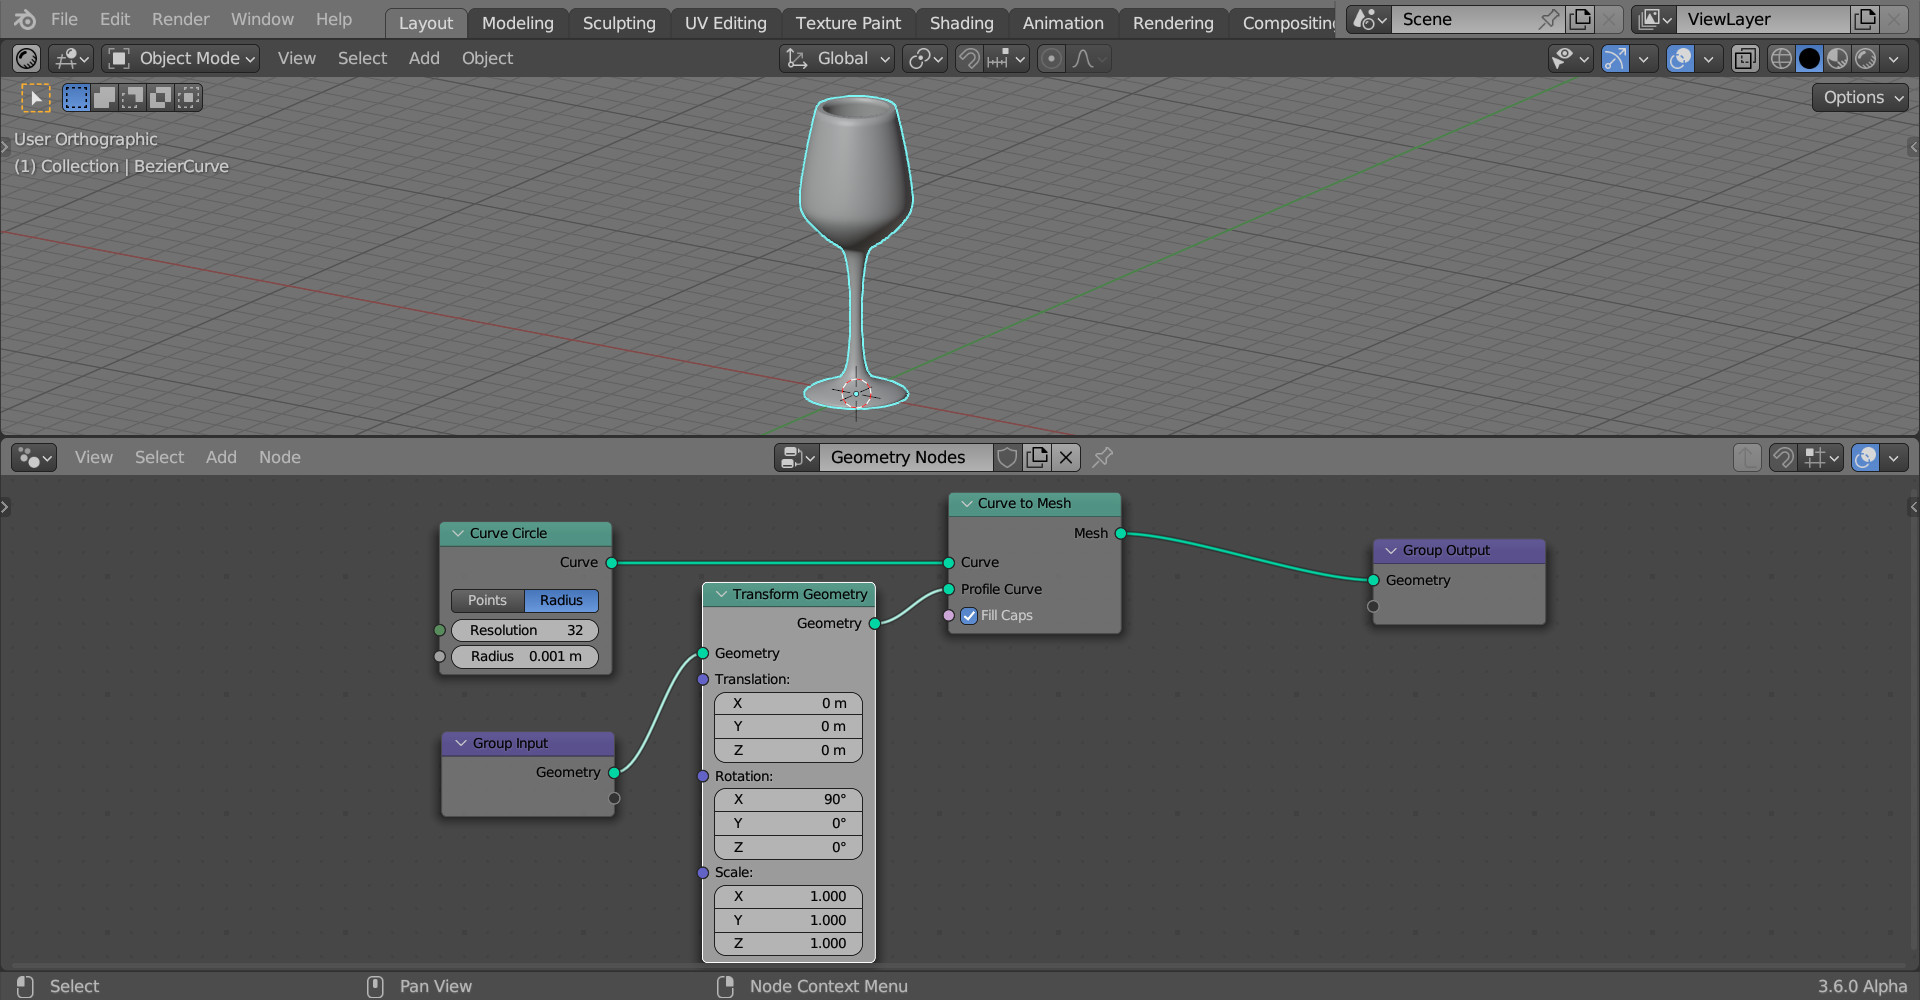
Set the “Radius” value in the Curve Circle node to 0.001.
And finally, we got the required shape of the glass.
Alternatively, we can leave the radius of the circle unchanged, but simply move the profile along the X-axis in the edit mode by a distance equal to the radius of the circle. The result will be exactly the same.
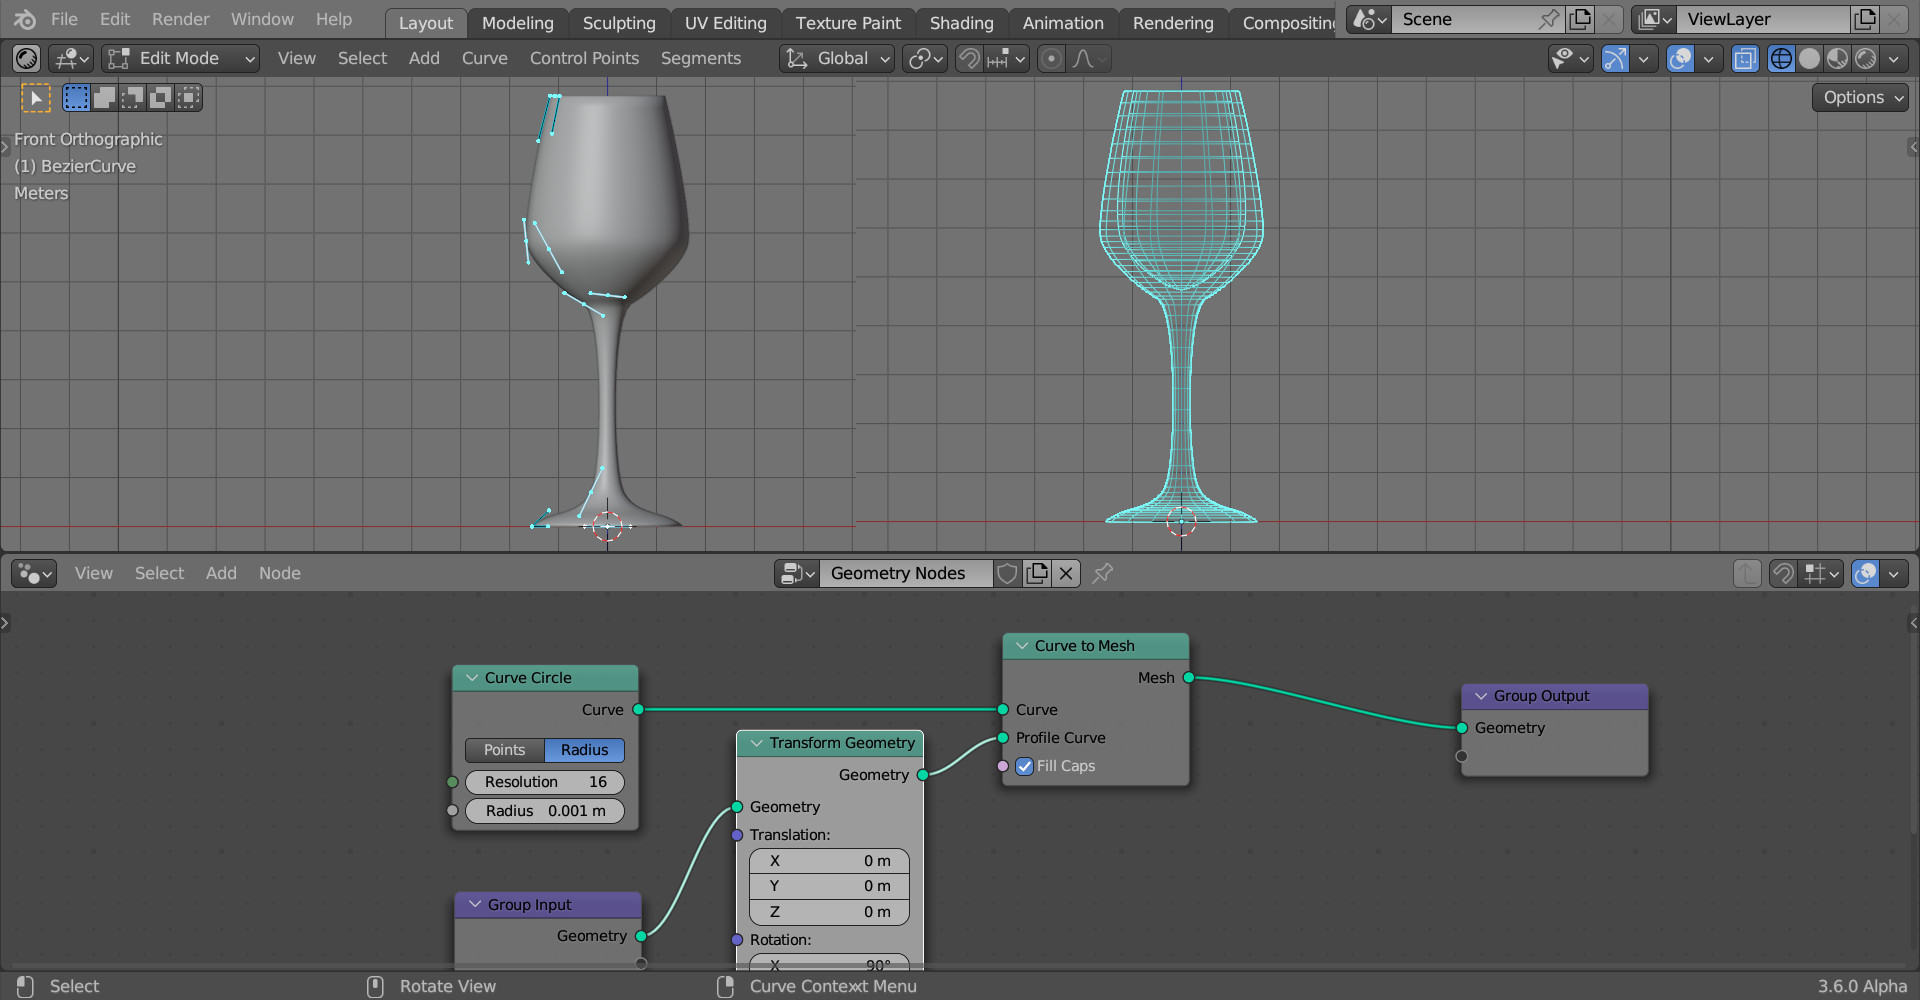
So, we have made a beautiful glass, the shape of which is at the same time very easy to change, adjust and rebuild to new shapes by changing its profile curve.