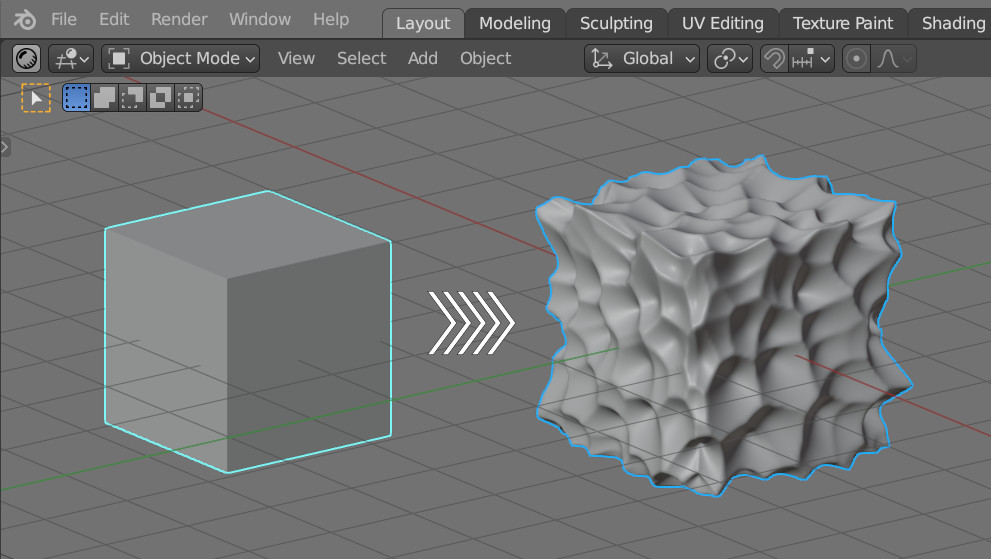
Deforming a mesh with texture maps in Blender Geometry Nodes, we can achieve very interesting results. For example, with the Voronoi texture, it is very easy to add a bit of “organic” to any object.
 .blend file on Patreon
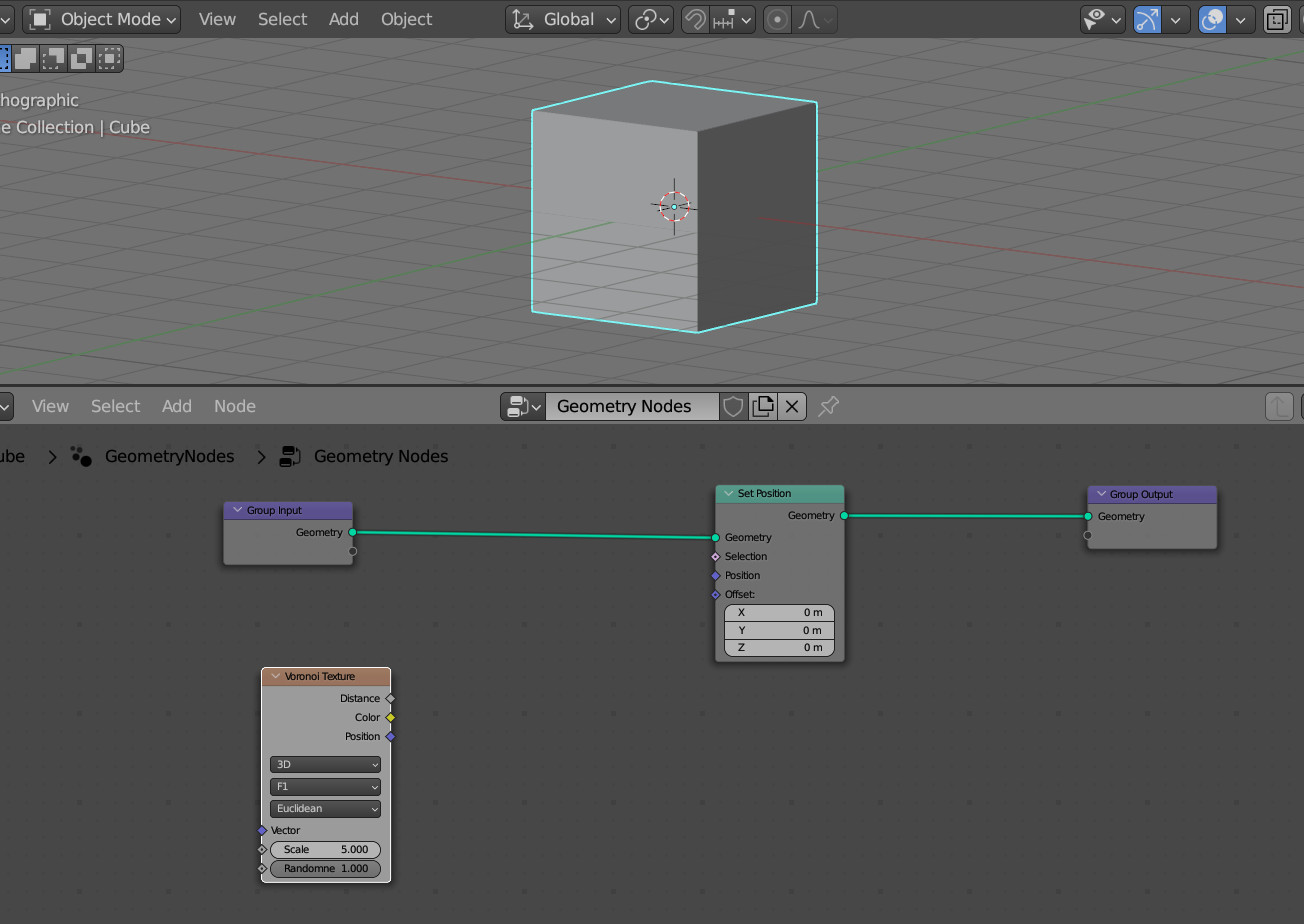
Add a cube to the scene (shift + a – Mesh – Cube). Append the Geometry Nodes modifier to it and create the initial node tree by pressing the “New” button.

Add a Voronoi Texture node to the tree (shift + a – Texture – Voronoi Texture).

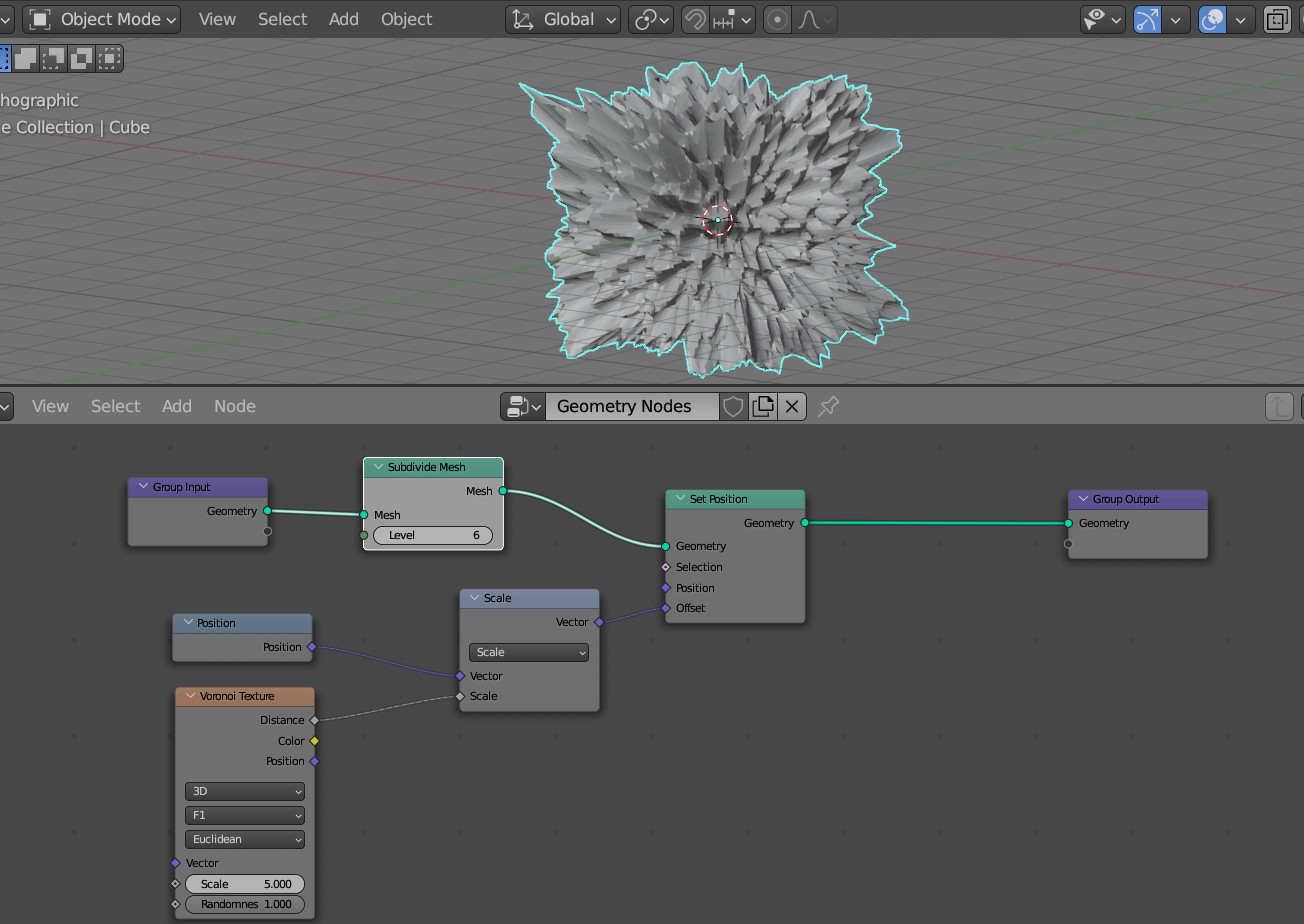
To deform a mesh with a texture, we need to offset each mesh vertex by the value obtained from the texture. In our case, we will use the Distance output.
To offset mesh points, add a Set Position (shift + a – Geometry – Set Position) node to the main branch of the node tree.
We will need to feed the offset value for each vertex of the mesh to the Offset input.
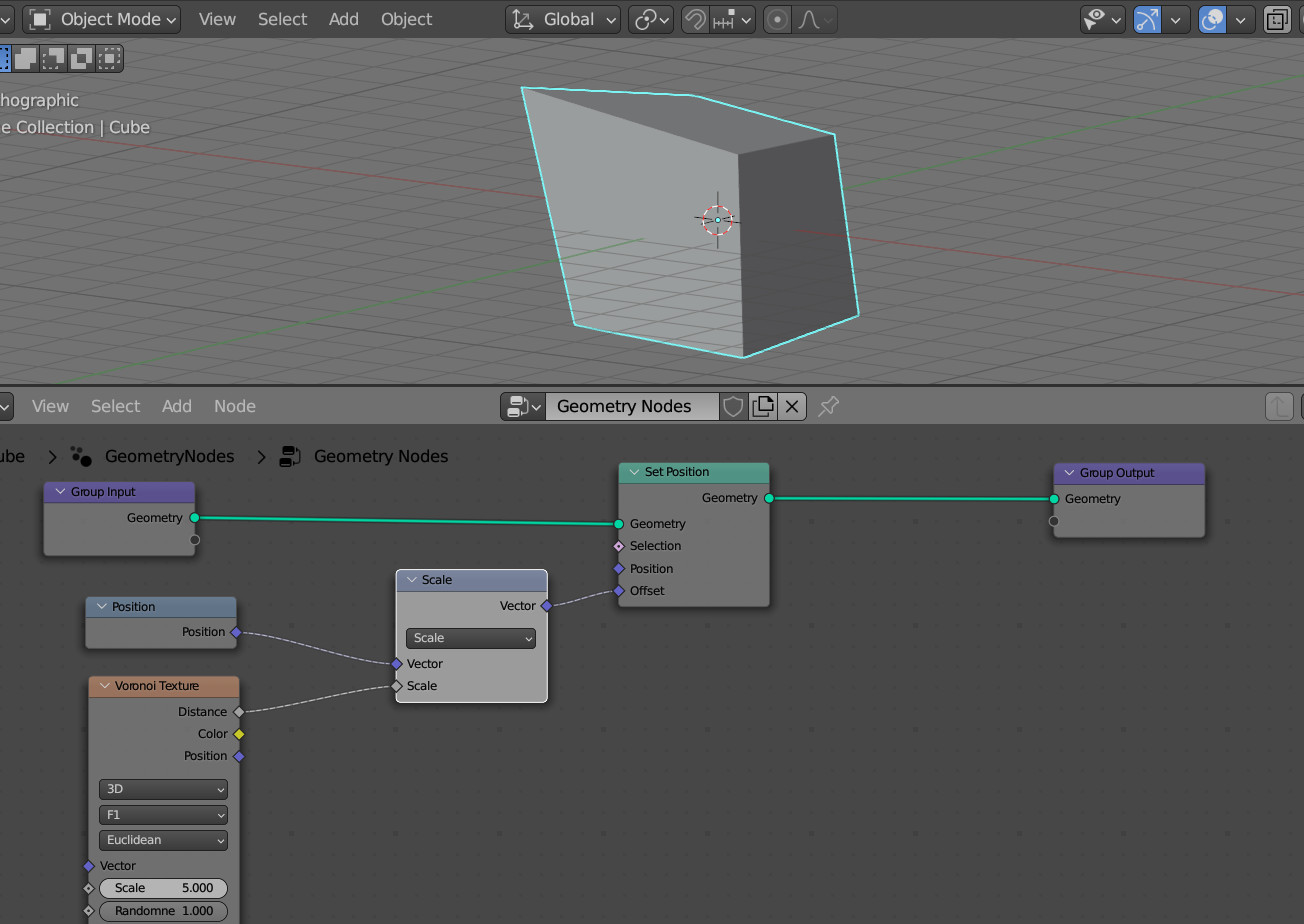
To get the offset for each vertex, we need to multiply the current position of the vertex by the factor we get from the texture node.
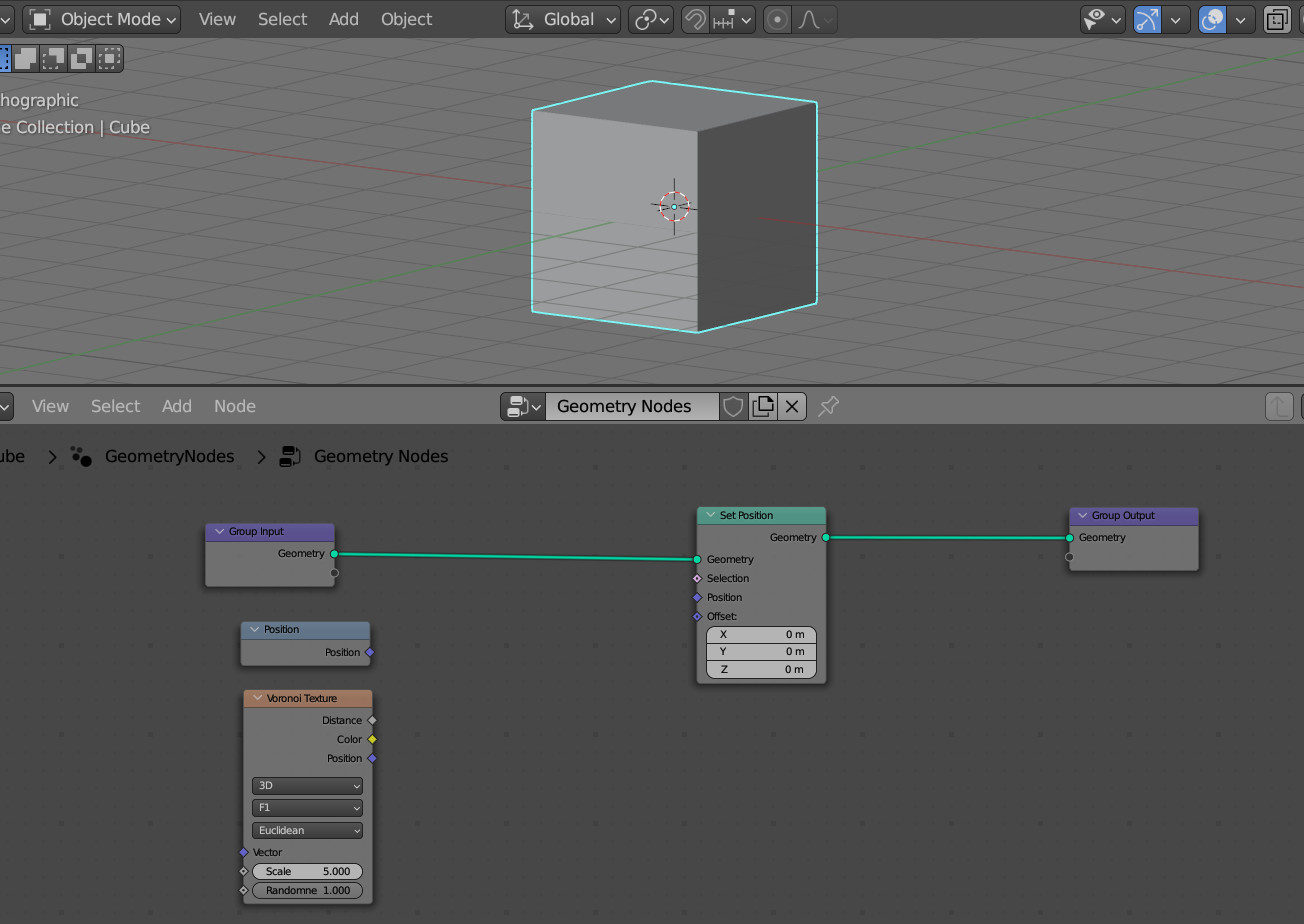
We can get the position of each vertex from Position node. Let’s dd it (shift + a – Input – Position) to our node tree.
For multiplication, we will use the Vector Math node. Add it (shift + a – Vector – Vector Math) and switch to the “Scale” mode. In this mode, the node will multiply the vector value from the “Vector” input by the scalar value from the “Scale” input.
Link the “Vector” input of the Vector Math node with the “Position” output of the Position node. Link the “Scale” input of the Vector Math node with the “Distance” output of the Voronoi Texture node.
At the “Vector” output, we get the location vector of each vertex of our mesh, multiplied by the coefficient from the Voronoi texture. Link the resulting value from the “Vector” output of the Vector Math node with the “Offset” input of the Set Position node to move the vertices of the mesh.
So far, the result does not look impressive. This happens for two reasons:
Firstly, our cube has too few vertices, only 8. We need to subdivide it, making its grid more dense.
Add a Subdivide Mesh node to the main node tree branch (shift + a – Mesh – Subdivide Mesh). Put it at the very beginning, right after the Group Input node. Set the number of subdivisions to 6.
The second reason is that the offset is too large.
Add a Math node (shift + a – Utilities – Math) to the tree between the Voronoi Texture and Vector Math nodes. Switch it to the “Multiply” mode and enter the value 0.1 into the remaining free lower input. This will reduce by a factor of ten the value obtained from the “Distance” output of the Voronoi Texture node.
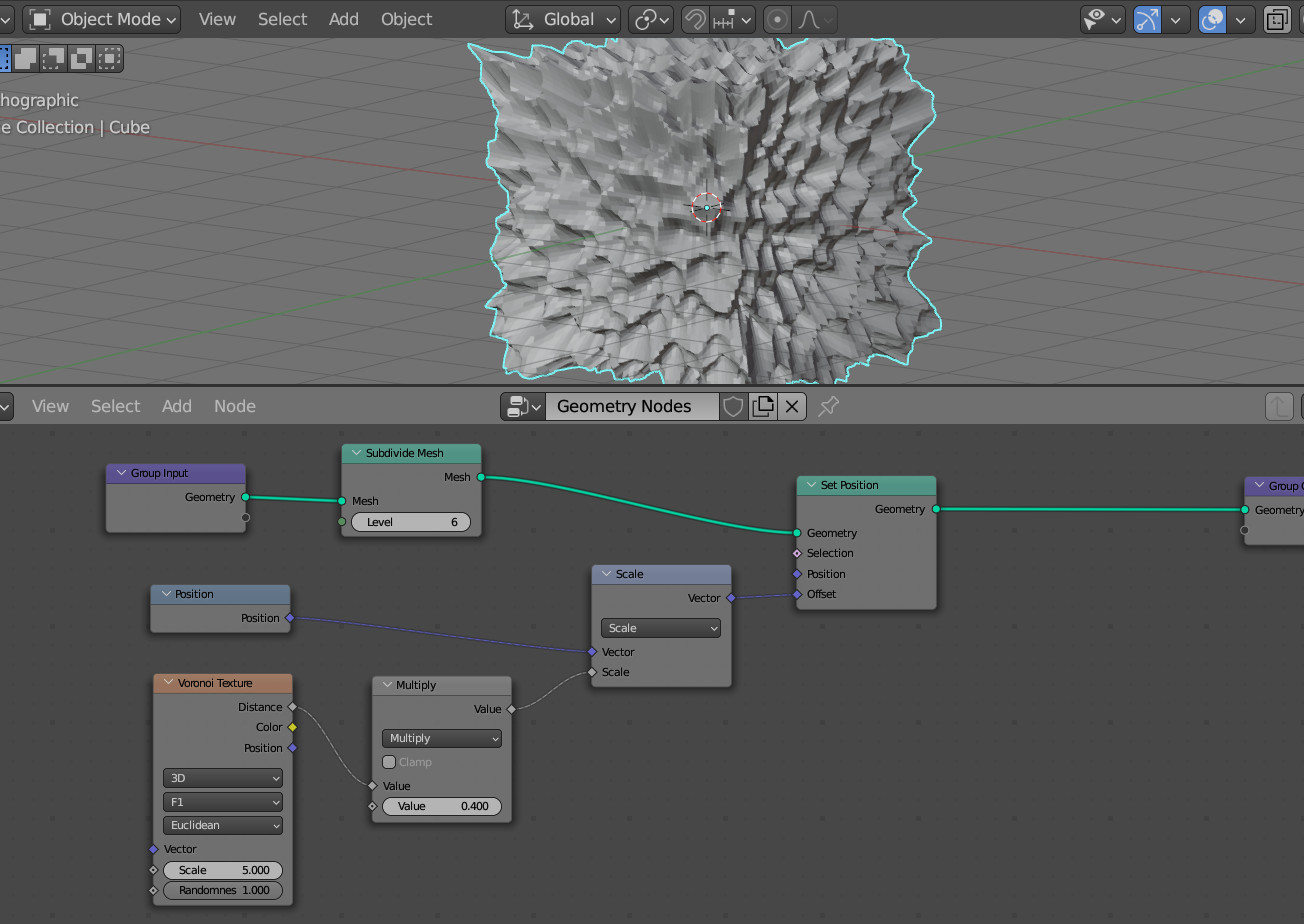
Reduce the scale of the Voronoi Texture by setting the “Scale” value in this node to 3.

The result is getting more interesting.
To make the final mesh smoother, add the Subdivision Surface (shift + a – Mesh – Subdivision Surface) and Set Shade Smooth (shift + a – Mesh – Set Shade Smooth) nodes to the end of the main node tree branch, before the Group Output node.
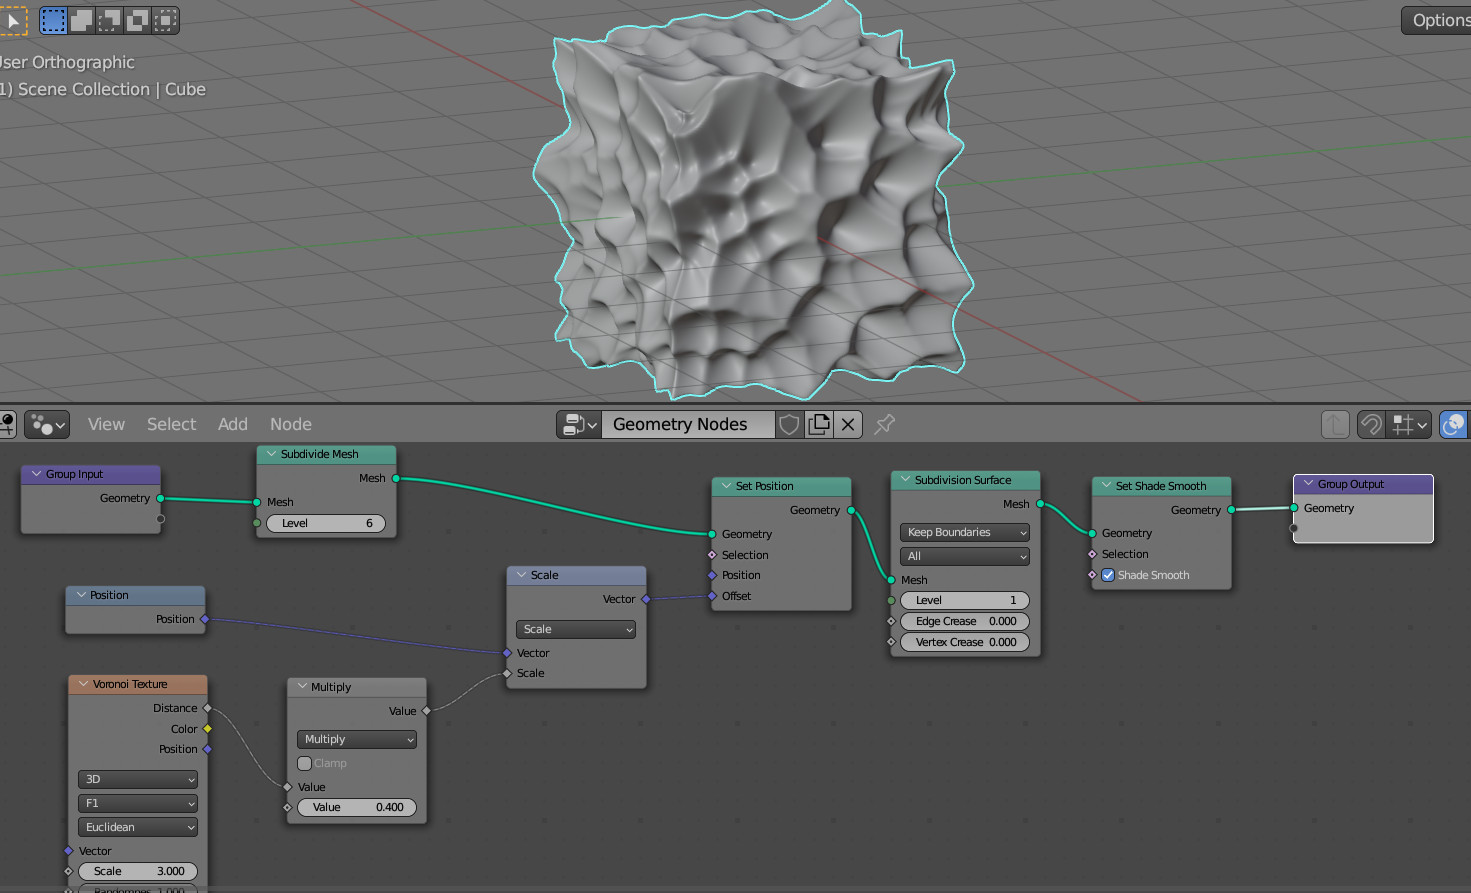
Now the cube looks much more interesting than the default.
This is cool! Is there a way to make the voronoi texture scale outwards based on the face normals instead of being directed by the object origin? If it’s a tall/long object, the voronoi starts to distort the farther away from the object origin it gets. I’m new to geometry nodes so i might not be explaining that correctly
Actually, nevermind. I think I got the desired result by just replacing the Position node with the Normal node.