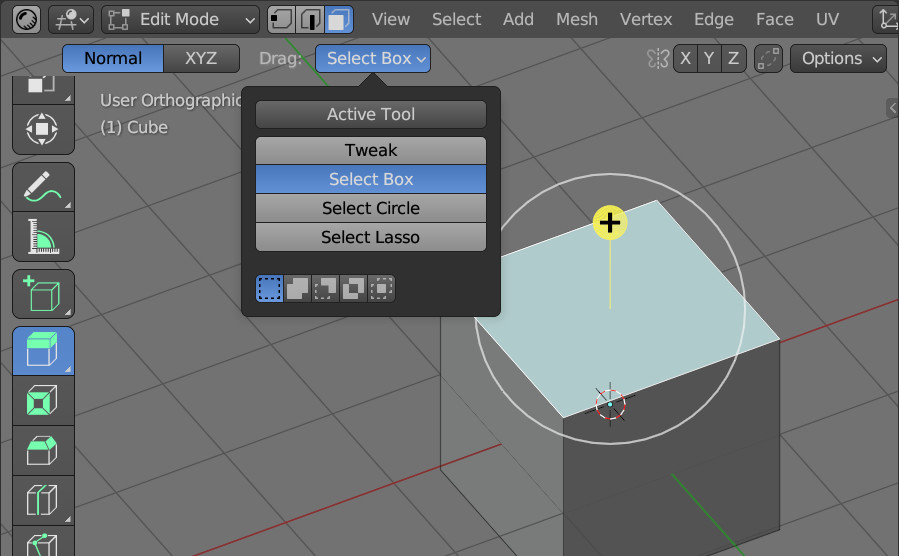
Switching between the “DEFAULT” and “FALLBACK” modes for tools in Blender allows us to use the tool in the first case by dragging the mouse anywhere in the 3D viewport, and in the second – only inside the area limited by the control ring.
 .blend file on Patreon
Switching between these two modes manually is done by selecting the desired “Drag” parameter value in the header of the 3D viewport area.
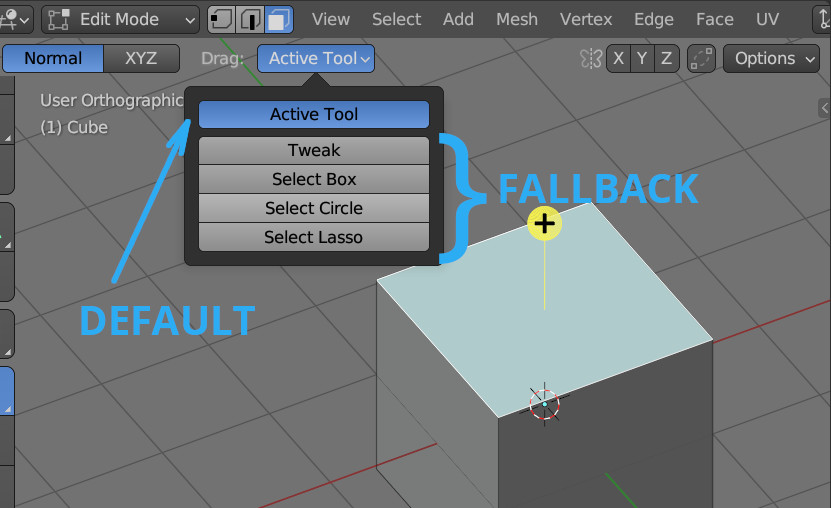
When selecting “Active Tool” the “DEFAULT” mode is activated. Any other selection will use the “FALLBACK” mode.
We can switch the mode using the Blender Python API. For example, let’s turn on the “DEFAULT” mode:
|
1 2 3 4 |
bpy.context.tool_settings.workspace_tool_type = 'DEFAULT' area = [area for area in bpy.context.screen.areas if area.type == "VIEW_3D"][0] area.tag_redraw() |
We enable the desired mode and redraw the viewport to immediately display the changes.
However, when we run this code, we will see that although the mode has switched to “DEFAULT”, the control ring is still displayed on the viewport screen. If we try to enable the “FALLBACK” mode in the same way, the control ring will not be displayed in the viewport.
This happens because the initialization of the DEFAULT/FALLBACK mode is also tied to the call of the tool itself.
Enabling FALLBACK mode
To correctly switch the current tool to the “FALLBACK” mode, we need to initialize this tool by specifying the True value in its “as_fallback” parameter.
|
1 |
bpy.ops.wm.tool_set_by_id(name="builtin.select_box", as_fallback=True, space_type='VIEW_3D') |
In the “name” parameter, we pass which selection item will be active:
- Tweak – builtin.select
- Select Box – builtin.select_box
- Select Circle – builtin.select_circle
- Select Lasso – builtin.select_lasso
Enabling DEFAULT mode
Specifying the False value in the “as_fallback” parameter will not work.
To switch to the “DEFAULT” mode, call the tool with the same command. After that, we’ll immediately switch it to “DEFAULT” mode, as we did at first.
|
1 2 |
bpy.ops.wm.tool_set_by_id(name="builtin.select_box", as_fallback=True, space_type='VIEW_3D') bpy.context.tool_settings.workspace_tool_type = 'DEFAULT' |