Using Blender Geometry Nodes, we can very easily and quickly create the effect of a spatial funnel with animation.
 .blend file on Patreon
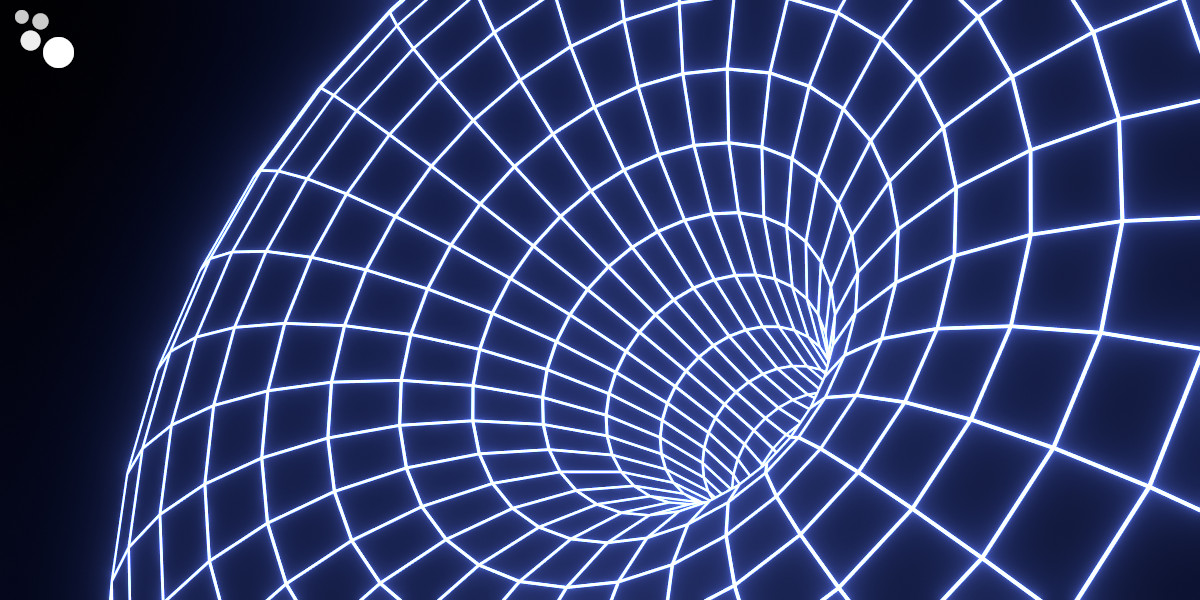
Add a plane to the scene (shift + a – Mesh – Plane), assign it a Geometry Nodes modifier, and initialize the node tree by clicking on the “New” button.
![]()
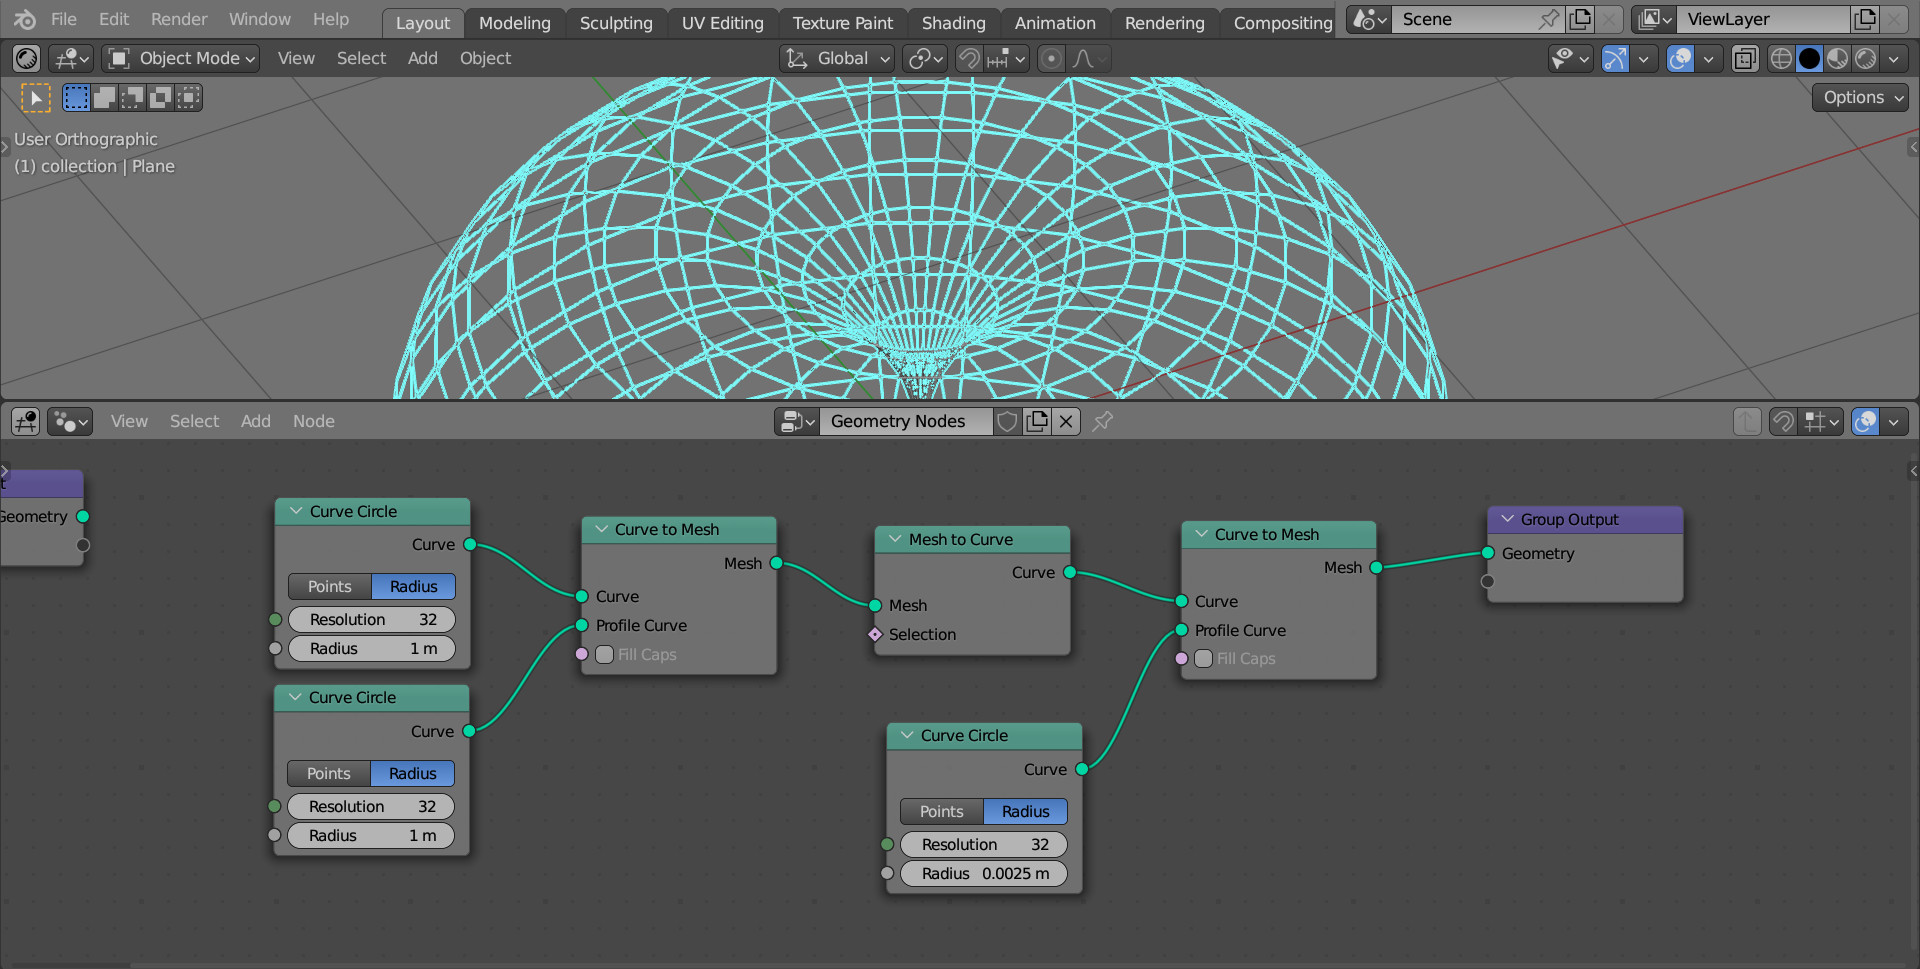
Add a Curve Circle node to the tree (shift + a – Curve Primitives – Curve Circle). Insert it into the main branch of the tree, replacing the original geometry of the plane, which we do not need.
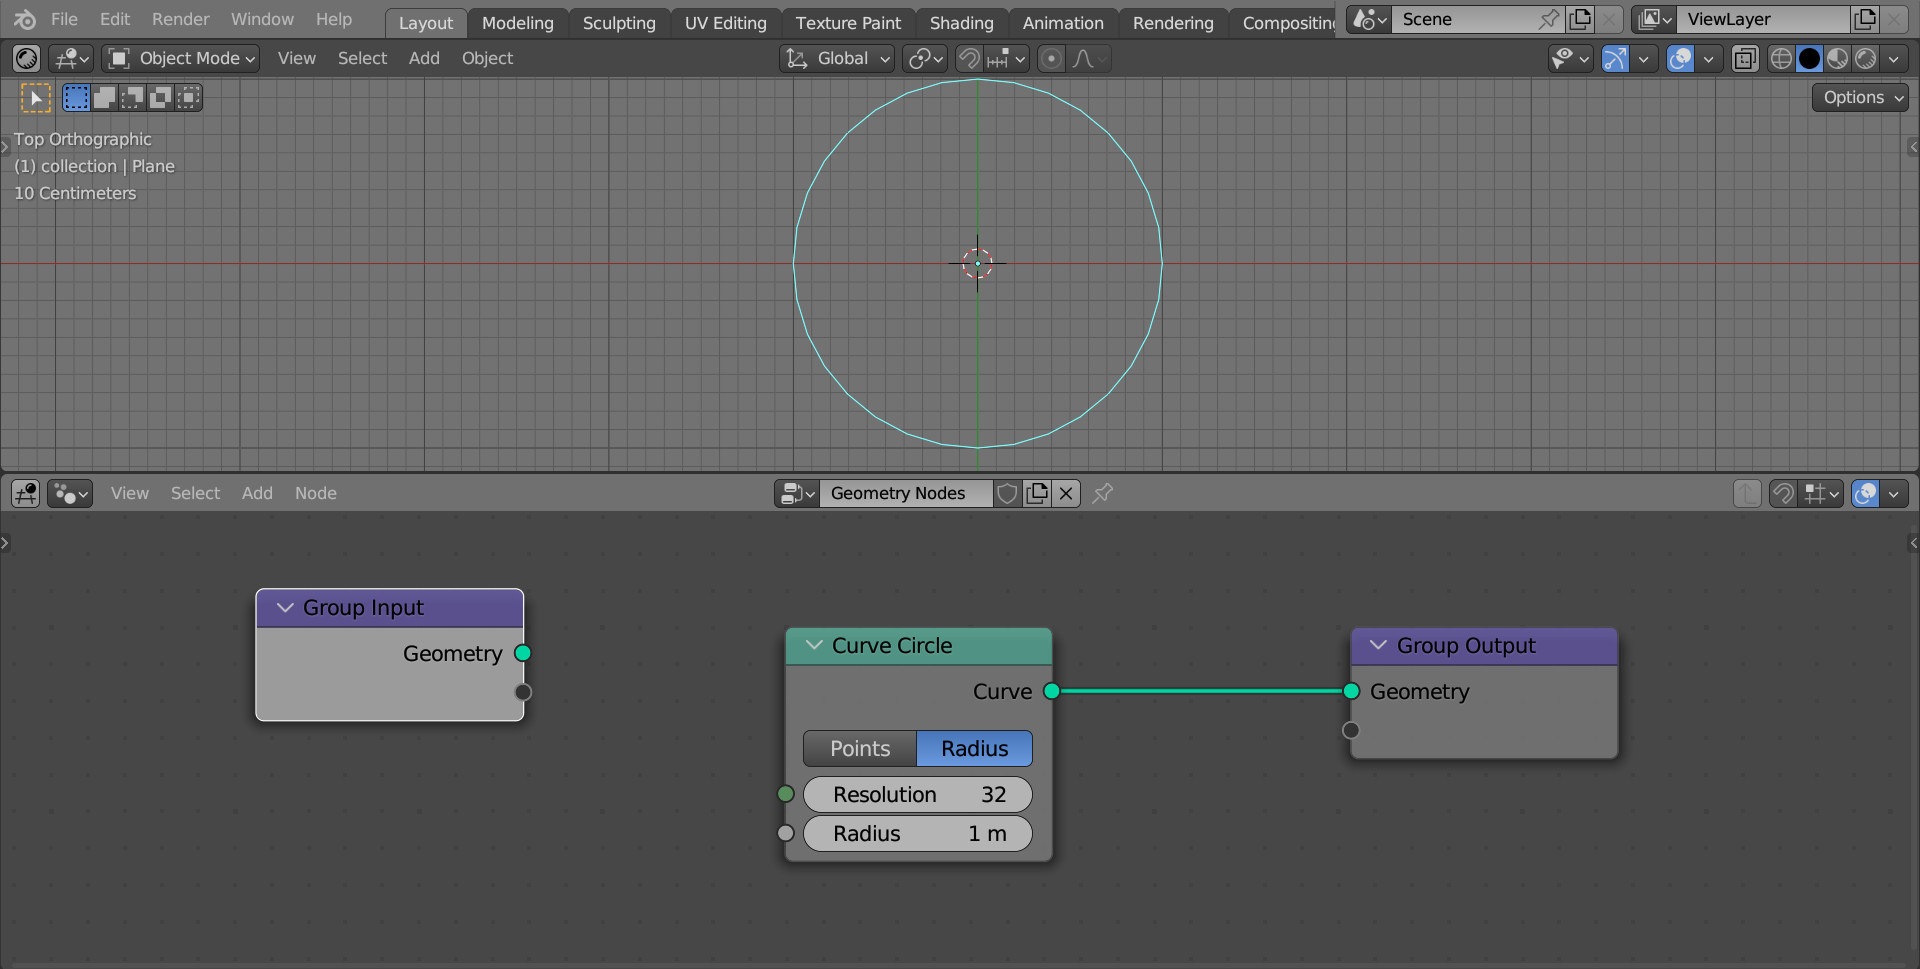
Make a copy of the Curve Circle node by selecting it and pressing shift + d.
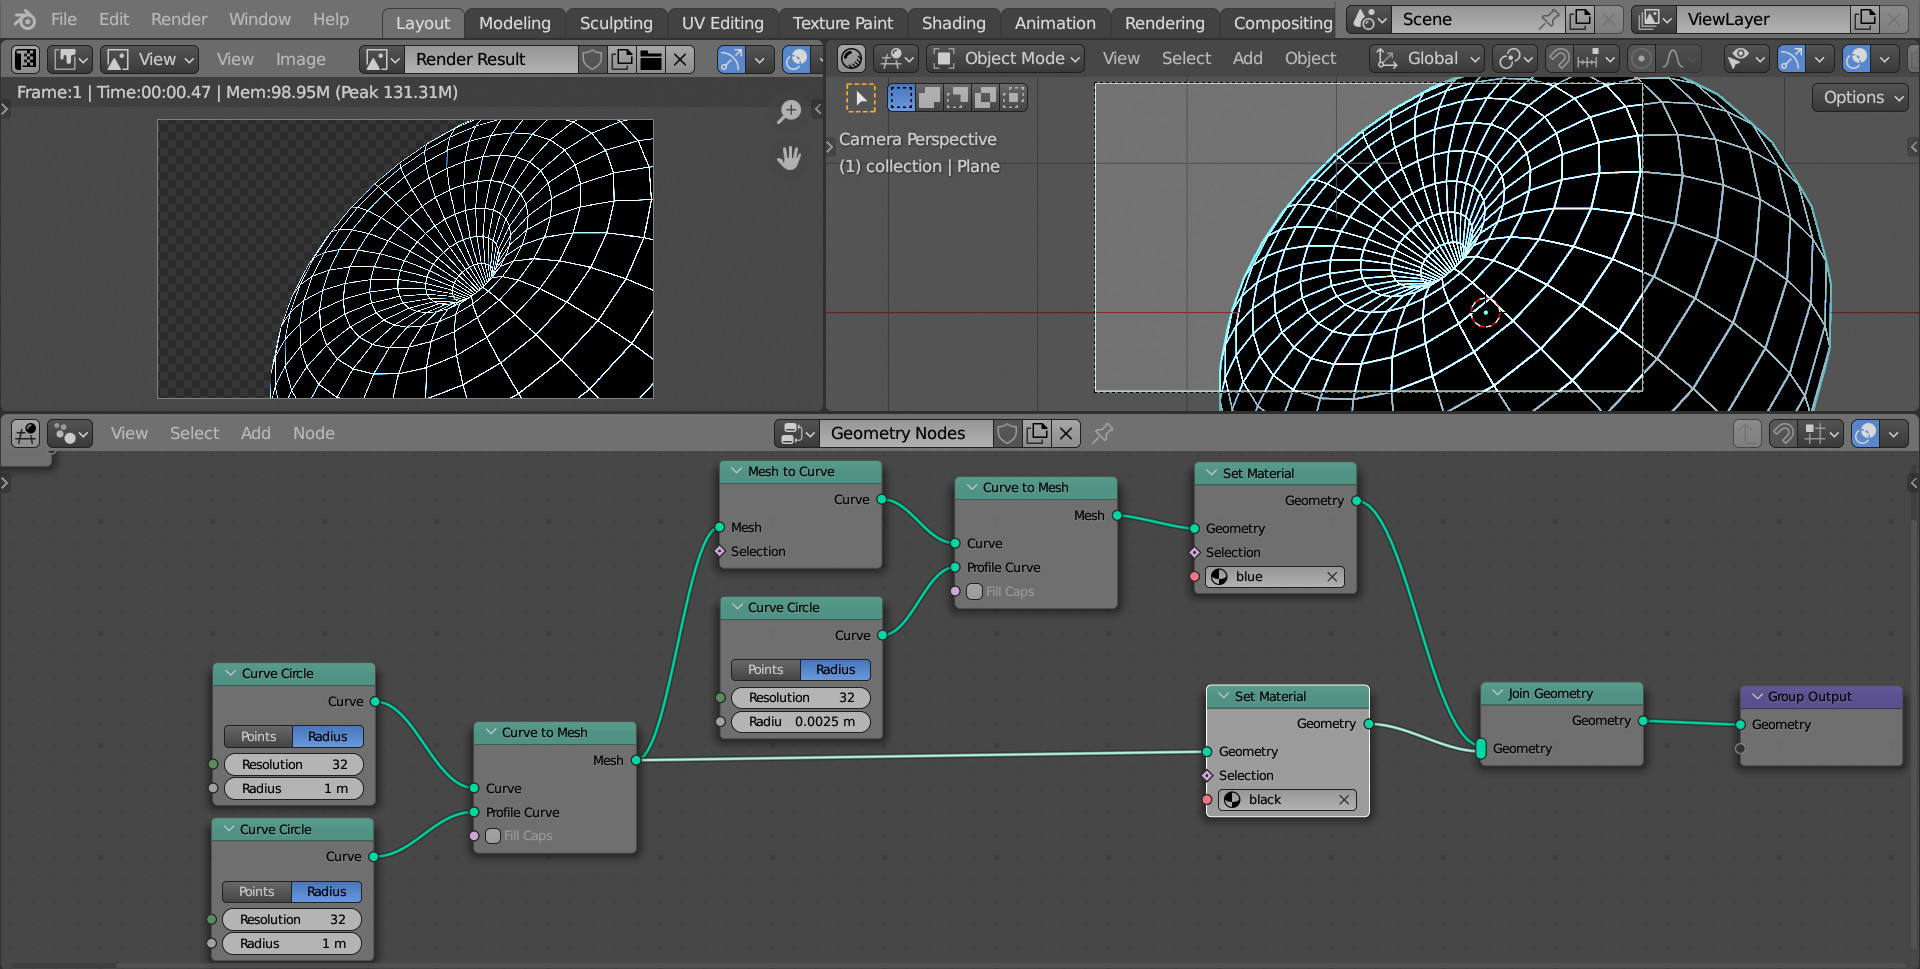
Add a Curve to Mesh node (shift + a – Curves – Curve to Mesh) to the end of the main branch of the node tree.
Link the outputs from both Curve Circle nodes with the Curve and Profile Curve inputs of the Curve to Mesh node.
The Curve to Mesh node traces a curve connected to its top Curve input by a second curve connected to its Curve Profile input. Thus, we got the shape of a torus.
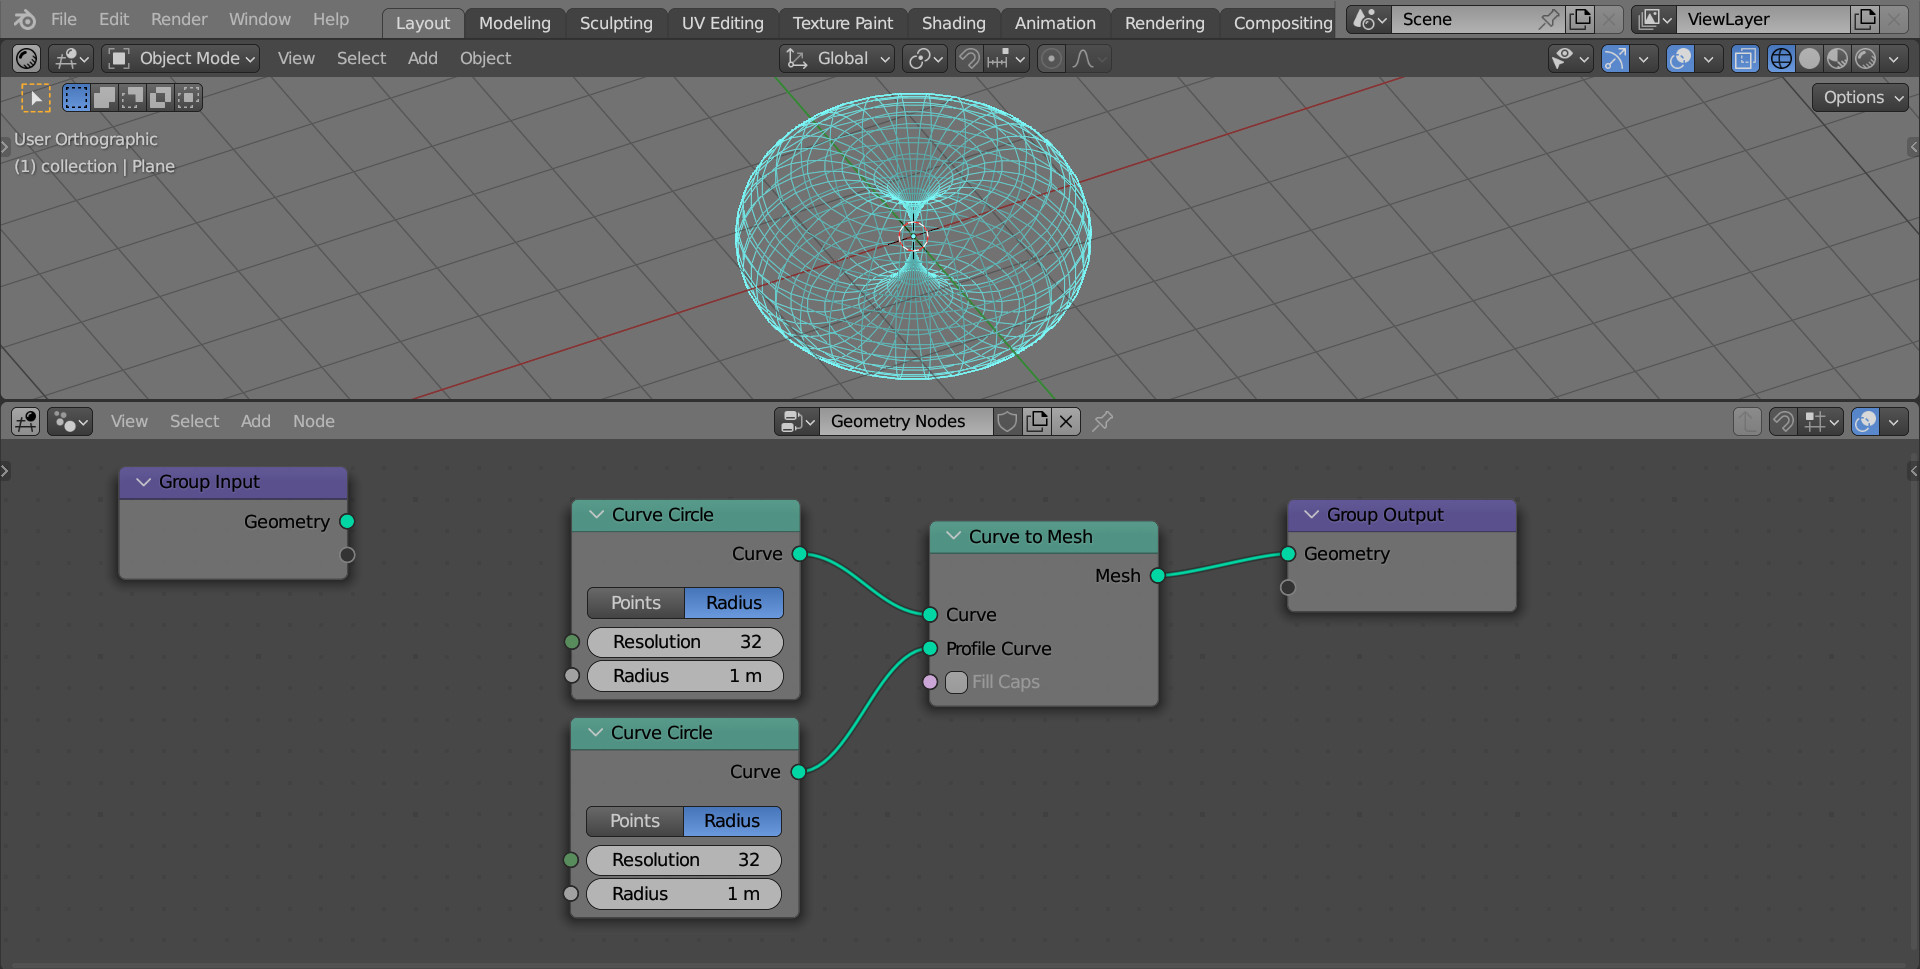
The resulting mesh in the Wireframe mode (z – Wireframe) looks like we want, but the mesh is flat itself. To form edges, we will do the same operation of tracing the curve with the profile of another curve again.
Add a Mesh to Curve node (shift + a – Mesh – Mesh to Curve) to the end of the node tree.
This will remove all polygons from the mesh and convert all of its edges to curves. Now, our mesh looks like it should be in the Solid view mode (z – Solid).
To make the curves thicker, add another Curve to Mesh node (shift + a – Curves – Curve to Mesh) to the end of the node tree.
Make another copy of the Curve Circle node (select – shift + d). Set its Radius value to 0.0025. Link the output of this node with the Curve Profile input of the last Curve to Mesh node.
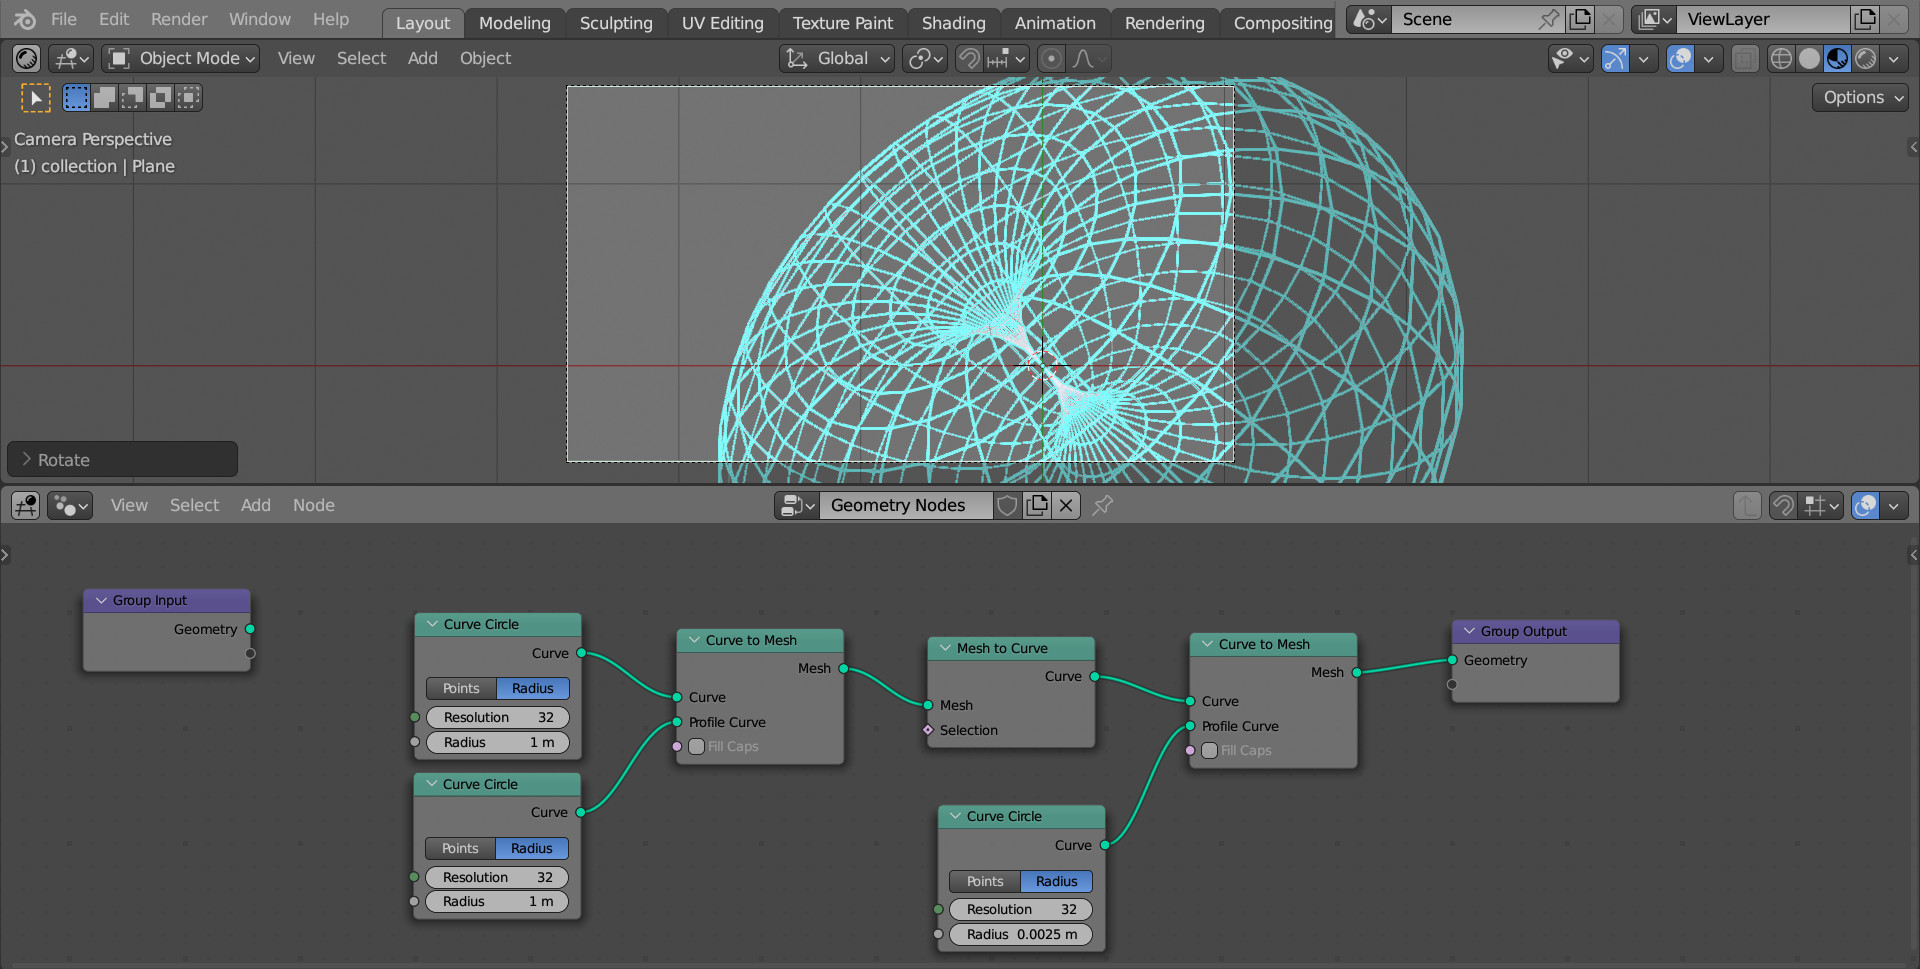
Let’s add a camera to the scene and rotate our mesh as needed.
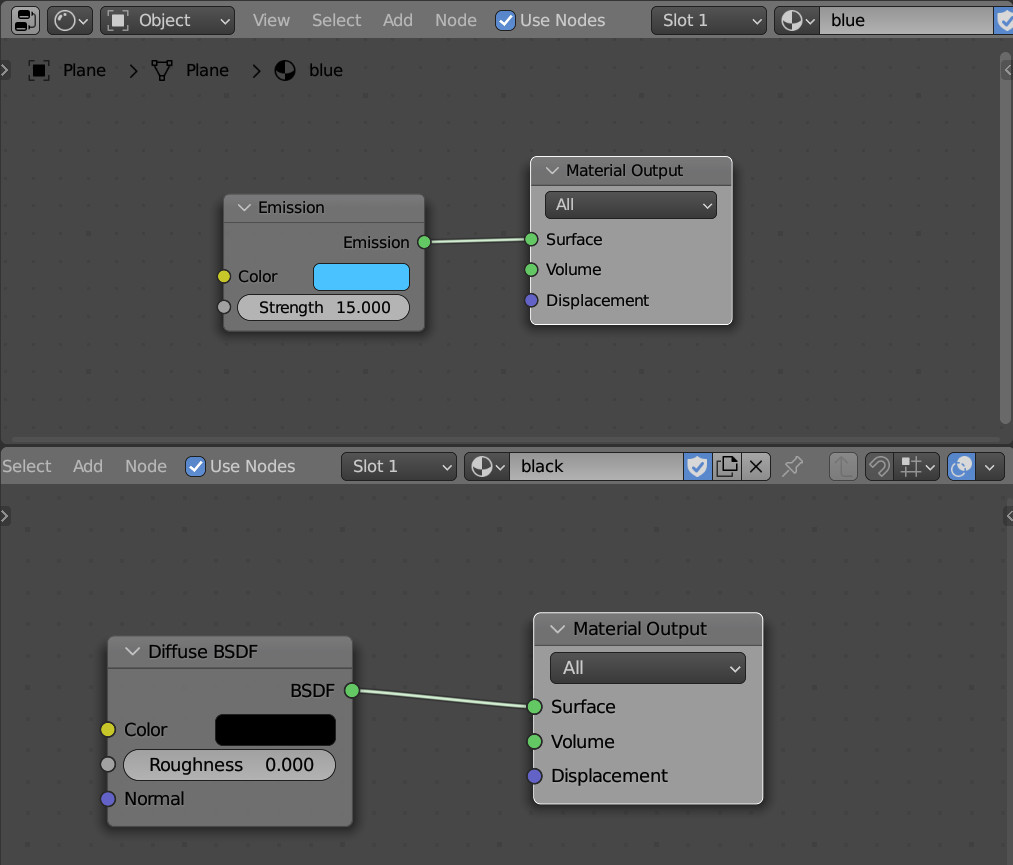
Switch to the Shading Editor and create two simple materials: Black and Blue.
Blue – from one Emission node with a blue glow color and a glow strength of 15.
Black – from one Diffuse BSDF node with black color.
Switch back to the Geometry Nodes editor.
Add a Set Material node (shift + a – Materials – Set Material) to the end of the node tree. In its “Material” field, set the previously created Blue shader.
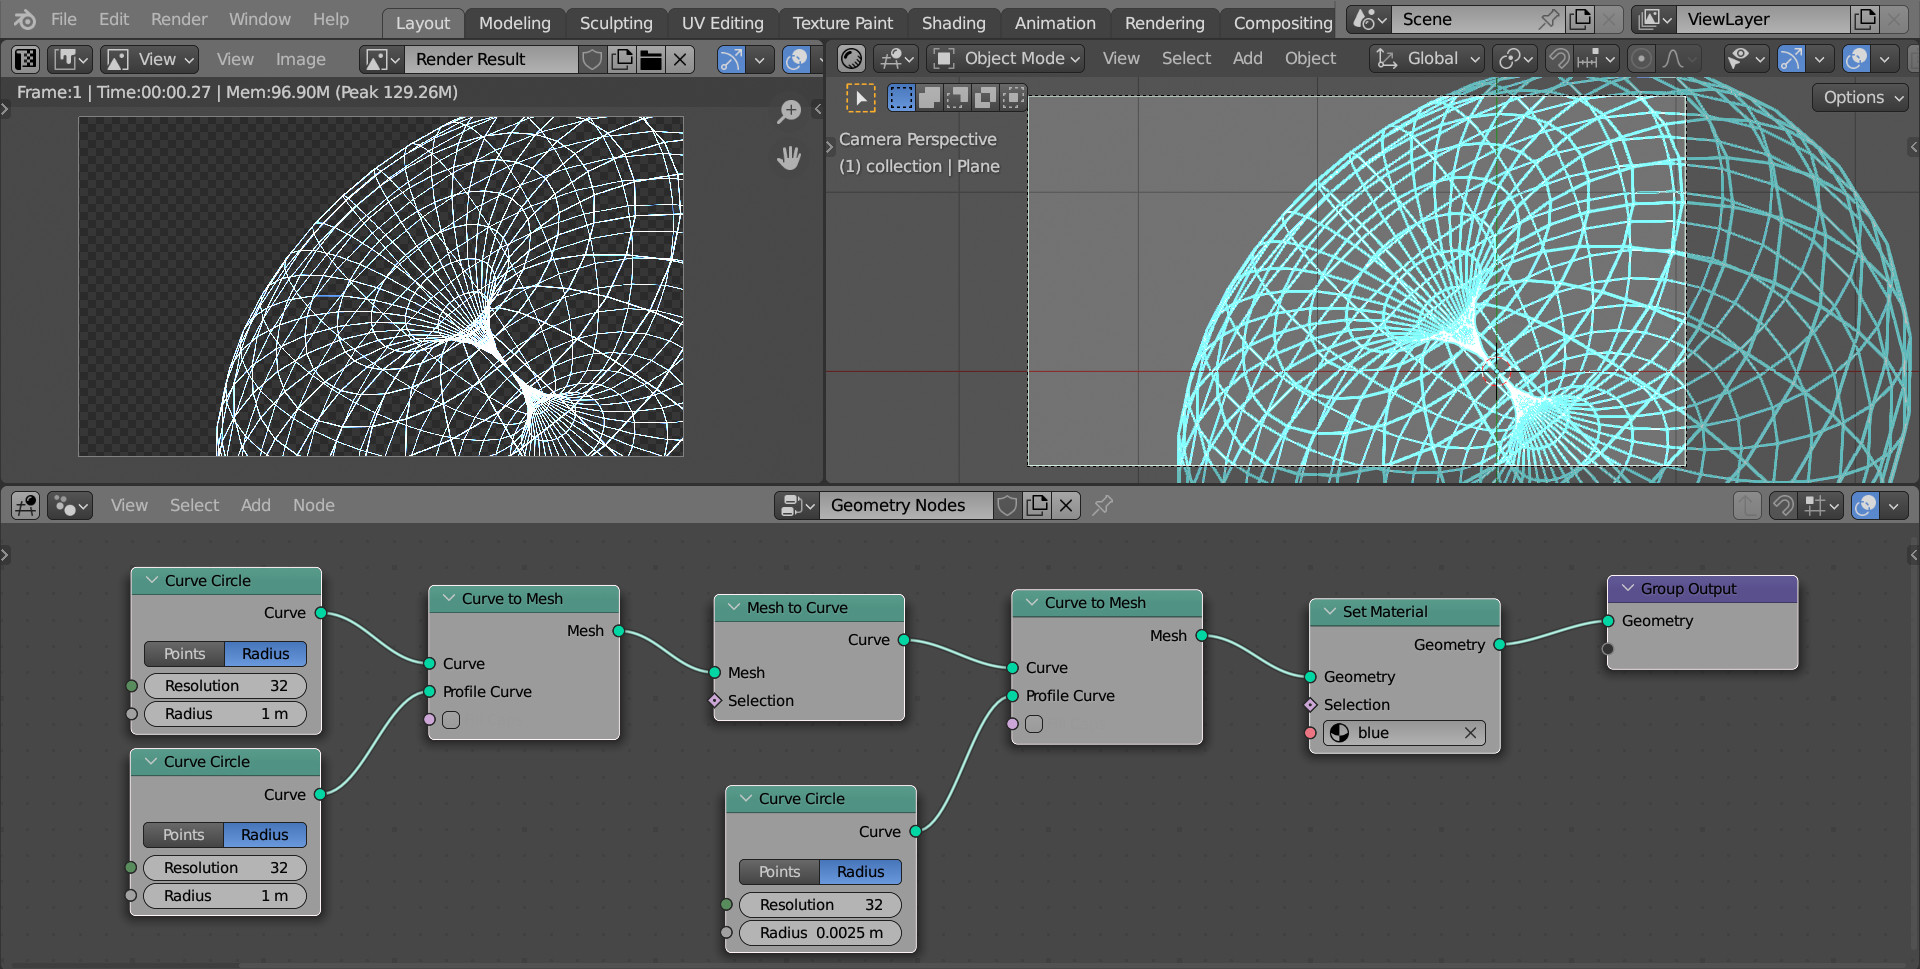
Now the entire mesh is visible on the render. To hide the back surface, let’s merge the flat surface geometry of the mesh with the edges.
Add a Join Geometry node (shift + a – Geometry – Join Geometry) to the end of the node tree. To combine polygon planes with the final edge geometry, link the output of the first Curve to Mesh node with its input.

Set the color for the polygons by adding another Set Material node (shift + a – Materials – Set Material). Add it after the first Curve to Mesh node and set the Black material in its Material field.
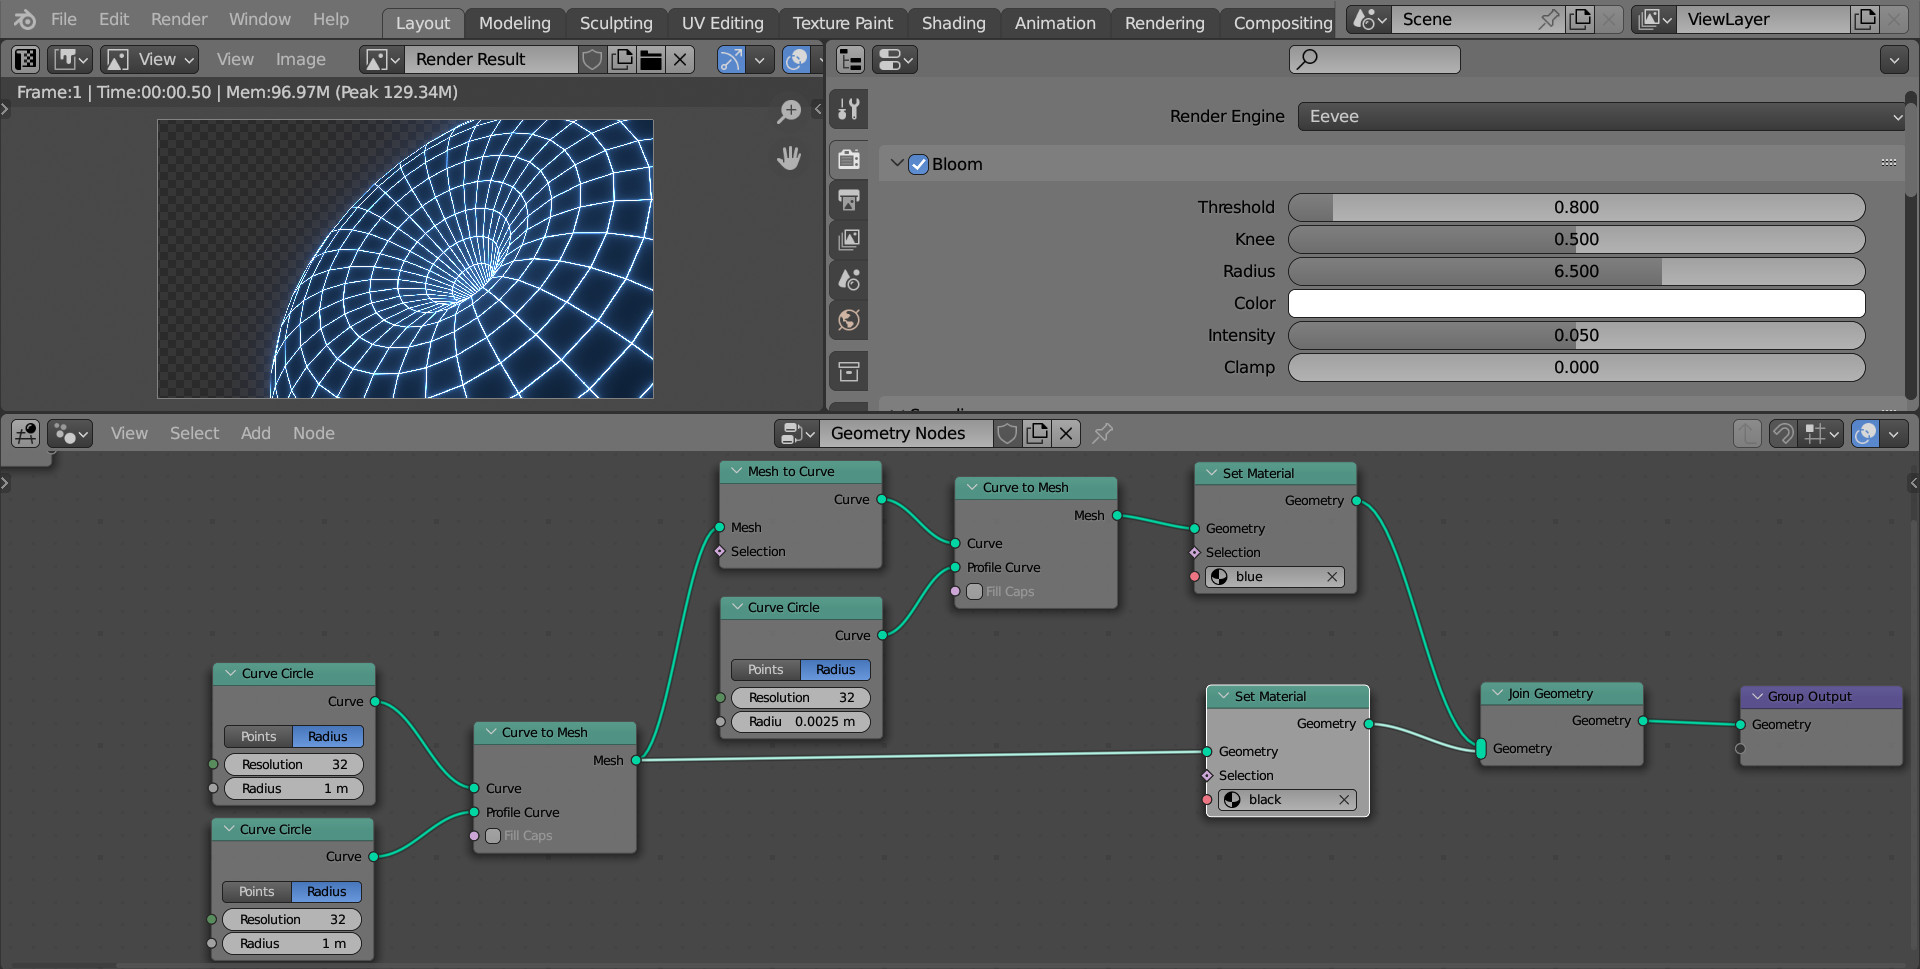
In the properties of the EEVEE render engine, check the Bloom checkbox to add a glow halo.
The render itself looks good. Let’s add some animation.
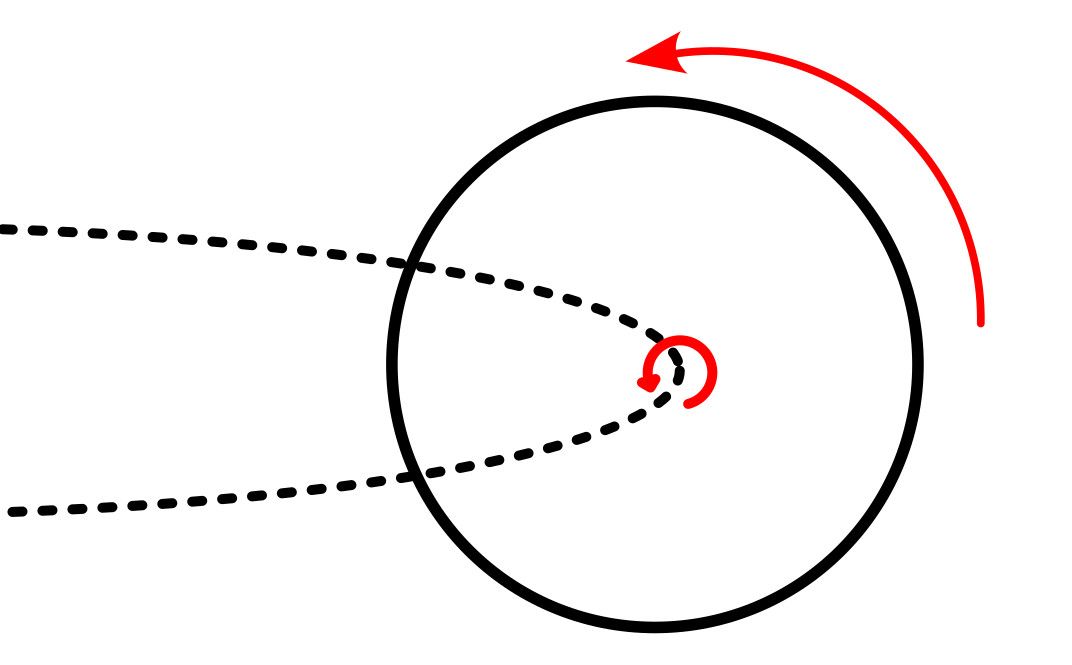
To make the rings move inside the funnel, we can use the Tilt curve’s rotation parameter. When rotating a curve around its own axis, the curve that acts as a profile will also rotate.
To control the rotation of the curve, add a Set Curve Tilt node (shift + a – Curve – Set Curve Tilt). Let’s insert it right after the first Curve Circle node, which gives us the initial curve for forming the torus.
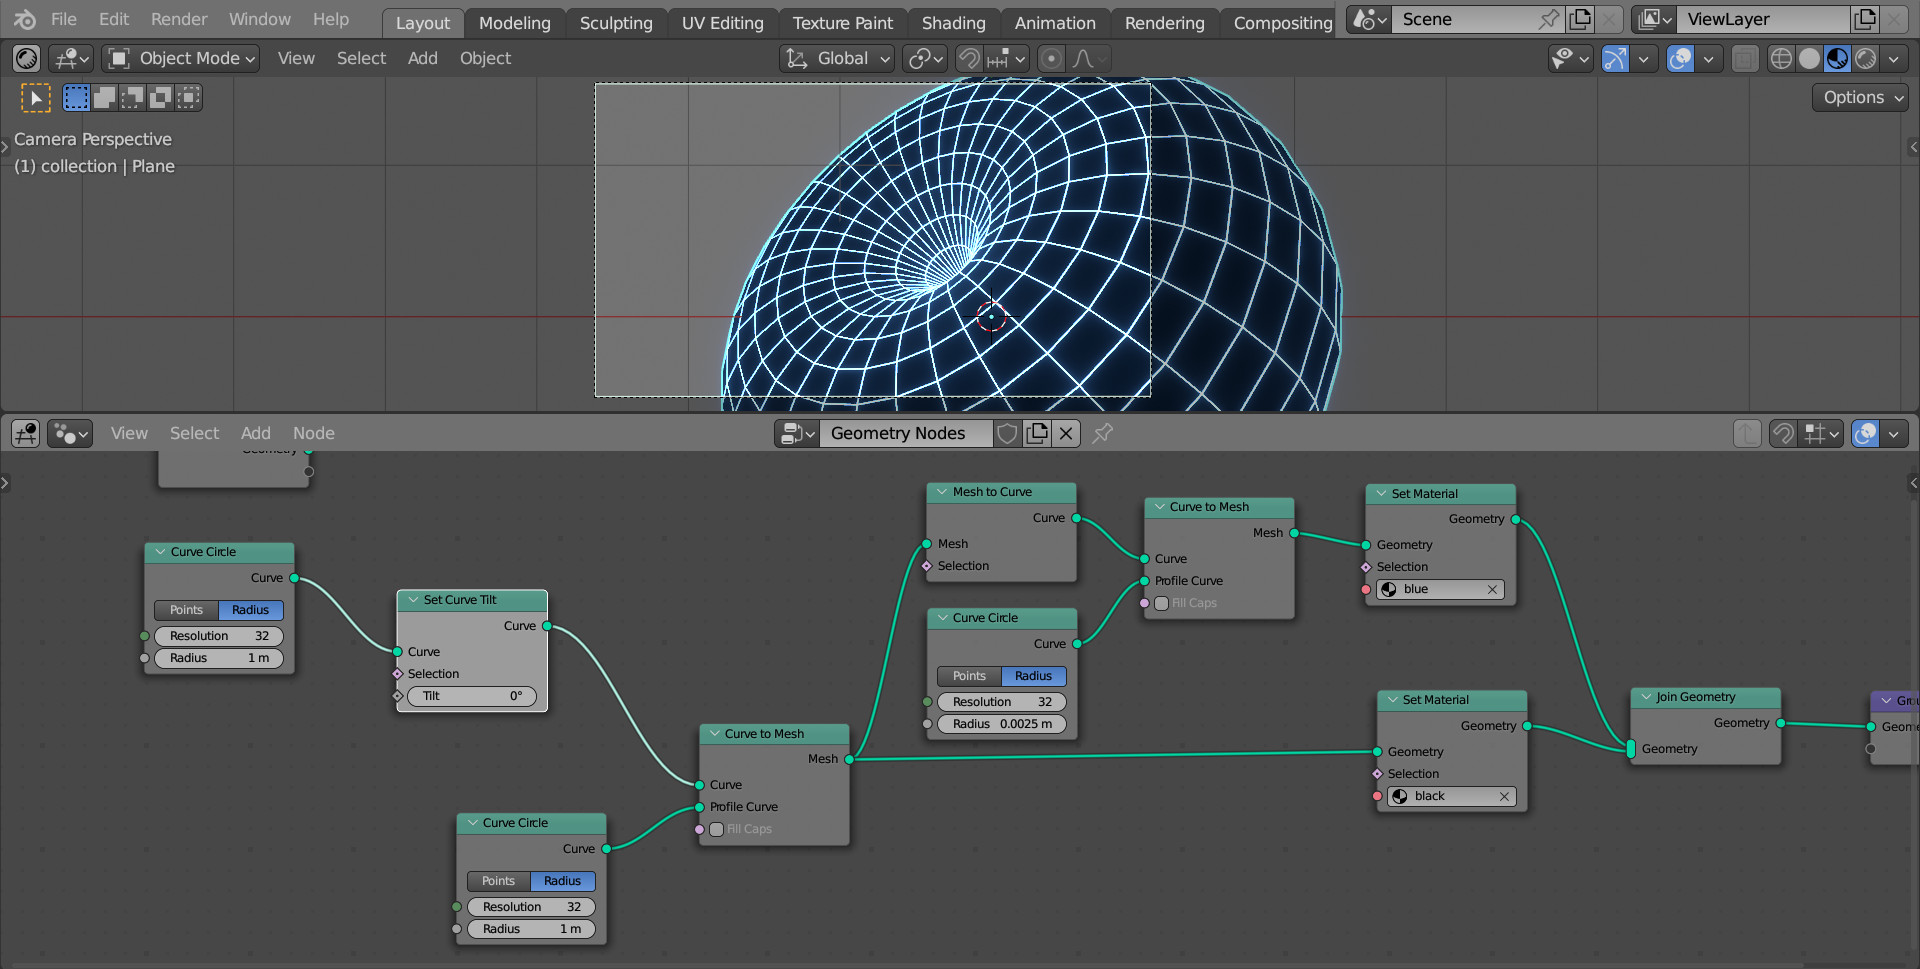
By scrolling the value in the Tilt field of the added node with the mouse, we can immediately see the effect we need.
Let’s link this parameter with the scene timeline.
Add a Scene Time node (shift + a – Input – Scene Time). Link the Frame output of this node with the Tilt input of the Set Curve Tilt node.
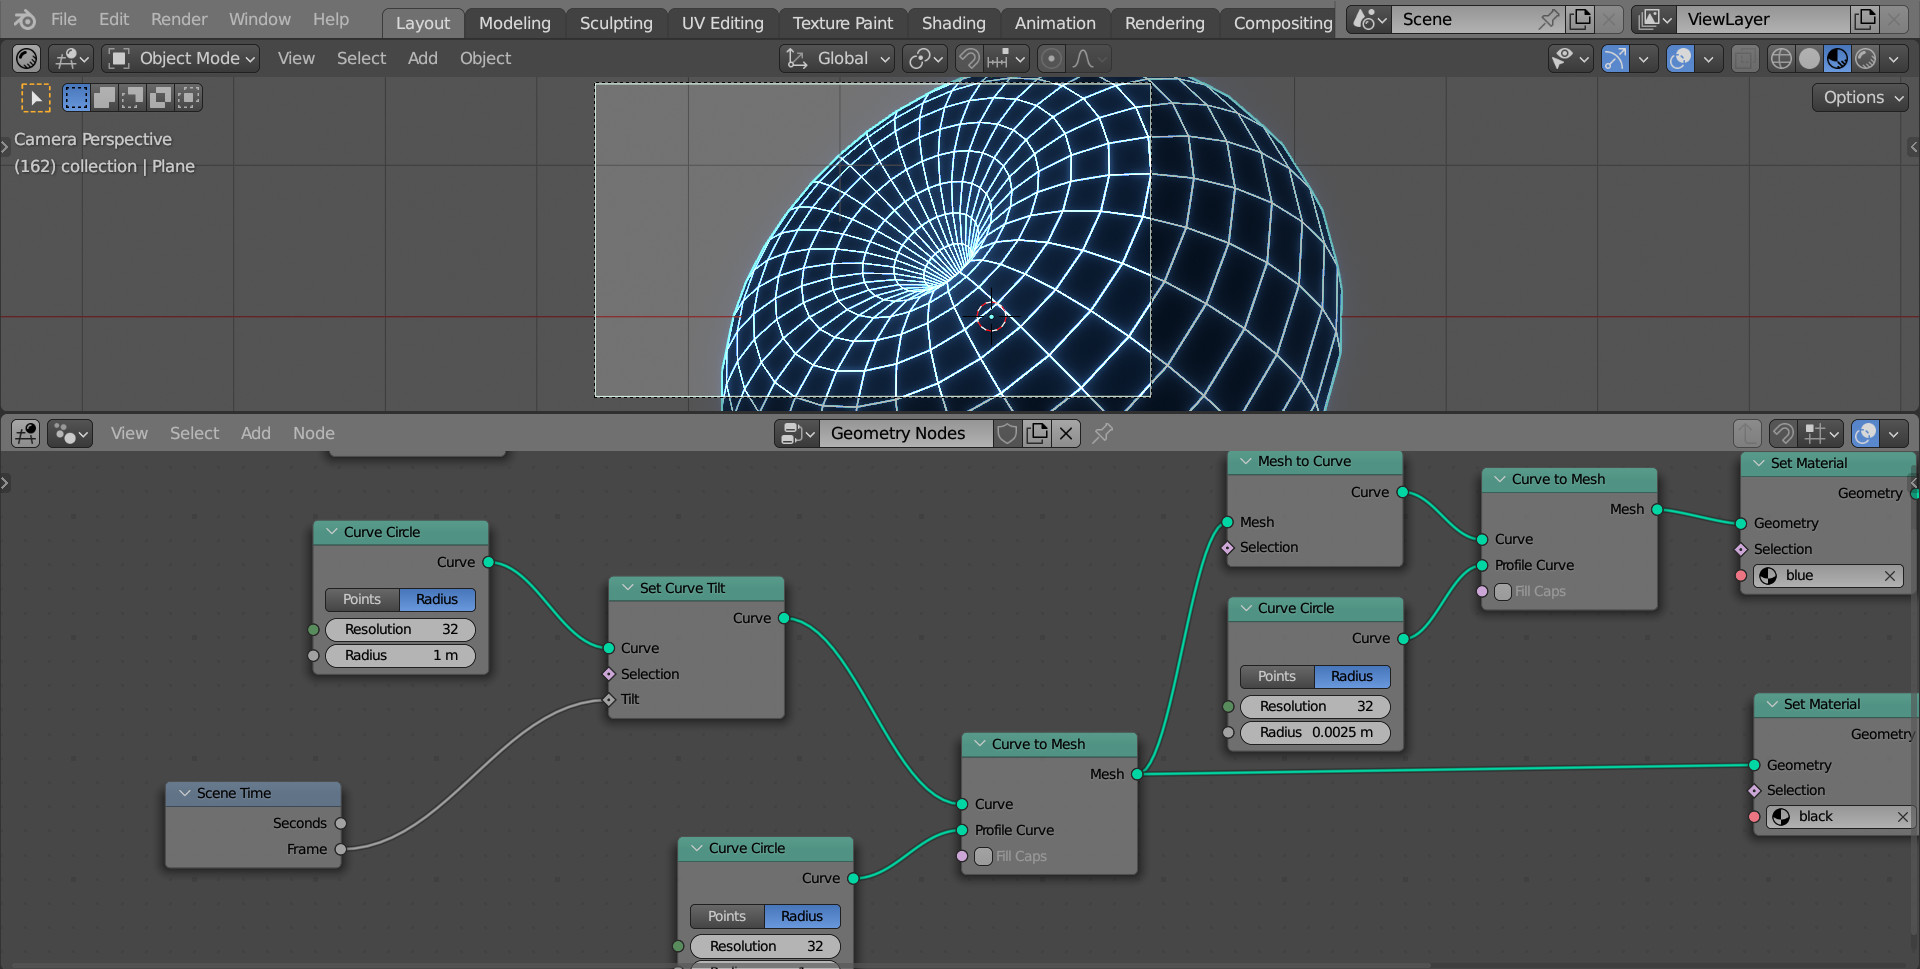
Funnel rings now rotate when animation is playing.
To adjust the speed and direction of the rings, add a Math node (shift + a – Utilities – Math) after the Scene Time node. Switch it to the “Divide” mode.

The value in the remaining free field of the Math (Divide) node is responsible for the speed of rotation of the rings, and its sign – for the direction of rotation.
Having set the appropriate values, we can start rendering the animation.