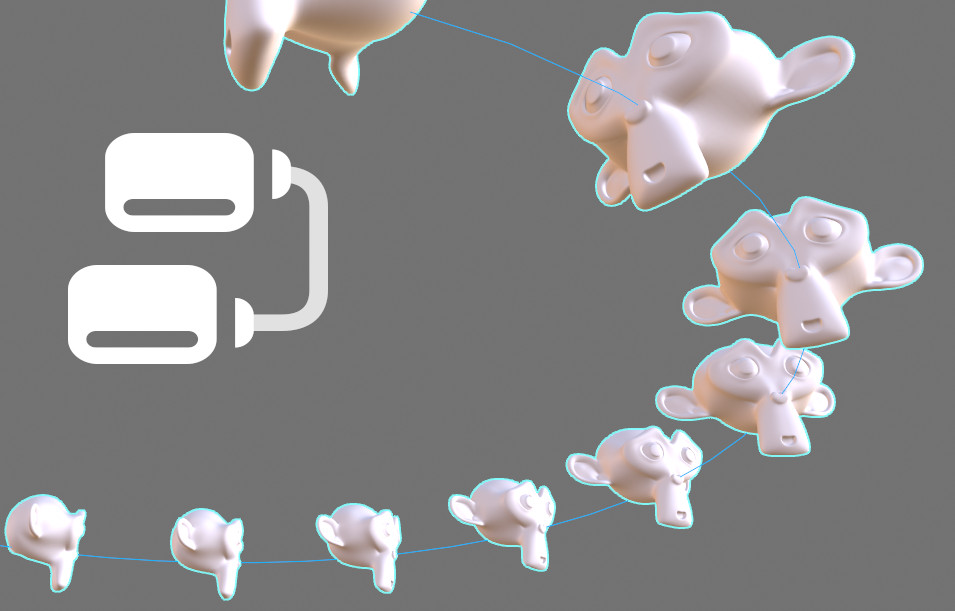
In Blender with Geometry Nodes, we can create several mesh instances (copies of a mesh), distribute them along a curve, and slide them along this curve to the desired position.
 .blend file on Patreon
Let’s look of how to do this.
Add Suzanne mesh to the scene and a curve along which we will place its instances:
shift+a – Mesh – Suzanne
shift+a – Curve – Circle
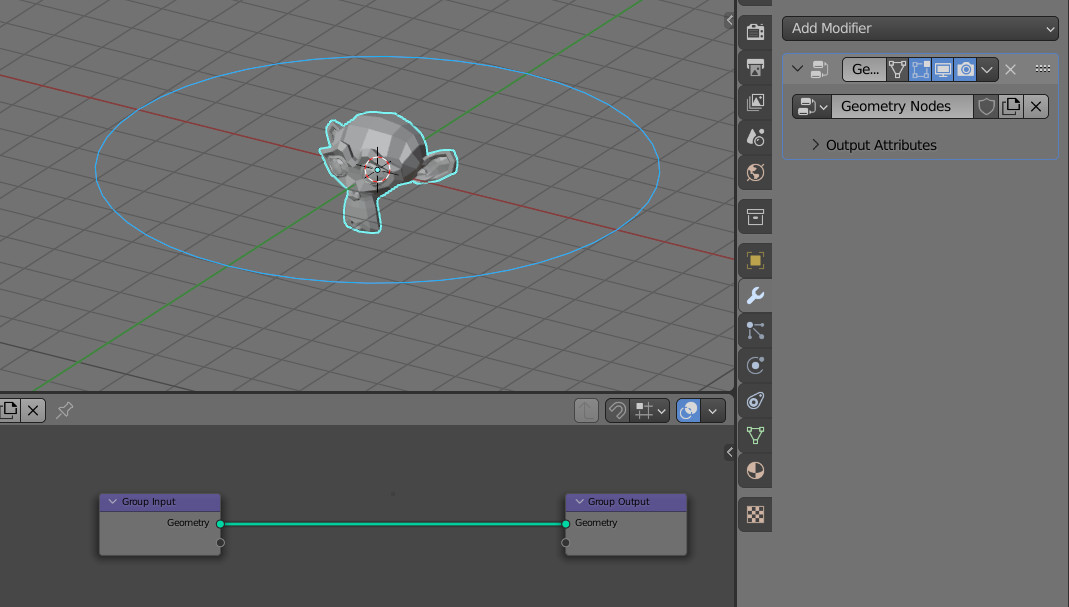
For the curve, set the radius to 5 m. Assign the “Geometry Nodes” modifier to the mesh and create a new node tree for it.
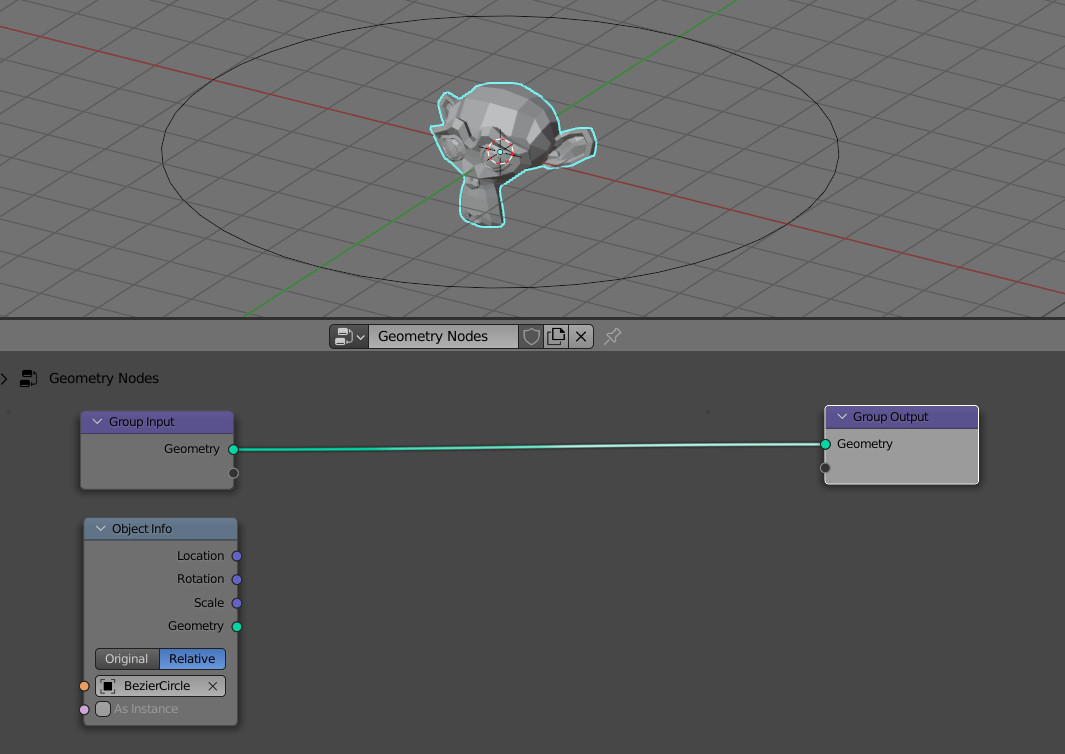
To access the curve from Susanna’s mesh node tree, add an “Object Info” node and select the “Bezier Circle” in its source field. Turn on the “Relative” mode to take the position of the mesh relative to the origin point of the curve.
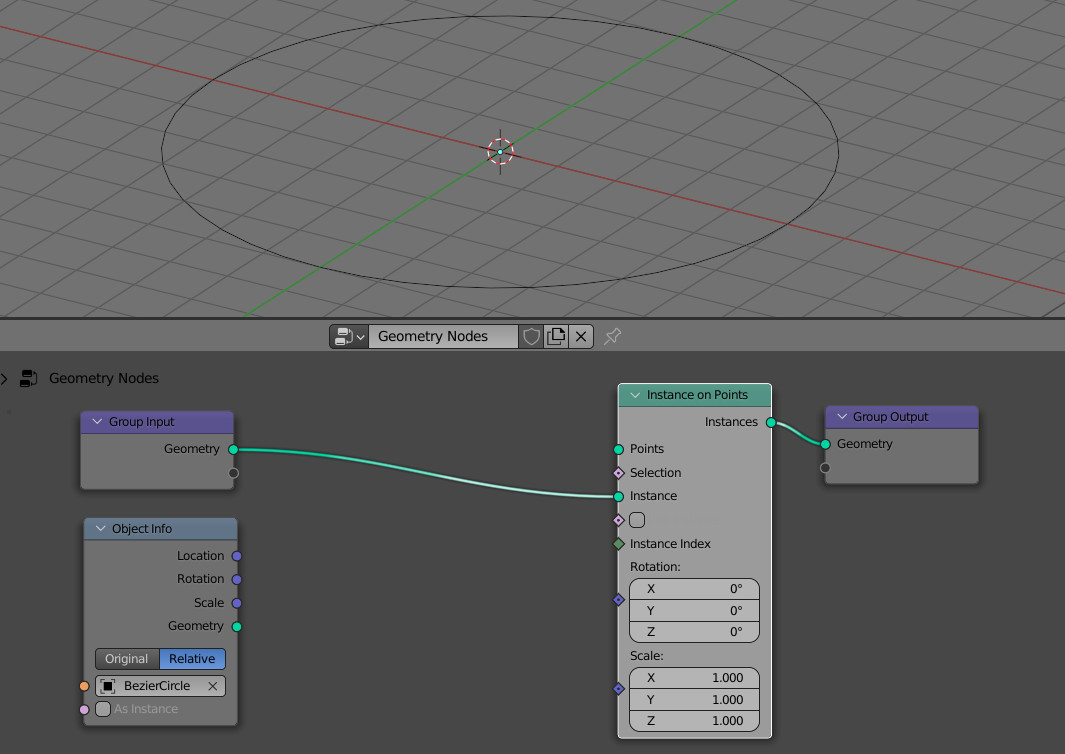
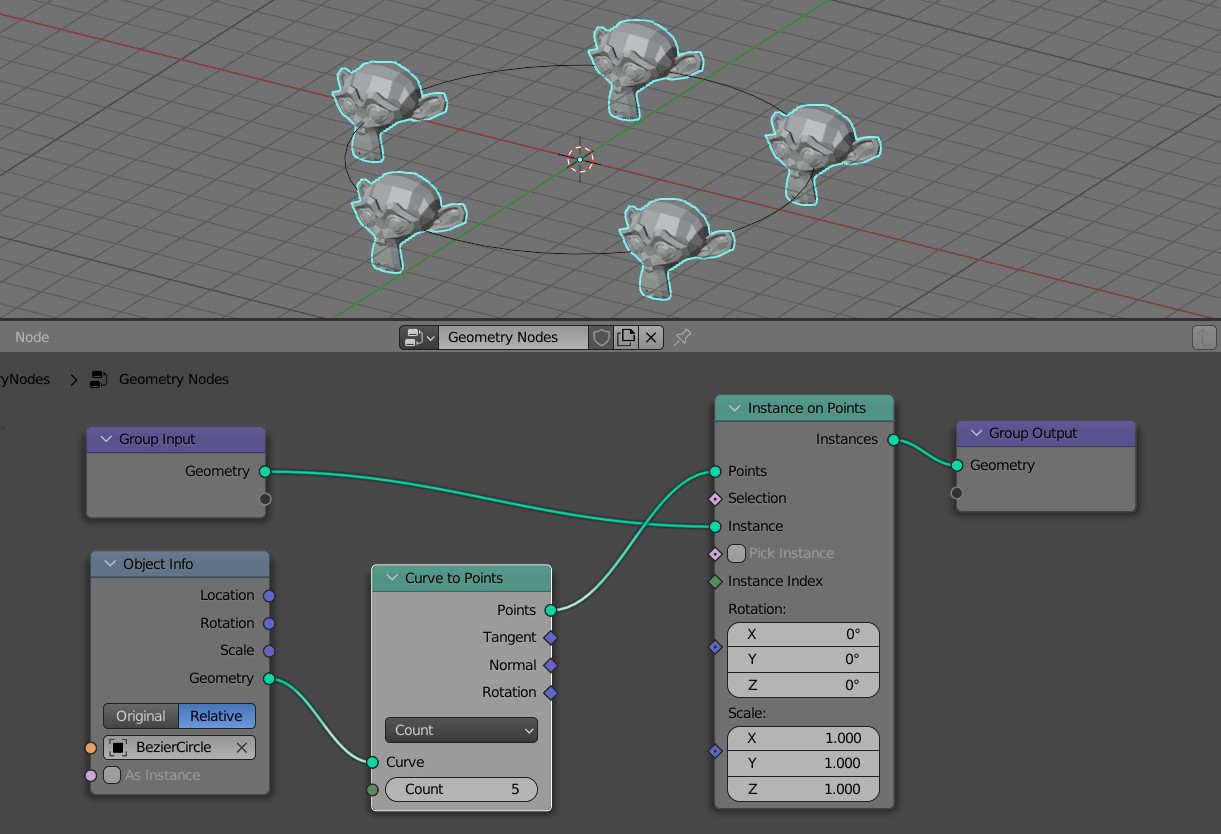
To create instances, let’s add an “Instances on Points” node to the node tree and connect it to the main branch. The geometry of the mesh should serve as a source of instances, so connect it to the “Instances” input of the node.
To know exactly where to place the instances, we need to feed a set of points to the “Points” input of the “Instance on Points” node. We will take these points from the curve.
We can convert a curve into a set of points using the “Curve to Points” node. Let’s add it to the tree and connect it to the curve. Link the “Points” output with the “Instance on Points” node.
Switch the node to the “Count” mode and set the value to 5. This means that 5 points will be created on the curve, dividing it into 5 equal parts.
By connecting the “Points” output to the “Points” input on the “Instance on Point” node, we triggered the creation of an instance of Suzanne at each of the 5 points on the curve.
Now, to move the instances along the curve, we need to get an offset for each of them. The “Sample Curve” node in the “Factor” mode will help us with this. It gives the relative position of a point on the curve in the range 0 – 1, where 0 is the start of the curve and 1 is the end.
Let’s add this node to the tree, as well as the “Set Position” node to set the desired position for the points.
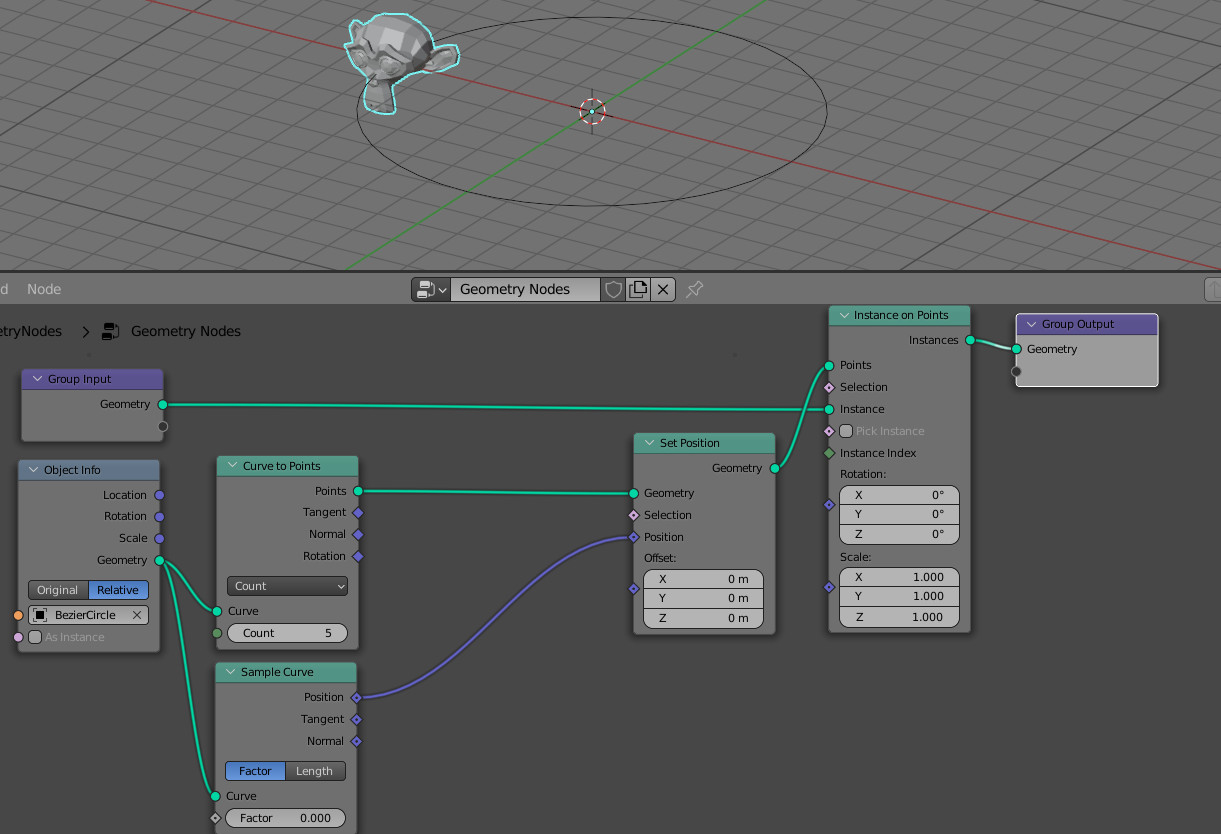
Now we use the “Sample Curve” node to define a point on the curve and assign its coordinates to all points received from the “Curve to Points” node. Therefore, all 5 instances have now moved to one point.
In order for
To give us offset coordinates not for one point, but for the entire set of 5 points, the “Sample Curve” node’s “Factor” input must also be given not one value, as it is now, but 5.
For each of our 5 instances located at 5 points of the curve, we can get an index – its serial number from 0 to 4. The indices of the points on the curve will be exactly the same.
By dividing the index by the total number of points, we get the relative offset for each point on the curve at the initial moment.
Let’s add an “Index” node to the tree and with the “Math” node in the “Divide” mode divide the index by the number of points. As a result, we will get a set of offsets for each point on the curve. Let’s feed it to the “Factor” input of the “Sample Curve” node.

As we can see, the points, and the instances, returned to their places.
To manually slide the instances along the curve, add another extra offset using the “Math” node in the “Add” mode.
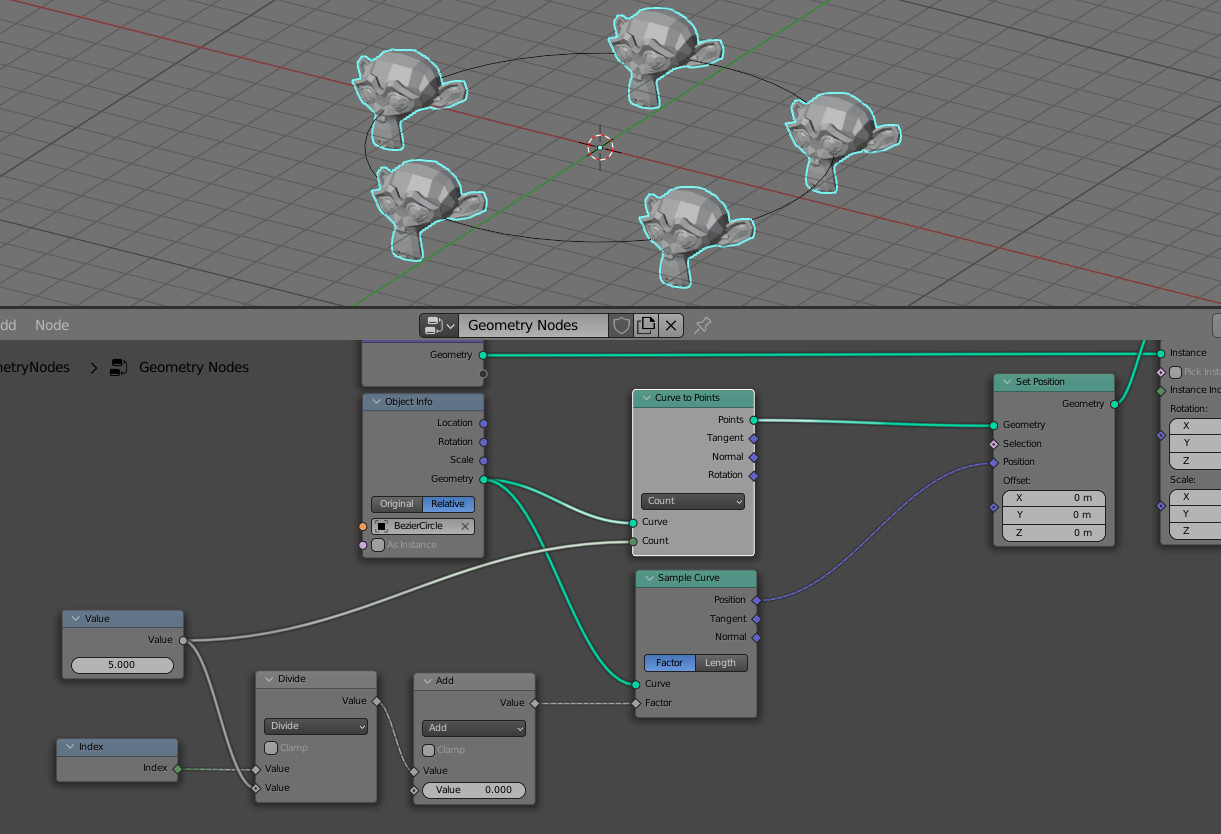
By changing the value of this node, we move the instances along the curve.
However, as we can see, the offset of instances is not cyclic. To cycle it so that the last instance always follows the first one, let’s add another “Math” node in the “Modulo” mode. Because the offset range in the “Sample Curve” node changes from 0 to 1, the cyclicity in the “Modulo” node we also set to 1, which corresponds to the entire length of the curve.
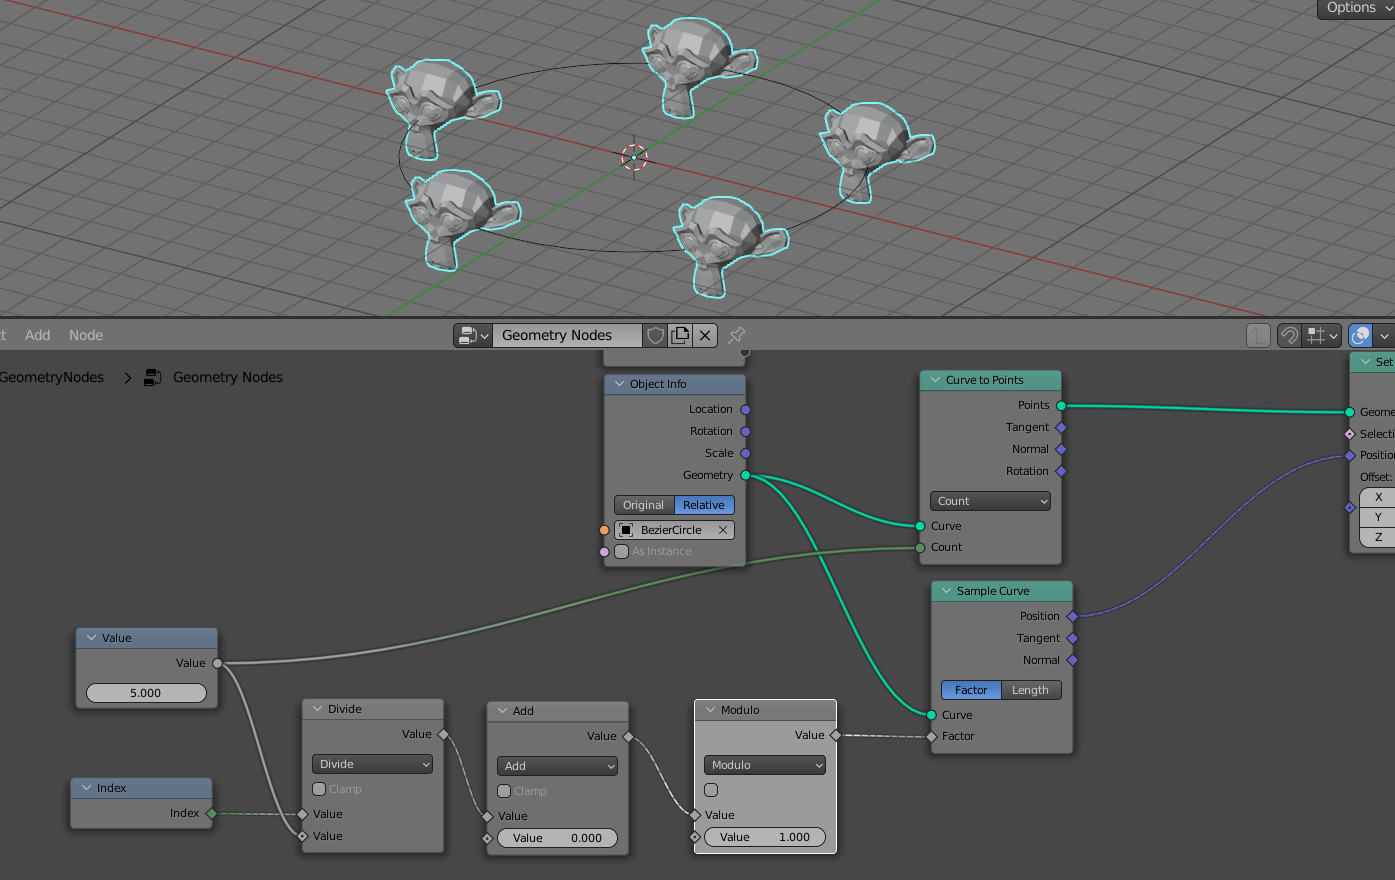
Now our instances correctly follow each other when scrolling the value in the “Add” node.
To make the instances look along the curve, let’s bring their “Y” axis to a tangent on the curve using the “Euler to Vector” node.

Now the instances face the direction of movement and can be scrolled along the curve.
Thank you so much! Well explained, easy to follow. Keep up the good content!
Very nice tutorial and well explained ! I have a question though, I’m interested to use the length on the “curve to points” node instead of the “count” option. So when I resize the curve, the number of instances increase at the same time to keep the same density, if that make sense. How could I do that with your current setup ?
I’ve found the answer to my question here while searching for something else.
Here is how to do the same thing explained here but with the “curve length” instead of the “count”
Thanks anyway ! It turns out your solution was exactly what I needed 🙂