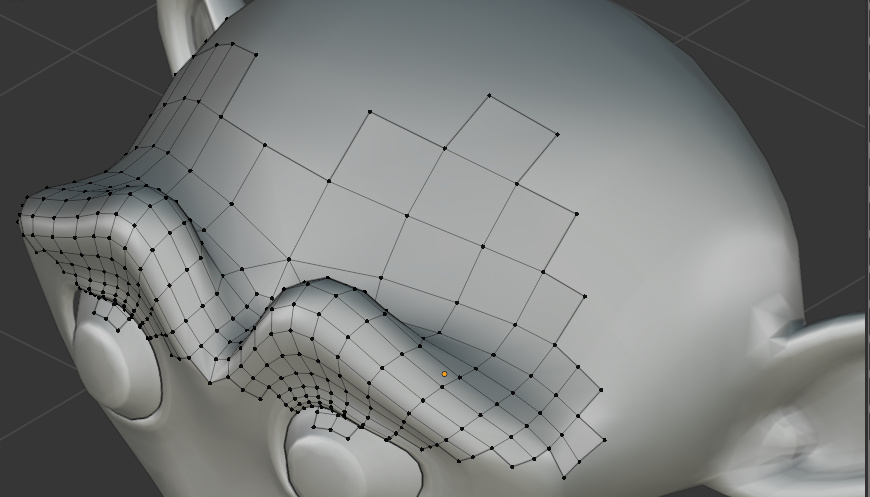
To make our retopology process faster and easier, the scene environment may be slightly adjusted.
 Content on Patreon
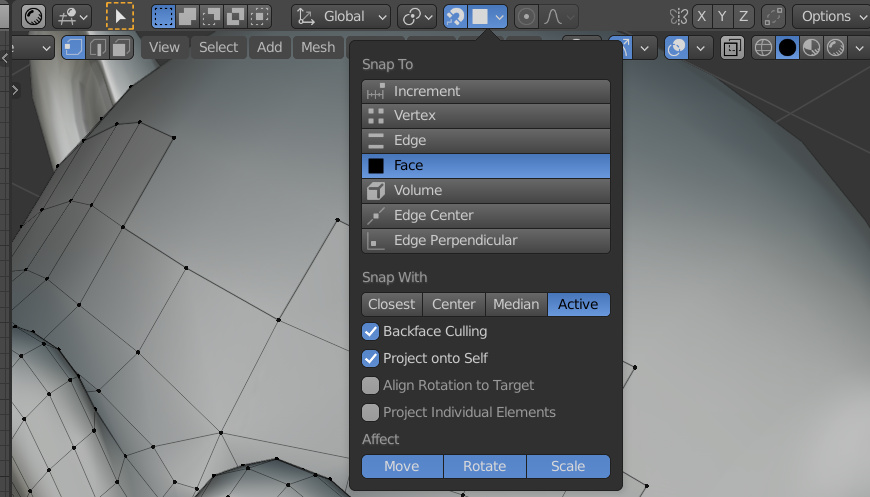
First, let’s enable snapping, set “Face” mode, and enable snapping to “Active” in the “Snapping With” section.
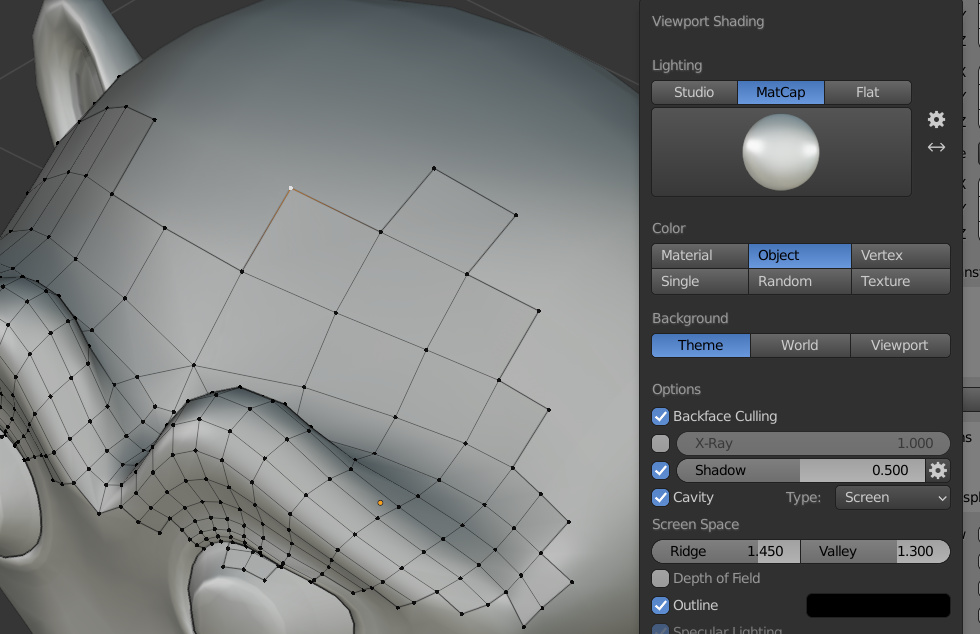
Also, check the “Backface Culling” checkbox so that the active retopology points do not magnetize to the backside of the processed mesh.
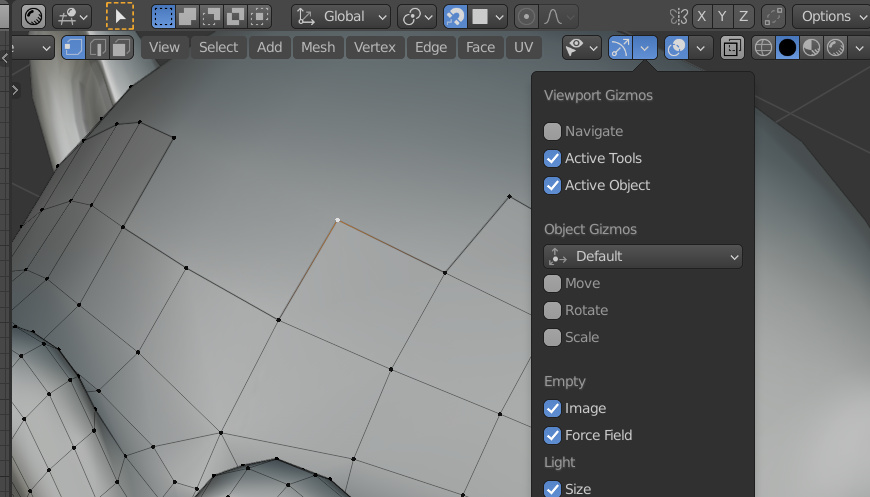
Remove all visual elements from the viewport screen, such as text statistics and the transformation gizmo.
In the “Viewport Gizmos” menu, uncheck the “Navigate” checkbox and the “Object Gizmos” checkboxes.
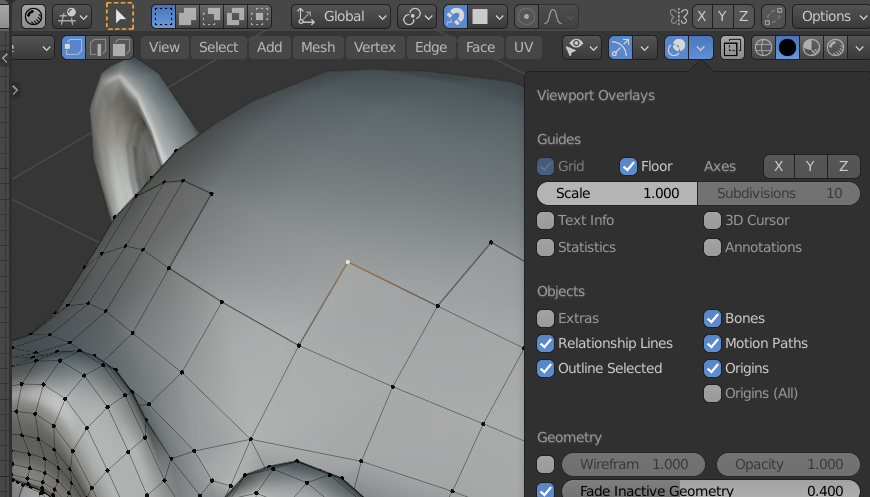
In the “Viewport Overlays” menu, uncheck the “Text Info”, “3D Cursor”, “Annotations” and “Extras” checkboxes. Turn off the global scene axes visibility.
In the “Viewport Shading” menu, set a suitable matcap – without bright glare and well contrasting with the color of the grid.
Set “Object” for the object’s color.
Set the “Backface Culling” checkbox.
Set the “Shadow” and “Cavity” checkboxes to better display the general shape of the processed object.
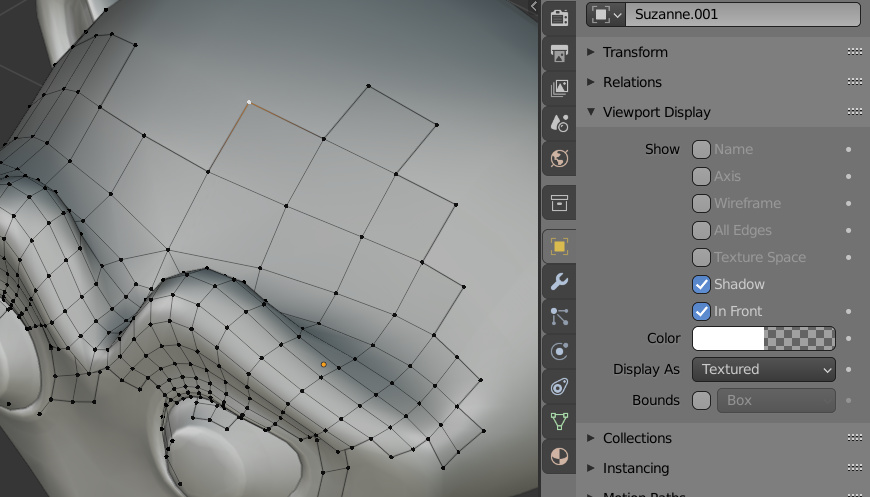
For the active wireframe with which we are making retopology, in the “Properties” window in the “Object Properties” tab in the “Viewport Display” section, check the “In Front” checkbox so that the wireframe is always displayed on top of the processed object, and set full transparency for the display color “Color”: Alpha = 0.0
With these settings, the retopology process will be easier and much clearer.