Using Blender Geometry Nodes, we can create a simple and effective technique for scaling mesh polygons to their center.
 .blend file on Patreon
Add a cube to the scene (shift + a – Mesh – Cube), assign the Geometry Nodes modifier to it, and initialize the node tree by clicking on the “New” button.

First, we need to get the center coordinates for each polygon. We can do this using the Capture Attribute node.
Add a Capture Attribute node (shift + a – Attribute – Capture Attribute) to the main branch of the node tree. Switch it to the “Vector” – “Face” mode.
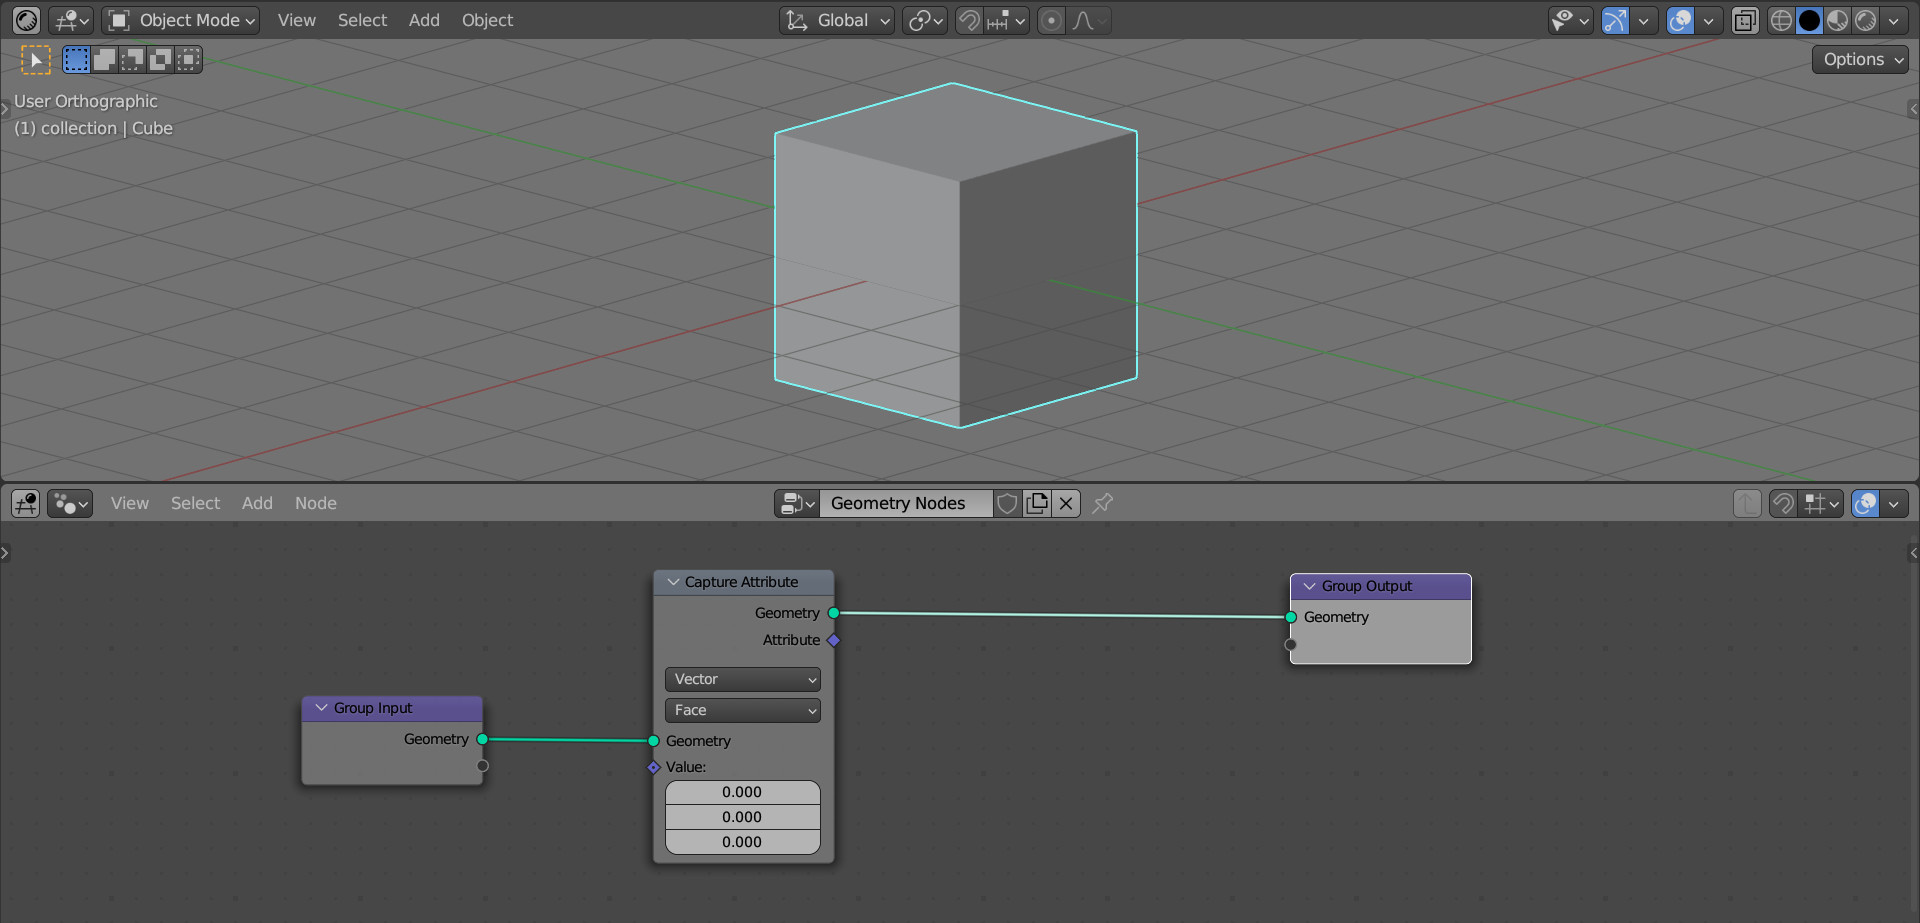
The Capture Attribute node stores the value of the attribute given to it.
Since we’re manipulating vector coordinates, add a Position node (shift + a – Input – Position) and link its “Position” output with the “Value” input of the Capture Attribute node.
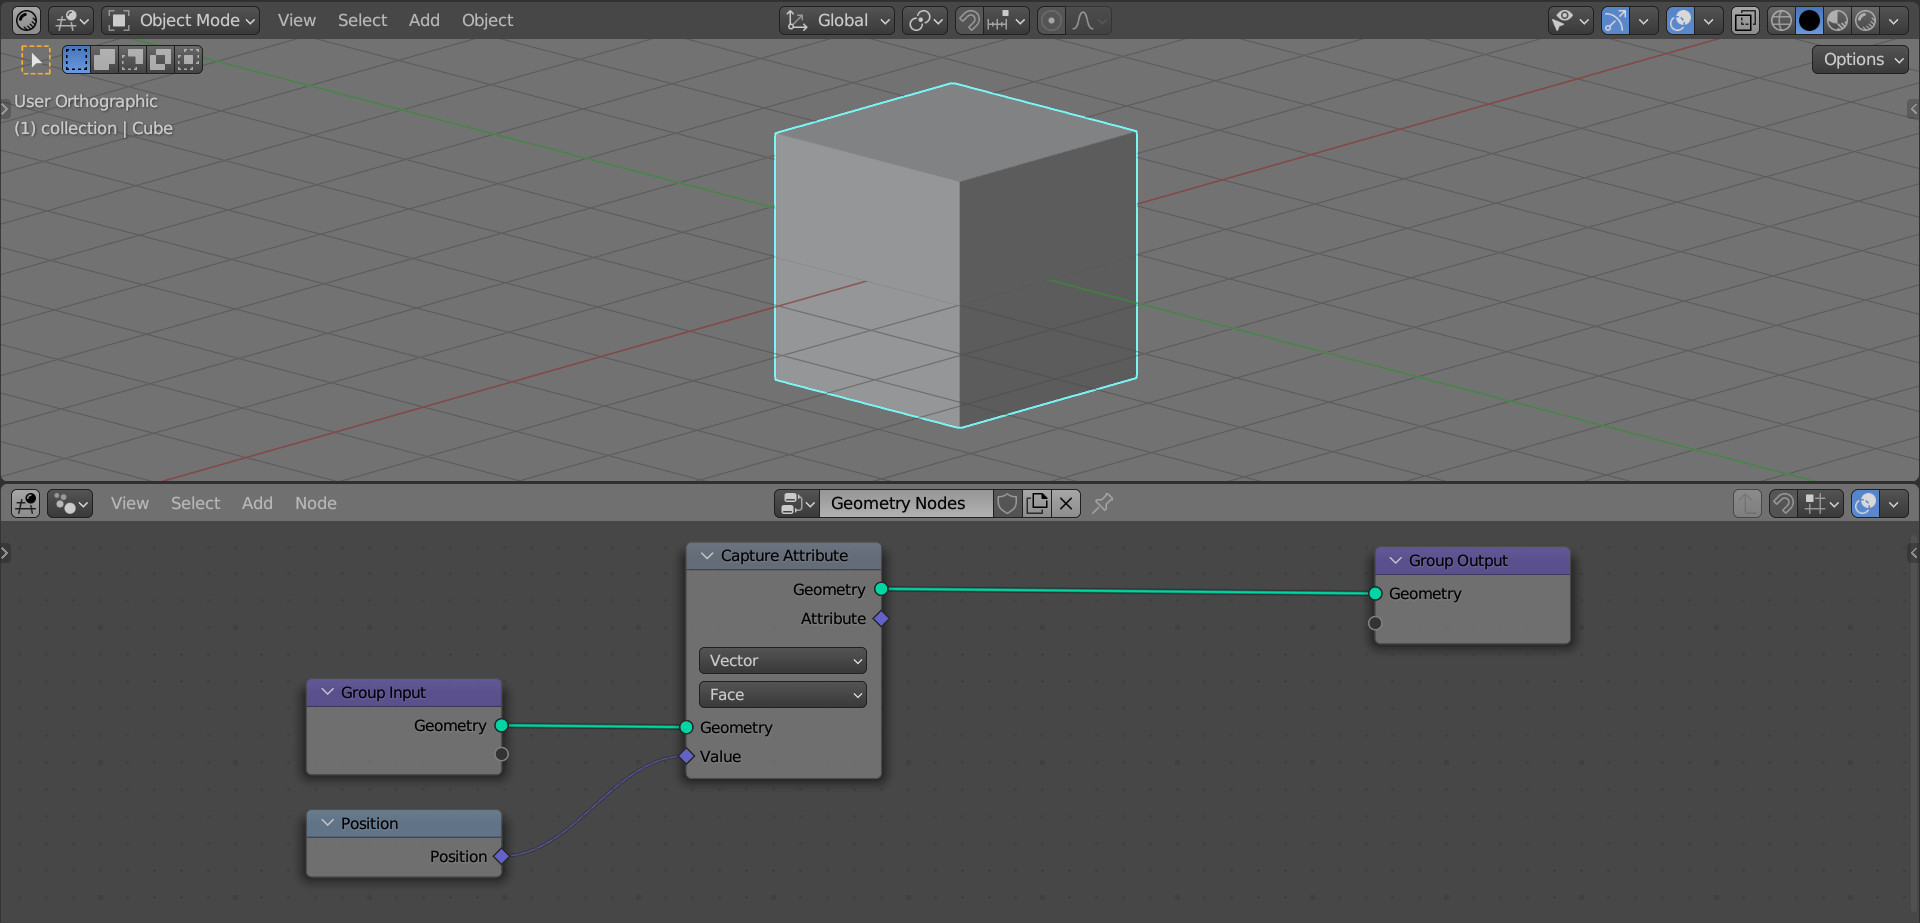
Now, at the output of the Capture Attribute node, we get the center coordinates of each polygon.
To scale the polygon to the received center point, we need the coordinates of its vertices, got from the output of the Position node, move towards the center of the polygon, got from the output of the Capture Attribute node.
To get an intermediate value between these two points, we can use the Mix Color node.
Add a Mix Color node (shift + a – Color – Mix Color). Switch it to the “Vector” mode, although this is not necessary, in the “Color” mode the node will work exactly the same because the color in Blender is represented in exactly the same way as a vector – by three numerical values.
Connect the outputs of the Position and Capture Attribute nodes to the “A” and “B” inputs of the Mix Color node.
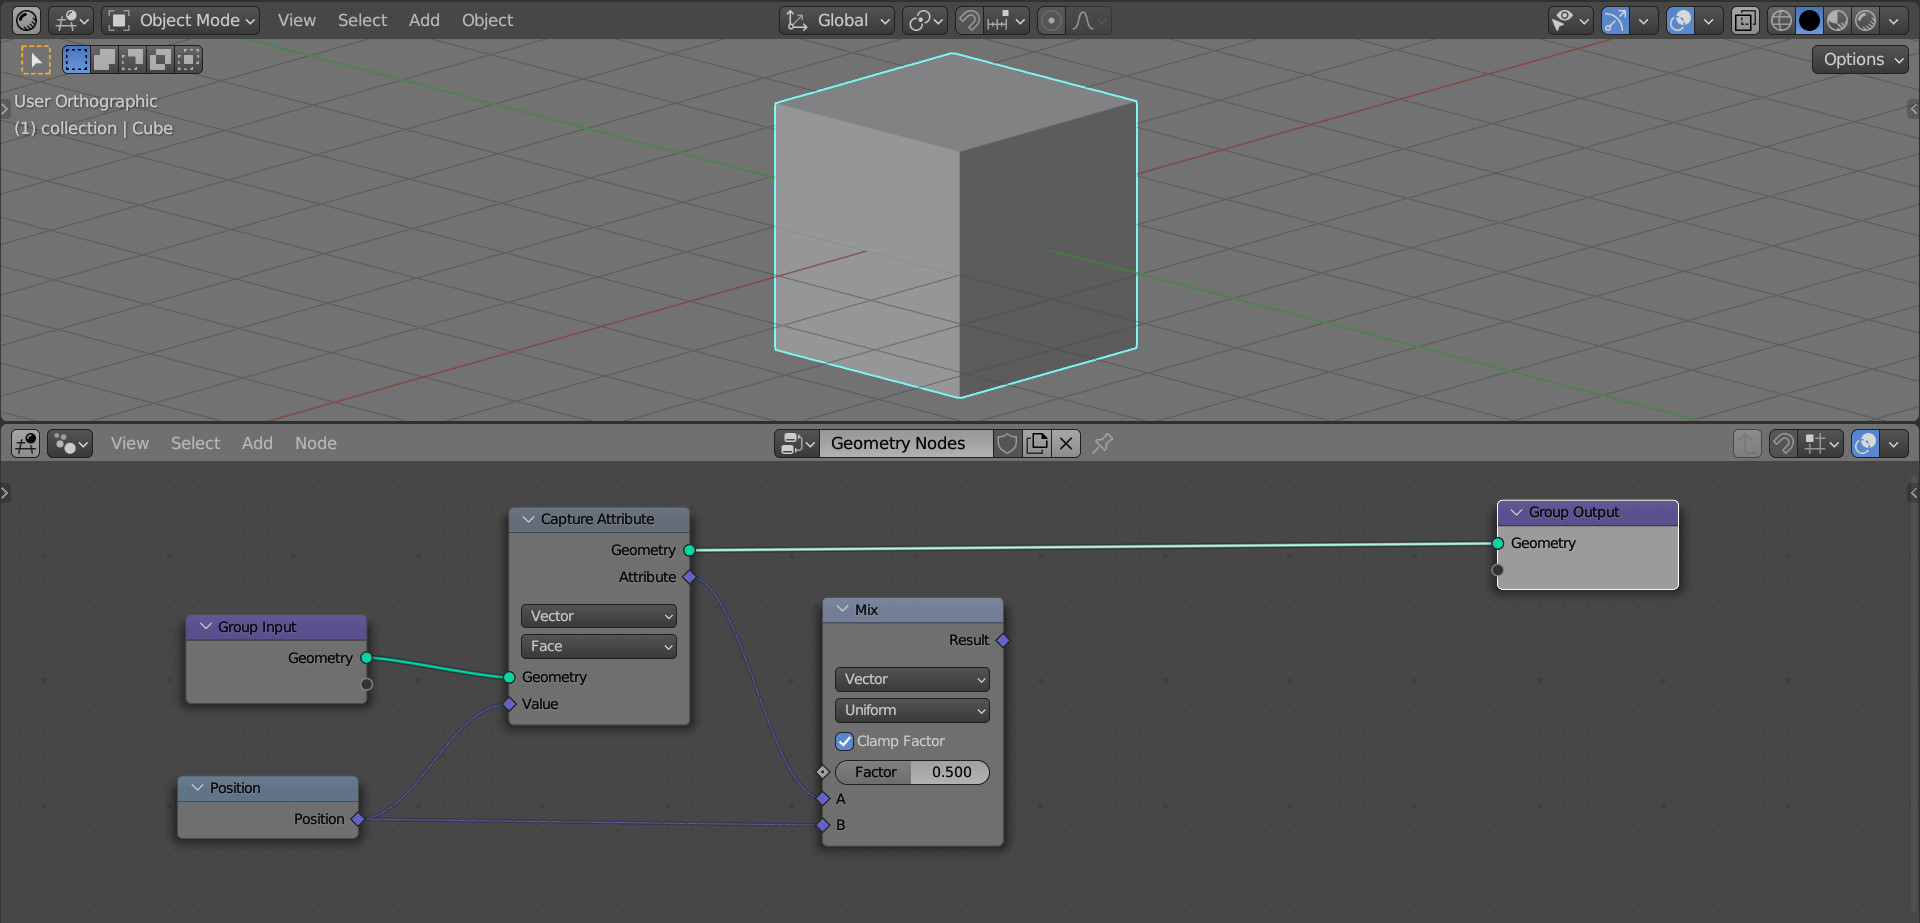
At the output of the Mix Color node, we get an intermediate value between the center of the polygon and the coordinates of its vertices. The amount of offset between these values is set by the “Factor” parameter of the Mix Color node.
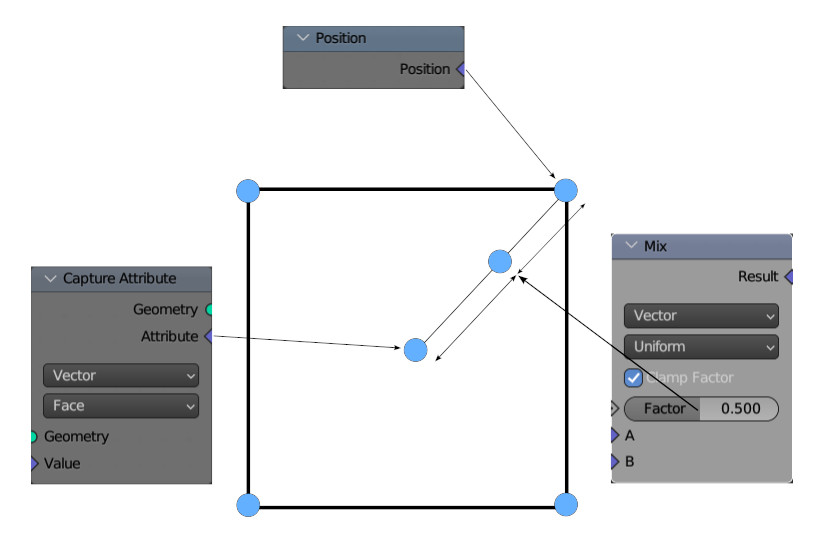
We can apply this to the mesh using the Set Position node. Add it (shift + a – Geometry – Set Position) to the main branch of the node tree, and link the output of the Mix Color node with the “Position” input of the Set Position node.
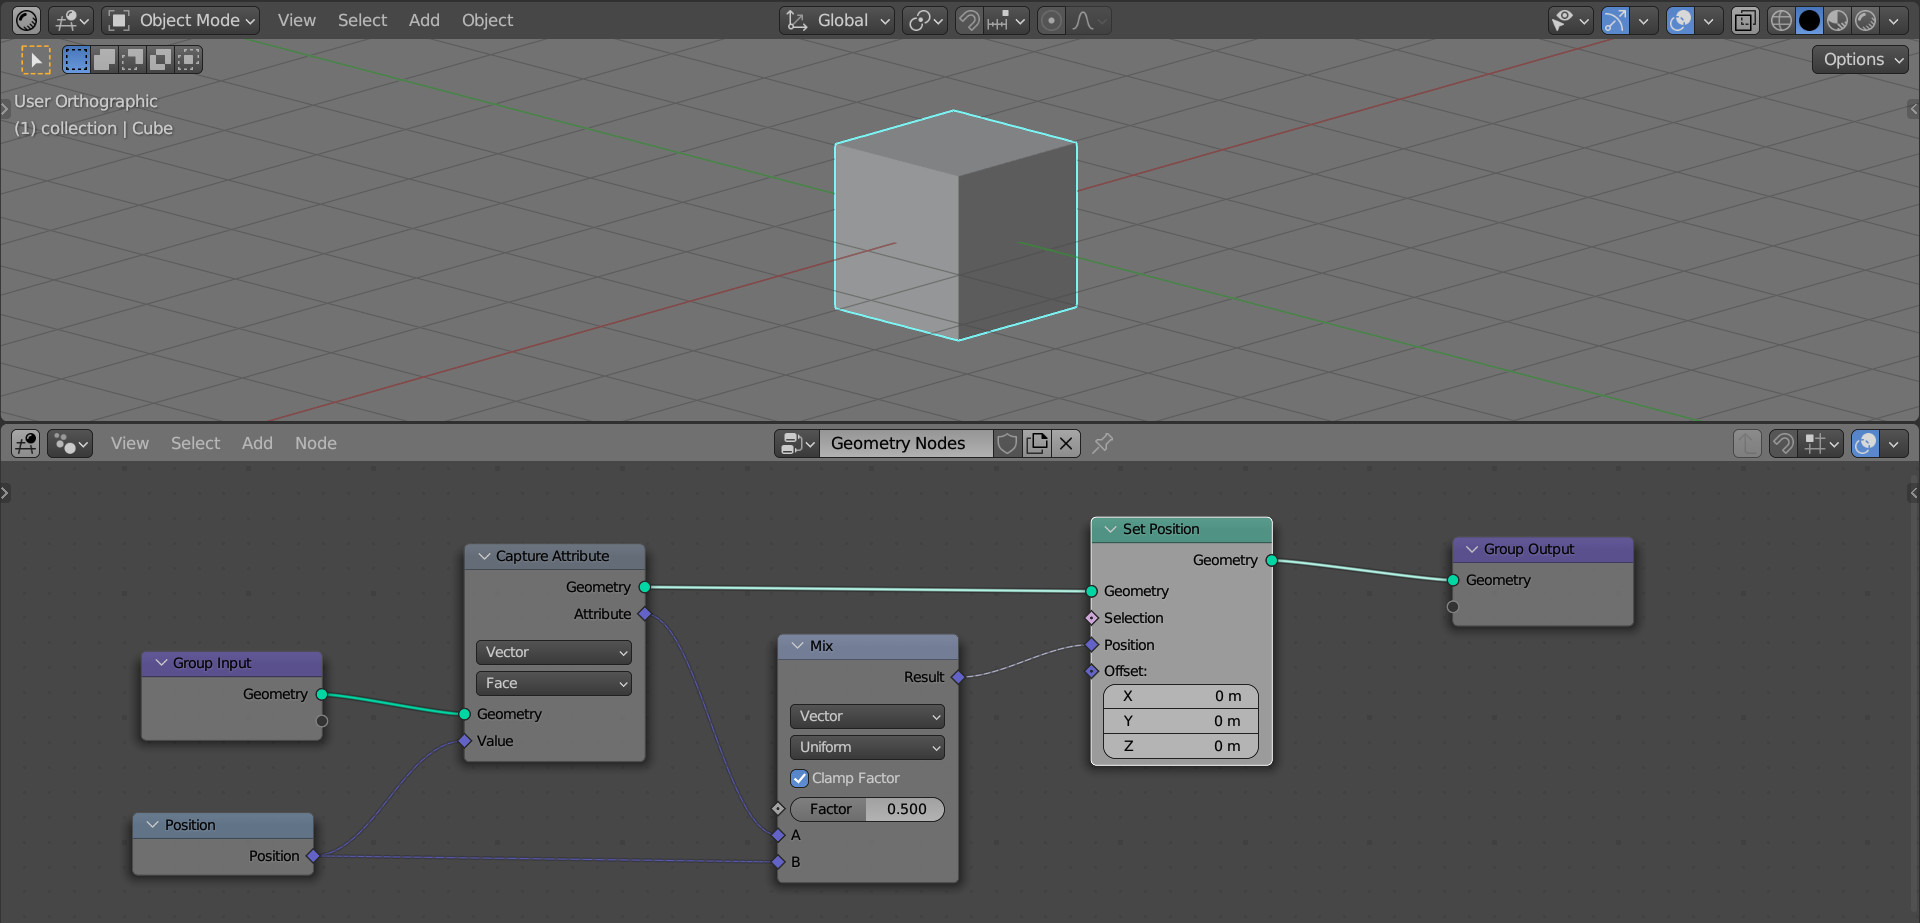
The polygons of the cube have scaled, but we did not get the desired effect. In order for each polygon of the cube to be scaled separately, we need to split them using the Split Edges node.
Add it (shift + a – Mesh – Split Edges) to the main branch of the node tree before the Set Position node.
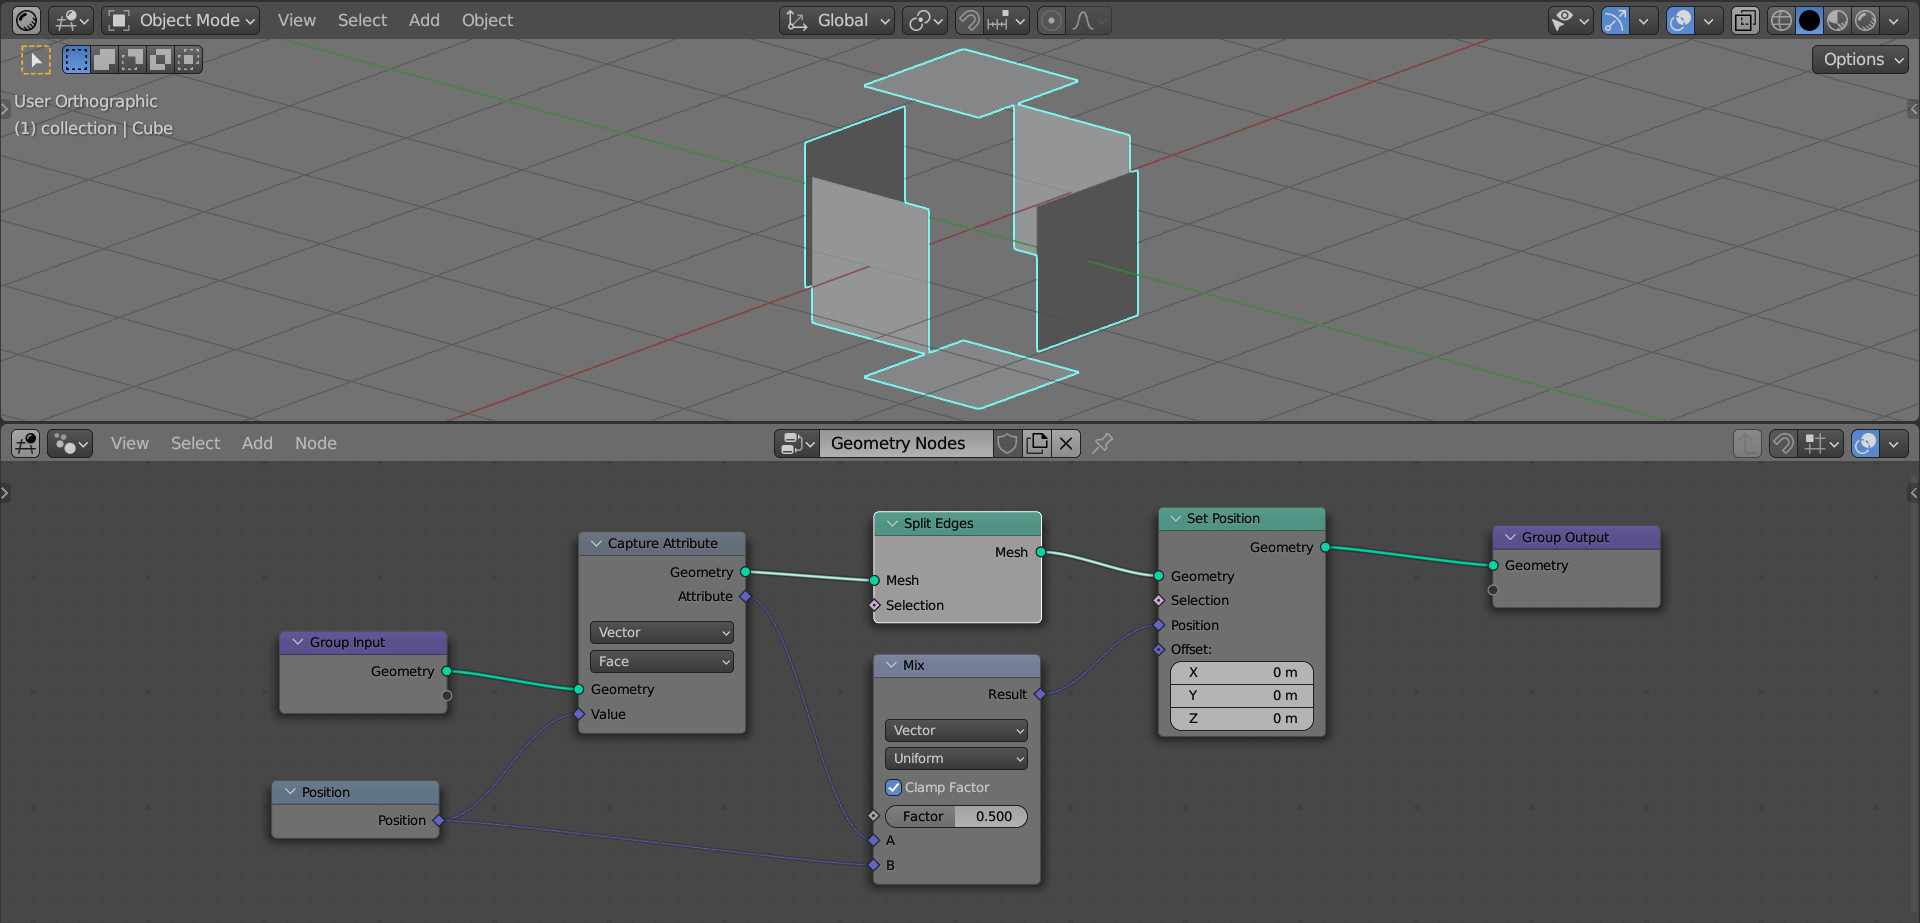
Now each polygon is scaled separately, and we can control their size by scrolling the “Factor” slider on the Mix Color node.