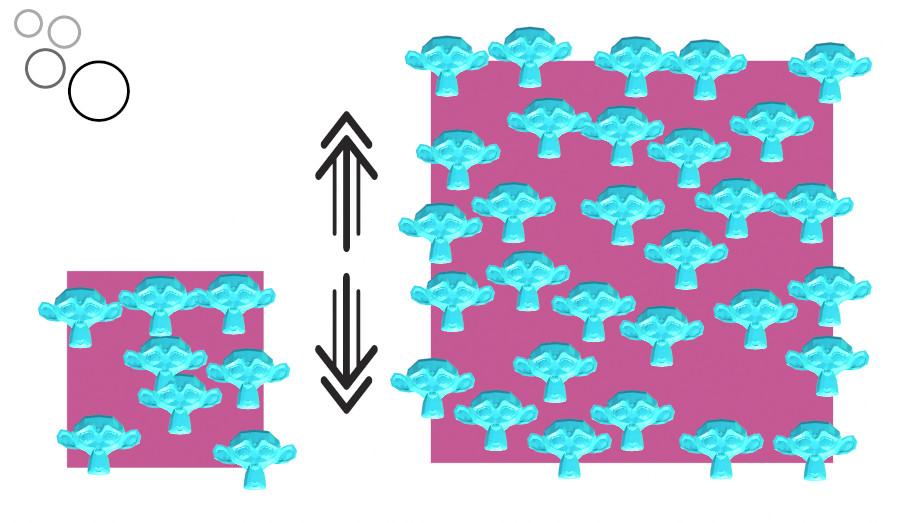
The distribution of object instances over the mesh surface in Blender is easily implemented with Geometry Nodes. In the simplest setup of such a node tree, when the scale of the base object changes, the dimension of the instances distributed on its surface also changes proportionally. However, it is possible to set a node tree in such a way that when the size of the base mesh changes, the size of the instances on it will remain unchanged, but their number will change.
 .blend file on Patreon
To start, let’s create a node tree for distributing instances of one mesh (Suzanne) over the surface of another mesh (Plane).
Add Suzanne to the scene (shift + a – Mesh – Monkey). Reduce it by pressing the “s – .2 – Enter” key combination, and apply the scale by pressing “Ctrl + a – Scale”. Hide it by pressing the “h” key.
Add a plane to the scene (shift + a – Mesh – Plane). Assign the Geometry Nodes modifier to it and initialize the node tree.
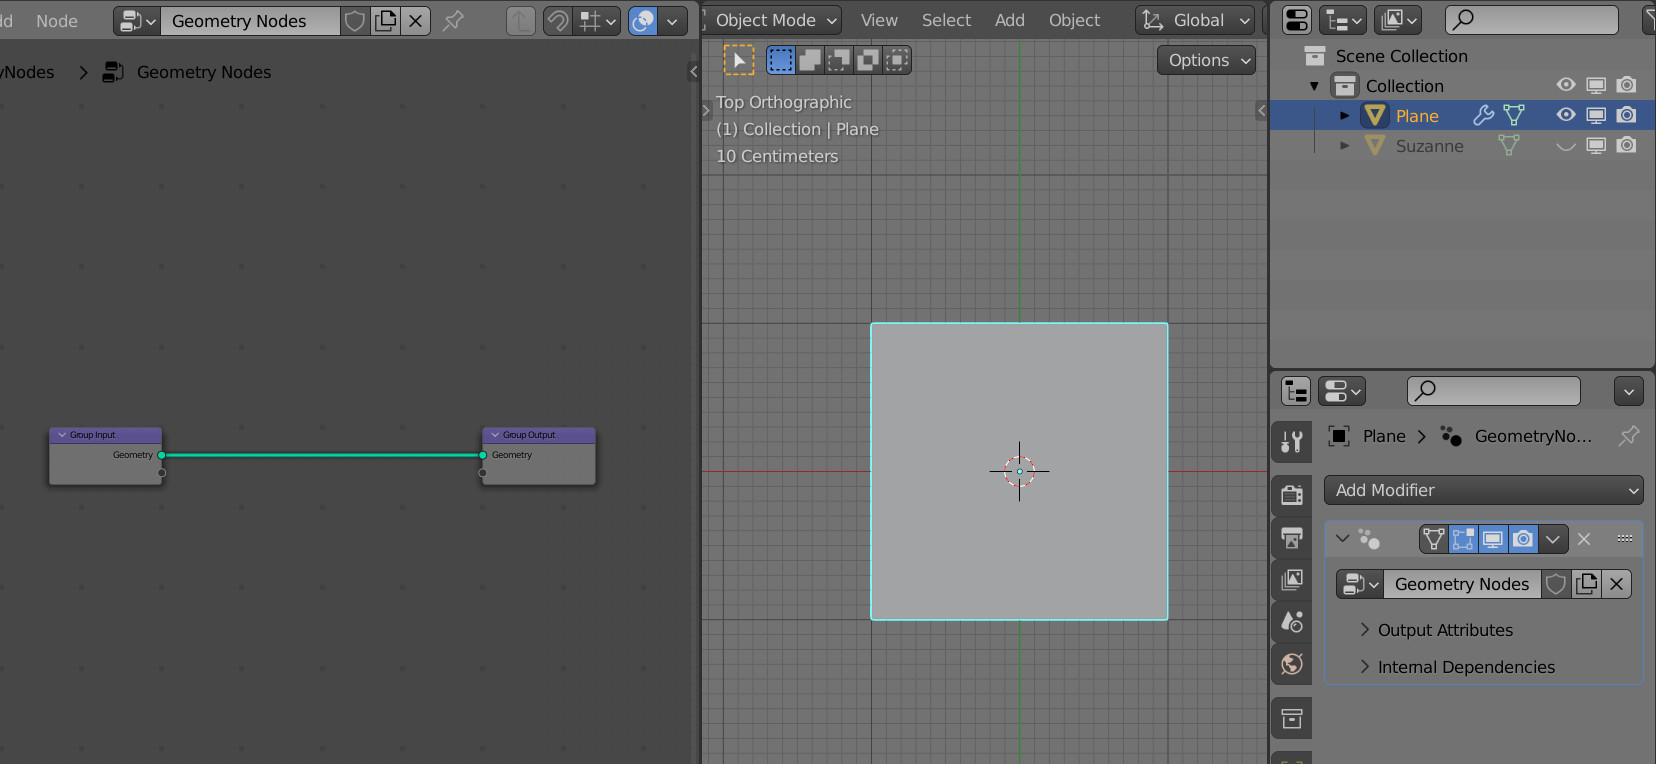
Let’s create the simplest node tree for distributing Suzanne’s instances over the Plane surface.
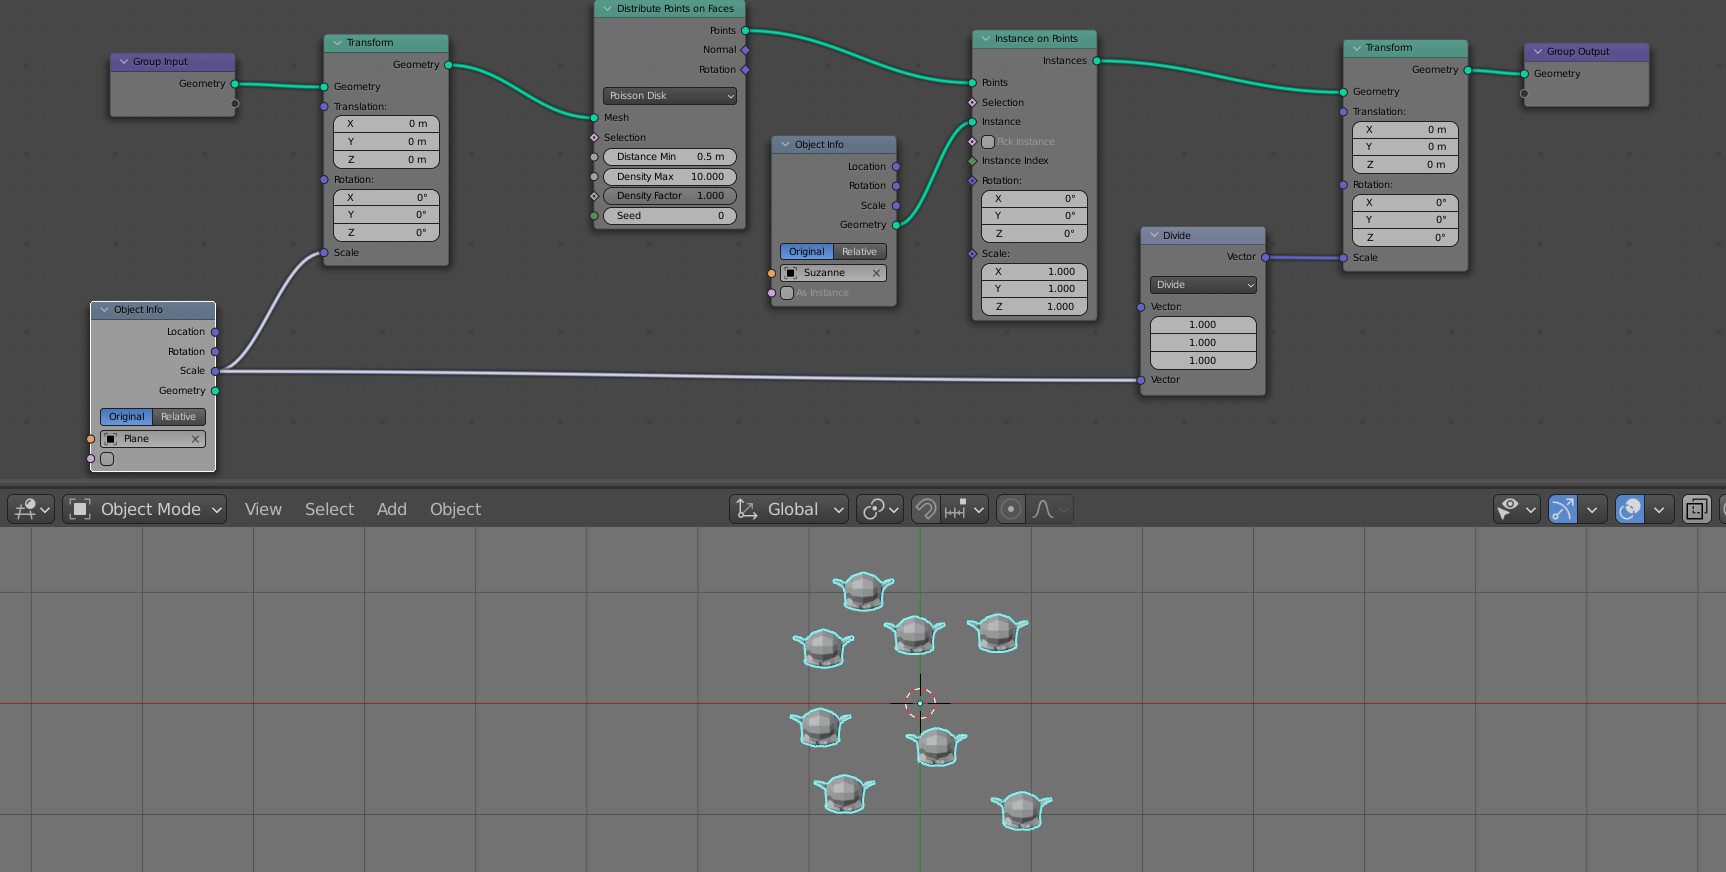
Add a “Distribute Points on Faces” node (shift + a – Point – Distribute Points on Faces) and an “Instances on Points” node (shift + a – Instances – Instances on Points) to the main node tree branch.
Add an “Object Info” node (shift + a – Input – Object Info). In its “Object” field, set “Suzanne” and connect its “Geometry” output to the “Instance” input of the “Instance on Points” node.
For the “Distribute Points on Faces” node, select the “Poisson Disk” mode and set the value of the “Distance Min” field to 0.5 so that the distributed meshes do not intersect.
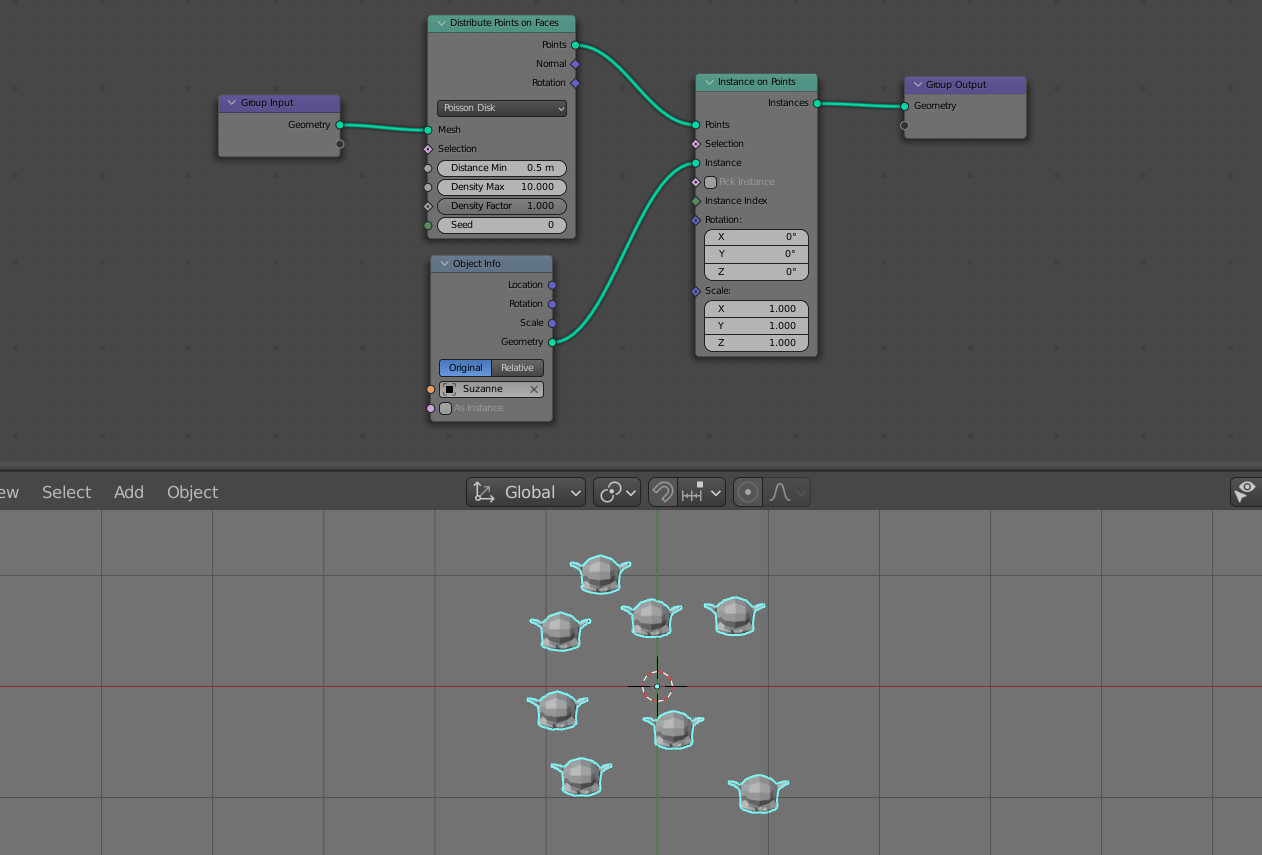
Instead of a plane, we got Suzanne’s meshes distributed over it.
If we now try to scale the plane by pressing the “s” key and moving the mouse, Suzanne’s meshes will scale too.
To maintain the original size of Suzanne’s meshes when scaling the plane, the easiest way is to add a “Transform” node (shift + a – Geometry – Transform) before the “Distribute Points on Faces” node and scale the plane not by pressing the “s” keys in the viewport, but by changing the values in the “Scale” field of this node.
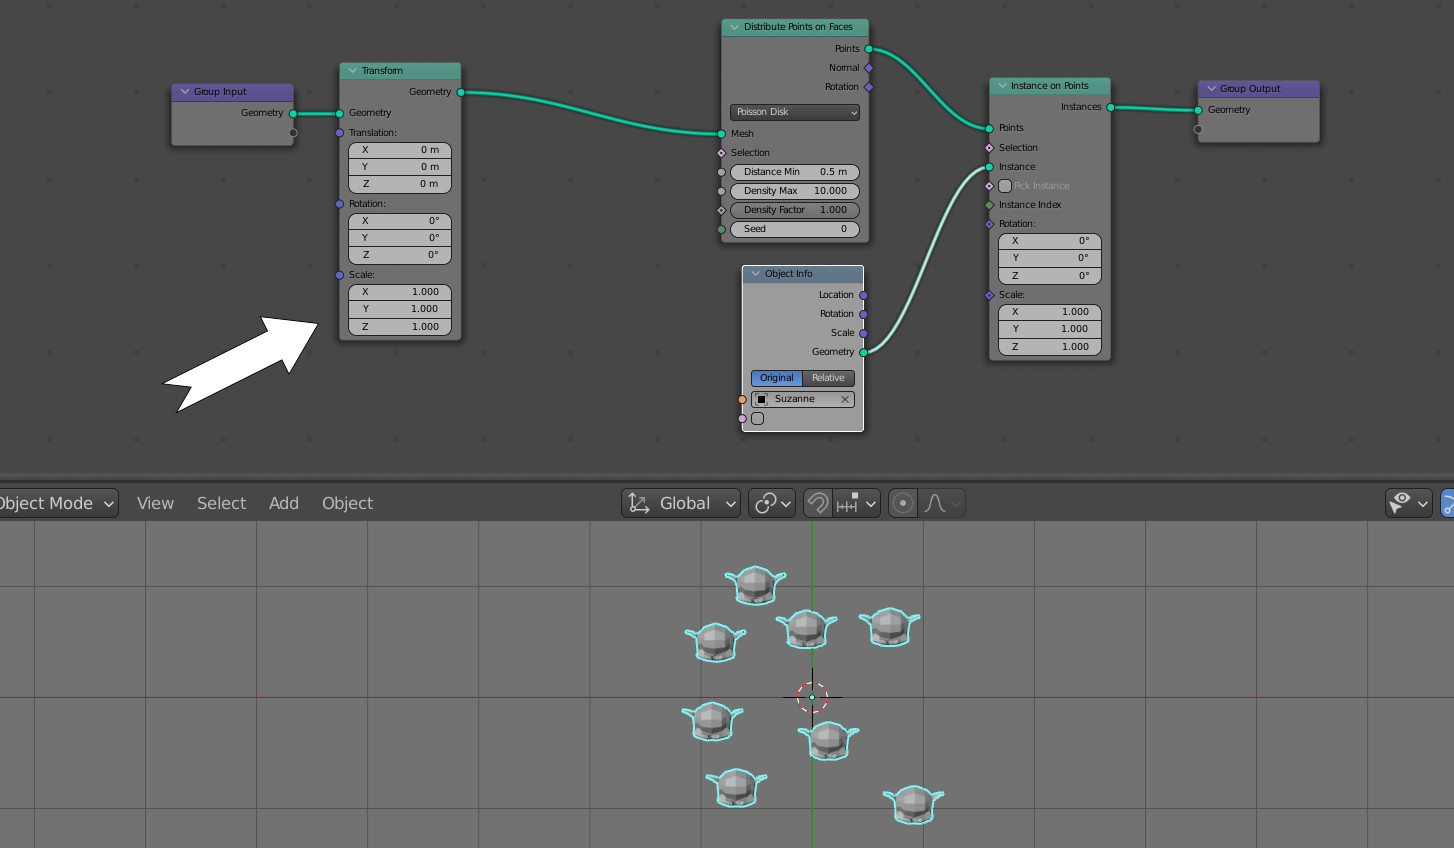
We immediately got the required result – only the plane is scaled, and the instances, remaining of a constant size, fill its entire area.
However, switching to the Geometry Nodes editor every time to change the scale is not very convenient. The scaling of the plane in the viewport can be associated with its scaling through Geometry Nodes.
To get the scale factor from the Plane object, let’s add one more “Object Info” node (shift + a – Input – Object Info). However, in its “Object” field, select our Plane object itself. From the “Scale” output of this node, we can get the current scale value of the plane now. Link the “Scale” output of the “Object Info” node with the “Scale” input of the “Transform” node.
Now we scale the plane through Geometry Nodes, but we take the scale factor from the plane as object.

If we now try to scale the plane in the viewport by pressing the “s” key, we will see almost the behavior we want, but Suzanne’s meshes will still change in size. We can also notice that the scaling factor is increased – with a small mouse movement, the plane is scaled more than before.
This happens because we have overlapped and use two methods of scaling at the same time – object in the viewport and through Geometry Nodes. To solve this problem, we need to compensate this double scaling.
Add another “Transform” node (shift + a – Geometry – Transform) to the main branch of the tree after the “Instance on Points node”. To compensate for double scaling, we need to set the inverse scale through this node – multiply it by 1 divided by the scaling factor.
Add a “Vector Math” node (shift + a – Vector – Vector Math) and switch it to the “Divide” mode. All values in the upper “Value” field set to 1.0. Link the “Scale” output of the Plane “Object Info” node with the bottom “Value” field of the “Vector Math” (Divide) node. This way we get the inverse scale value.
Link the “Value” output of this node with the “Scale” input of the second “Transform” node. Thus, we multiply the scale by the inverse factor, compensating for double scaling.
Now, by scaling the plane in the viewport, we get a fully working behavior – the size of the instances does not change, and the instances fill the entire changing area of the plane.