In Blender 2.8, the displacement node in Cycles render-engine was changed from scalar to vector. If you simply connect a black and white height map to the Displace input of the material output node, like in Blender 2.7, it will not give the desired result.
To make the correct node displacement in Blender 2.8 add “CombineXYZ” and “VectorDisplacement” nodes to the material node tree. Connect the height map to the “Y” input of the “CombineXYZ” node and its “Vector” output to the “Vector” input of the “VectorDisplacement” node. After that, connect the “Displacement” output of the “VectorDisplacement” node to the “Displacement” input of the material output node.
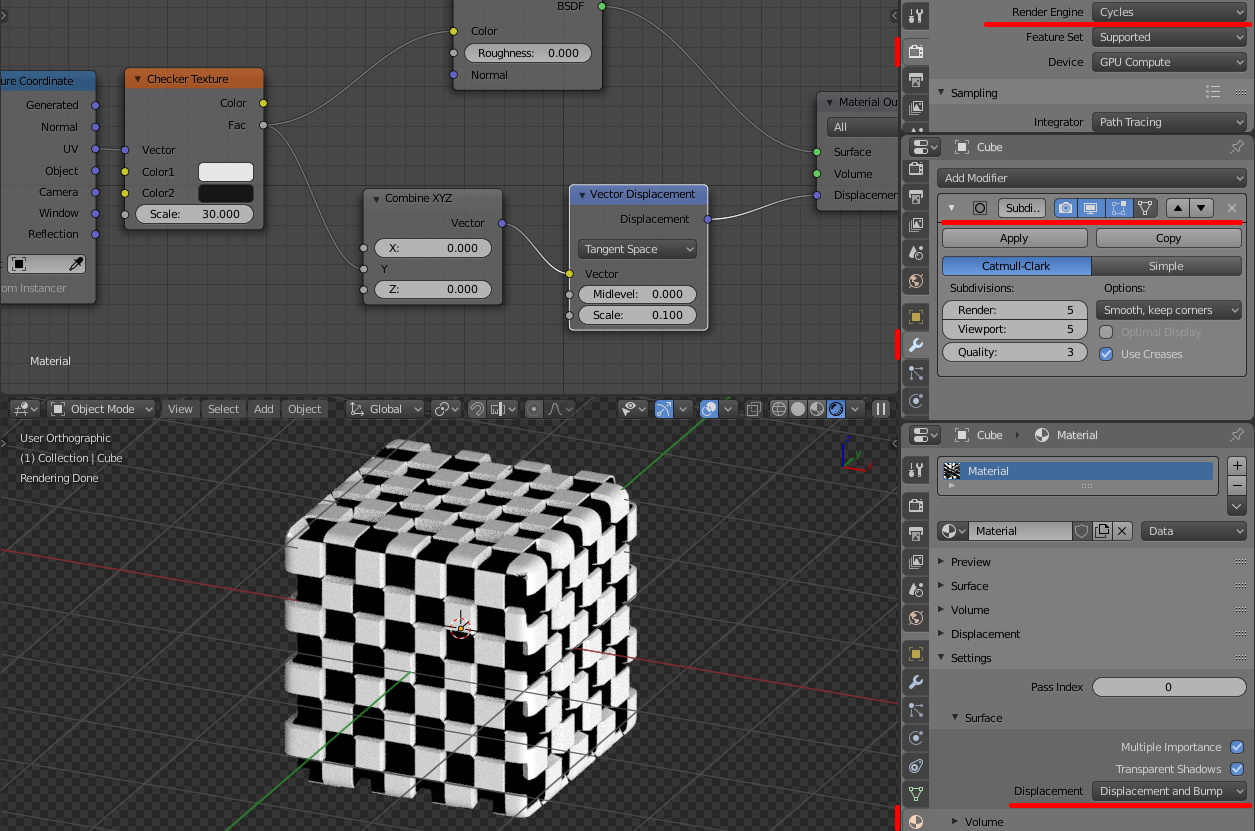
To make the displacement “real”, affecting the mesh geometry, add a “Subdivision Surface” modifier to the mesh and increase the number of subdivisions. In the mesh material properties (Settings – Surface), change the “Displacement” parameter to “Displacement and Bump”.