We create spherical surfaces often in the modeling workflow. It would seem that the sphere is the simplest object to model and any three-dimension editors, including the Blender, provides a default sphere in a set of basic primitives – just add it to the scene. However, is it really so easy to create a beautiful sphere?

To start let’s formulate the requirements for the sphere that we need:
- The general shape is to be as close to perfect sphericity.
- Smooth surface without specular artifacts.
Seems sufficient, but for modeling something not more complicated than the cue ball. If the sphere will be an integral part of any slightly more complex model, requirements are rising:
- Enough low polygonal base mesh – to conveniently work with the model.
- As a consequence of 3 – the final subdivision and smoothing are achieved by applying Subdivision Surface modifier.
Consider the possibility of obtaining such a sphere, which Blender provides:
- UV Sphere.
The easiest and most probably, frequently used option. UV-sphere is included in the set of primitives and can be easily added to the scene: Shift+a – Mesh – UV Sphere.
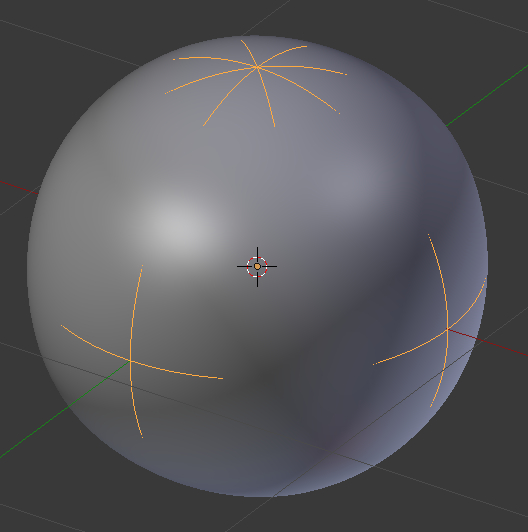
However, this sphere is far from perfect. After Subdivision Surface modifier adding immediately obvious two problems. The first – rather pronounced mesh ovoid. If the circle superimposed above the sphere, it is seen that at the top it adjoins to the sphere surface, and at the equator, it deviates.

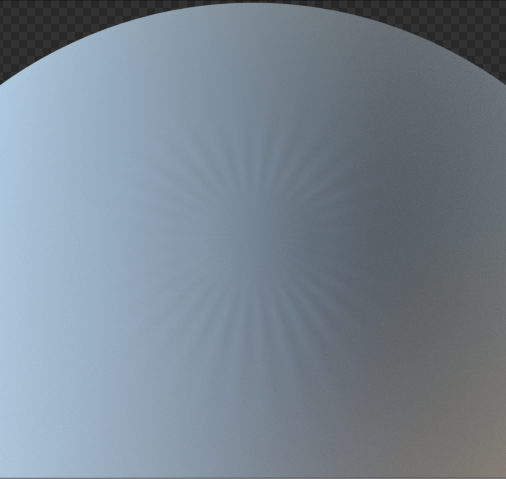
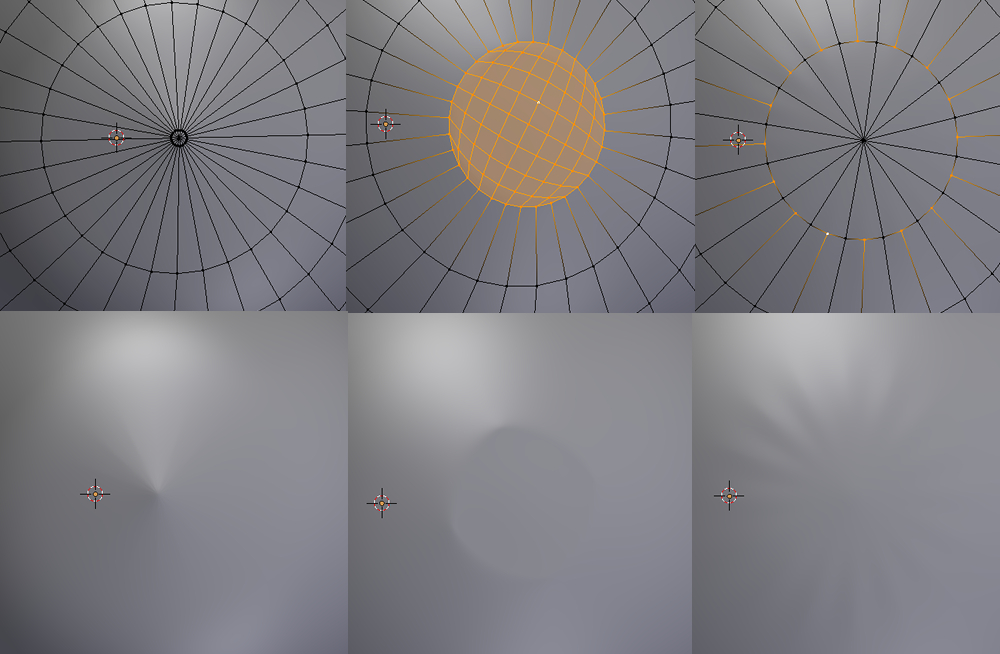
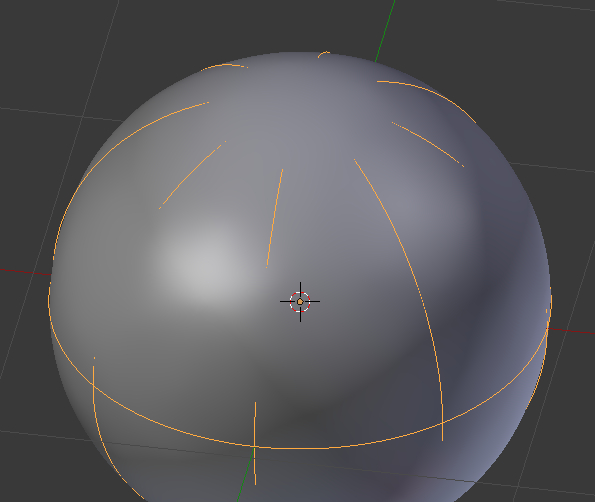
The second problem – star artifacts on top of the sphere arising from the fact that the Subdivision Surface modifier does not work correctly with triangles, which form the top sphere segment.
Artifacts can be controlled by tuning the topology in problem area:
- Convert triangles to quads
- Fill the problem area with the Grid Fill tool and make sphericity with proportional editing or alt+shift+s with Factor = 1
- Make the problem area as small as possible
But no one of this methods does not provide good quick results, they all require fine hand tuning.
- Ico Sphere
This sphere type is also included in a set of Blender primitives: shift+a – Mesh – Ico Sphere.
Such a sphere is used in modeling the much less common. Mainly due to the fact that it consists of triangles. Low poly modeling with Subdivision Surface modifier usage is difficult. Simple tasks, like the separation of half sphere, for Ico Sphere becomes quite nontrivial.
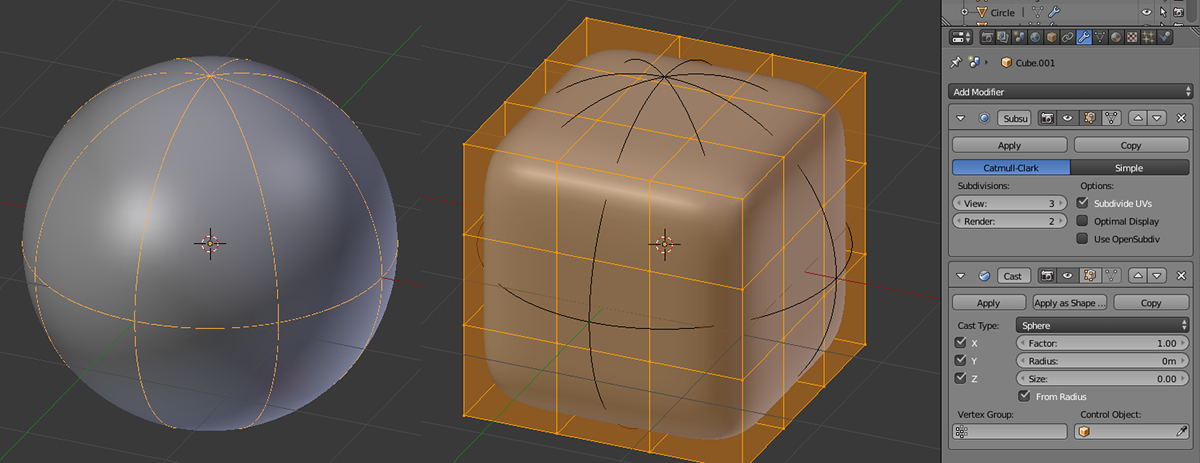
For the same reason, the final shape of Ico Sphere after applying Subdivision Surface modifier is not perfectly spherical. If we impose a circle above the sphere – expressed angularity becomes visible.
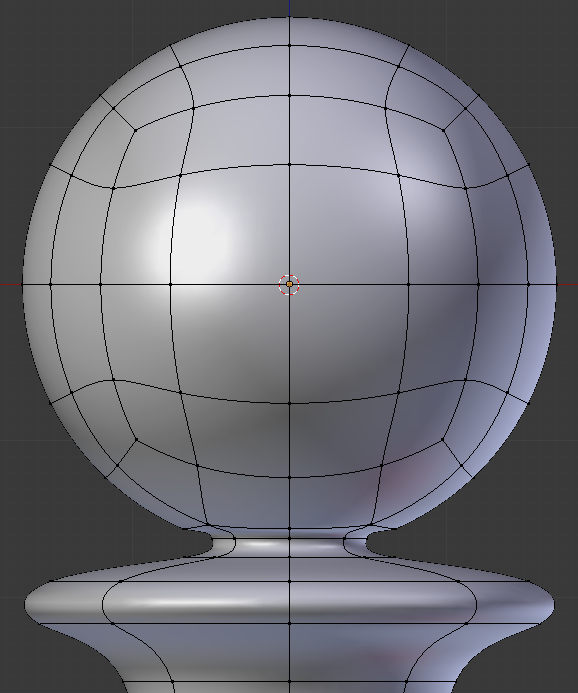
- The sphere from the cube
A sphere can be created not only taking the prepared workpiece from the set of primitives. The same Subdivision Surface modifier can be used to create the basic shape of a sphere. Just add a cube to the scene (shift+a – Mesh – Cube), add Subdivision Surface modifier to it and increase the number of subdivisions. Now we easily achieved a spherical shape.
To make a further convenient work process, set Subdivisions to 1 and next apply the modifier. Now we have enough sphericity billet which can be more improved through the To Sphere tool (alt+shift+s) with Factor = 1. After these operations add Subdivision Surface modifier again for final smoothing.
The final shape of the sphere looks better than in the two previous versions, but still not perfect.
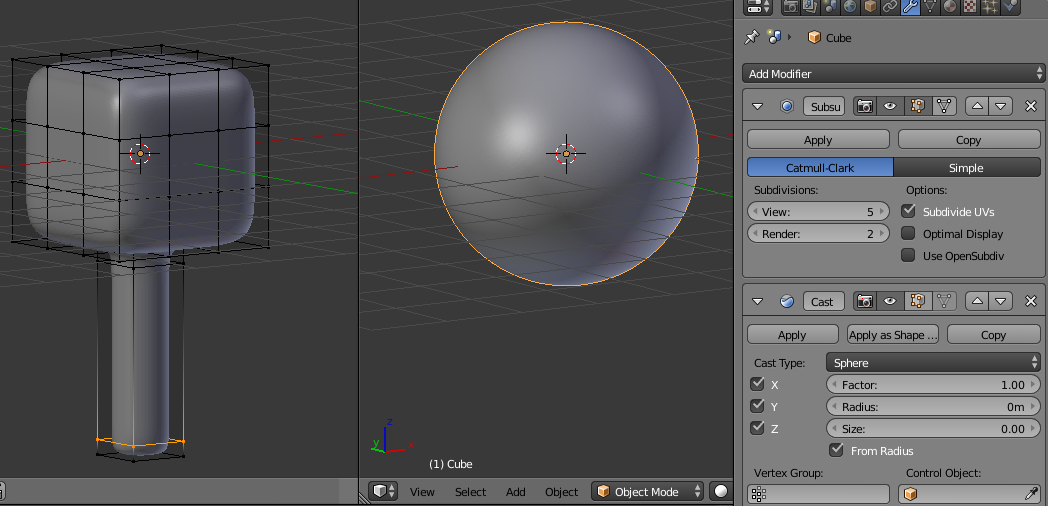
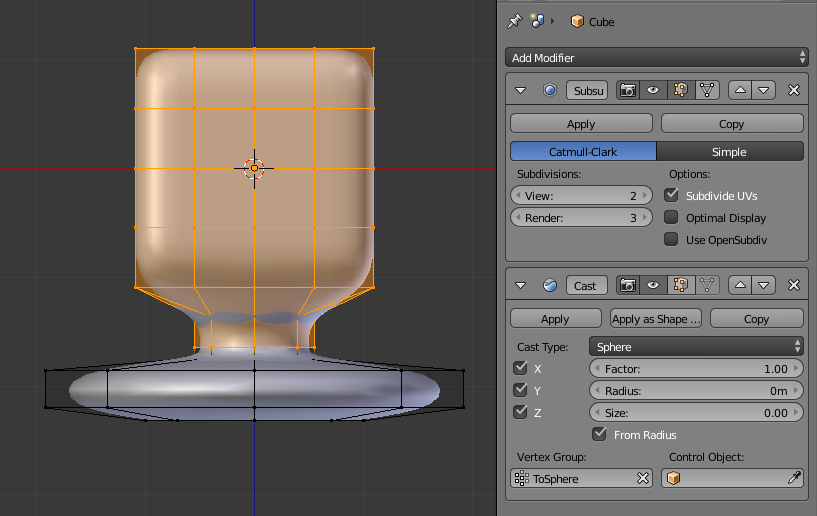
- The sphere from the cube + Cast modifier
Sphere created from the cube satisfies almost all the points set forth at the beginning of the requirements. Apart shape. But the shape can be brought to the perfect by adding the Cast modifier with Cast Type = Sphere and Factor = 1.
- Add the cube to the scene (shift + a – Mesh – Cube)
- Make a small subdivision for further modeling convenience (tab – w – Subdivide, Number Of Cuts = 2)
- Add to it the Subdivision Surface modifier (View = 2)
- Add to it the Cast modifier (Cast Type = Sphere, Factor = 1)
The result is the sphere with ideal shape, which at the same time makes it possible to work with low-level geometry:
However, if try, for example, to extrude one polygon from the cube, there will be no result. The Cast modifier results in the field of absolutely all, including any changes in the original mesh geometry.
To solve this problem, let’s limit the Cast modifier impact to a group of vertices.
In edit mode (tab) select all vertices except those which will participate in the geometry change. Add new vertex group (Data panel – Vertex Group – +), name it ToSphere and assign all of the selected points to the group by pressing Assign button.
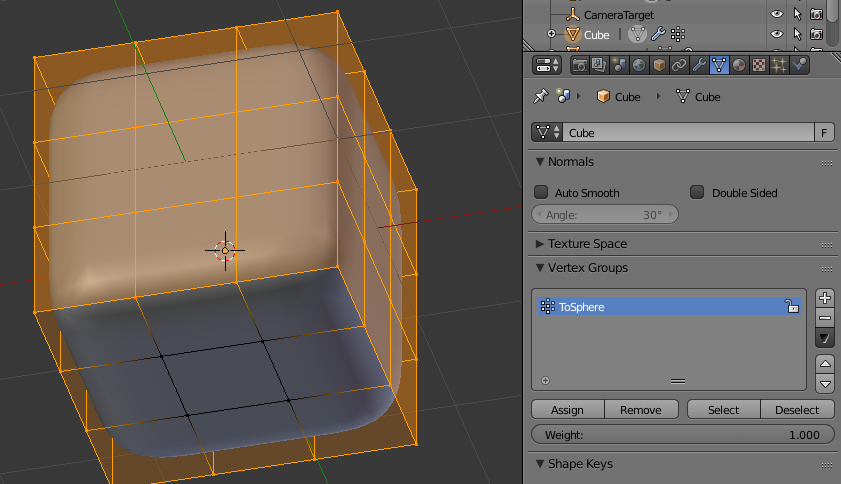
In Modifiers panel specify ToSphere group in Cast modifier – Vertex Group field. Now modifier influence only for this group of vertexes that allows changing the base mesh at vertexes outside the group.
The polygon at the bottom of the cube can now be extruded without loss of effect.
If continue extruding, another unpleasant effect becomes visible: if the total size of the object increasing, the diameter of the sphere increasing too:
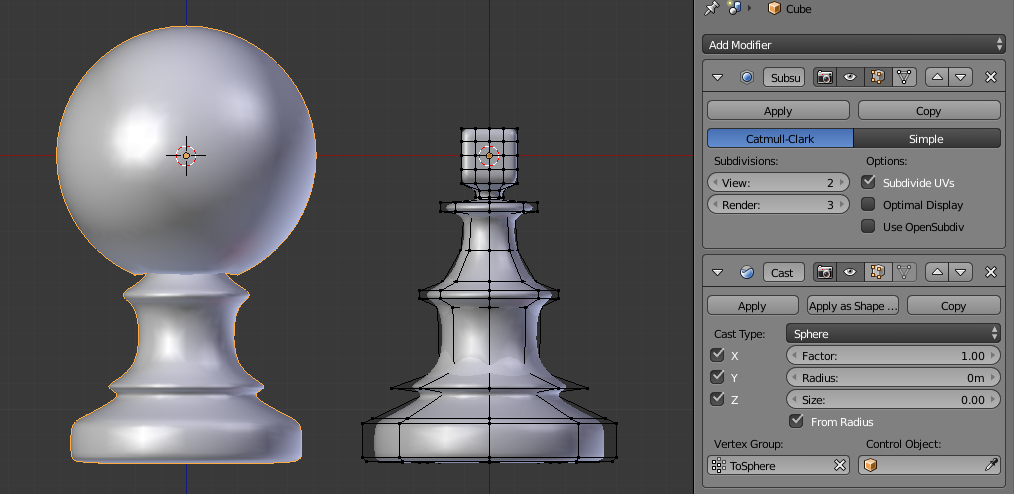
This occurs most likely because the Cast modifier calculates the conversion based on the total size of the entire mesh.
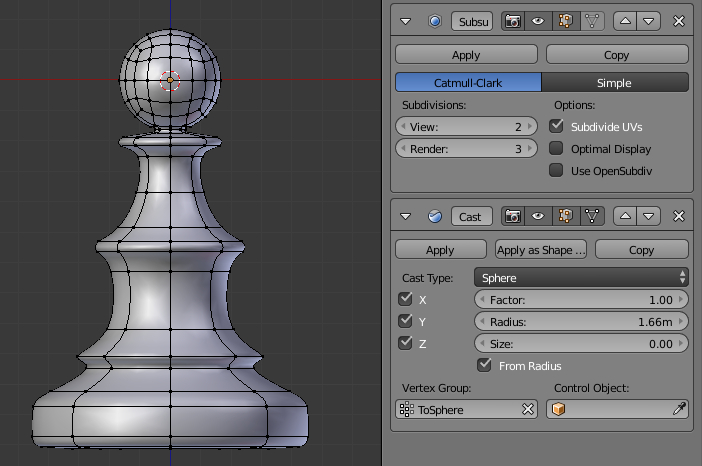
To solve this problem, the Radius parameter of the Cast modifier can be used. It needs to reduce a bit the scale of the original cube, because Radius option is effective only in the direction of increasing values, and set the Radius, visually fit sphere size to required.
Another moment to pay attention: Cast modifier takes the center of the mesh – Origin as the starting point of casting. Once the Origin is moved from the center of the formed sphere, all achieved effect disappears. In order not to lose sphere with the Origin movement, the Control Object parameter of the Cast modifier can be used.
Add the Empty to the scene (shift+a – Empty – Sphere) and place it in the center of the forming sphere (in current Origin location). Set this Empty in the Control Object field of the Cast modifier. Now modifier takes specified Empty as the starting point to cast, and the Origin of the mesh can be moved to the center of its base.
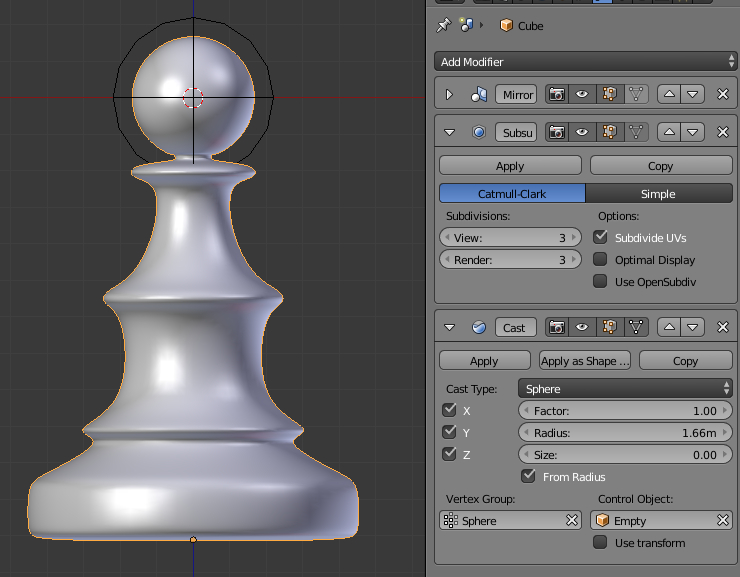
As a result, the sphere received, which meets all the requirements set forth: precise geometric shape, a low-poly original mesh base with the possibility of easy changes, the lack of specular and geometric artifacts.