Background with simple gradient can greatly improve the final image. For example, a heart with gradient background looks like significantly better than the same heart with white background.

However, if you need to save such image as JPG, the gradient becomes aliased that fails the impression of the image. That problem is named “banding”. Is it possible to defeat the gradient aliasing?
To start, let’s create a heart with a gradient background. To do this:
- Create the heart mesh and render it with a transparent background.
- Switch to the Compositing Mode.
- In the Properties window, open the Texture tab.
- Choose Brush and create a new texture.
- set Type to Blend.
- set Progression to Quadratic sphere
- in the Colors panel check Ramp checkbox and adjust the colors.
- Choose Brush and create a new texture.
- In the Node Editor add a new texture node:
- shift+a – Input – Texture
- select created texture with the gradient in this node
- shift+a – Input – Texture
- Connect created Texture node with render results through the Alpha Over node

It seems that all is good. But if you save the image in JPG format and look at it closely, you will see that the gradient from smooth becomes aliased. There were no errors in rendering, the result is due to the conservation into the 8-bit JPG format.

Which means can be used to correct the situation?
- Save the final image in one of the advanced formats.
You can use such image formats as JPG2000, PNG or OpenEXR. This is the easiest way, and if it is possible to use it – excellent. But sometimes it required saving the final image only in JPG format.
- Use noise for reducing gradient banding.
Typically, in the final image we always trying to reduce the noise. However, noise increasing decrease gradient banding, so noise can help to solve the gradient problem with not much lost of the final image quality.
At first, auto-generated noise should be used:
- In the Properties window in the Render tab:
- in the Post Processing panel
- increase the value of the Dither parameter
- in the Post Processing panel
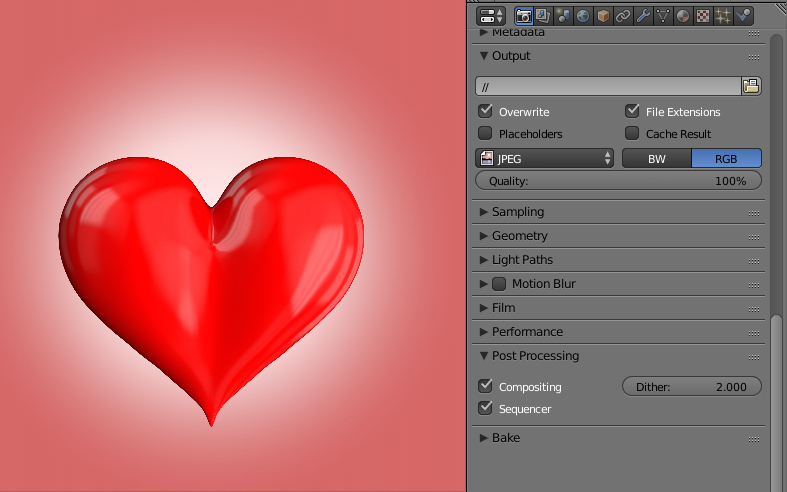
While increasing Dither value (the maximum is 2), more noise adds to the final image. Start with a small value and gradually increase it with controlling the ratio between noise and banding.
Dither parameter adds noise directly to the final image, it is not necessary to restart render process to achieve the results.
In most cases, the automatic noise allows achieving an acceptable result. However, there may be a case even this method does not get rid of the whole gradient steps. In this case, it is possible to add more noise to the image manually.
- Switch back to the Compositing mode.
- In the Properties window in the Texture tab (where previously the gradient texture was created).
- In Brush mode create a new texture by pressing the button with the plus sign.
- set Type to Noise.
- in the Colors panel check Ramp checkbox and adjust the colors as they were adjusted for the gradient texture.
- In Brush mode create a new texture by pressing the button with the plus sign.
- In the Node Editor add a new texture node
- shift+a – Input – Texture
- select created texture with the noise
- shift+a – Input – Texture
- Connect created Texture node with noise and Texture node with gradient through the Overlay node:
- shift+a – Color – Mix
- set it to Overlay mode
- Connect Color output of the Texture node (gradient) to the Image input of the Mix (Overlay) node
- Connect Color output of the Texture node (noise) to the Image input of the Mix (Overlay) node
- Connect Image output of the Mix (Overlay) node to the Image input of the Alpha Over node, related to the render result node
- shift+a – Color – Mix
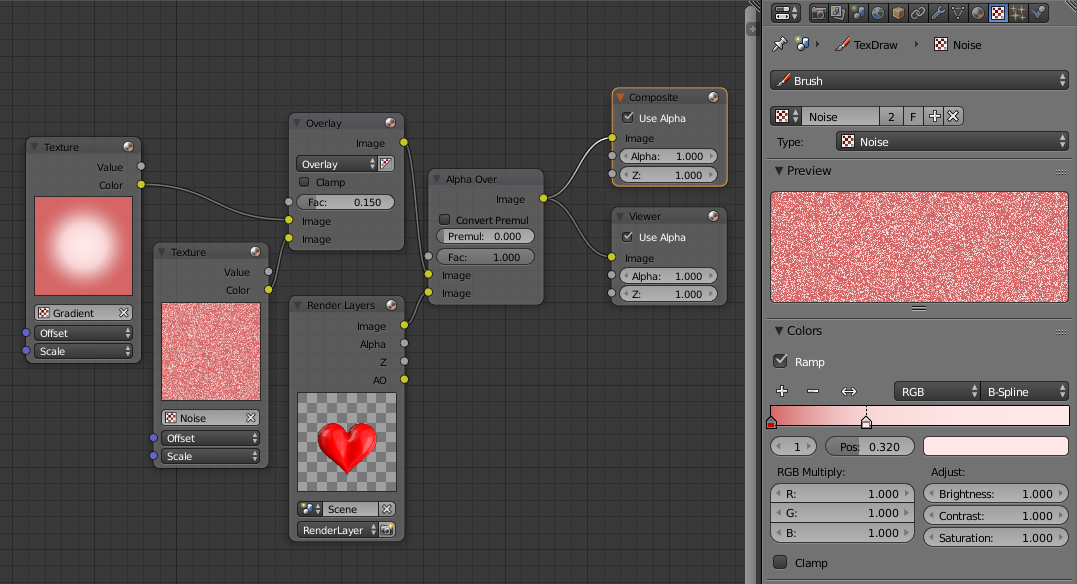
The Factor value of the Mix (Overlay) node controls the power of the noise overlay to the gradient. Changing this value you can achieve even better results for reducing gradient banding. But you must be careful that the noise does not become too visible in the final image.