There is a convenient opportunity in the Cycles render engine to render an object with shadows on a transparent background using material with the “shadow catcher” option. There is no such material in EEVEE render engine, however, in EEVEE we can make our own “shadow catcher” based only on nodes.
 Completed “EEVEE Shadow Catcher” material you can get from the BIS library.
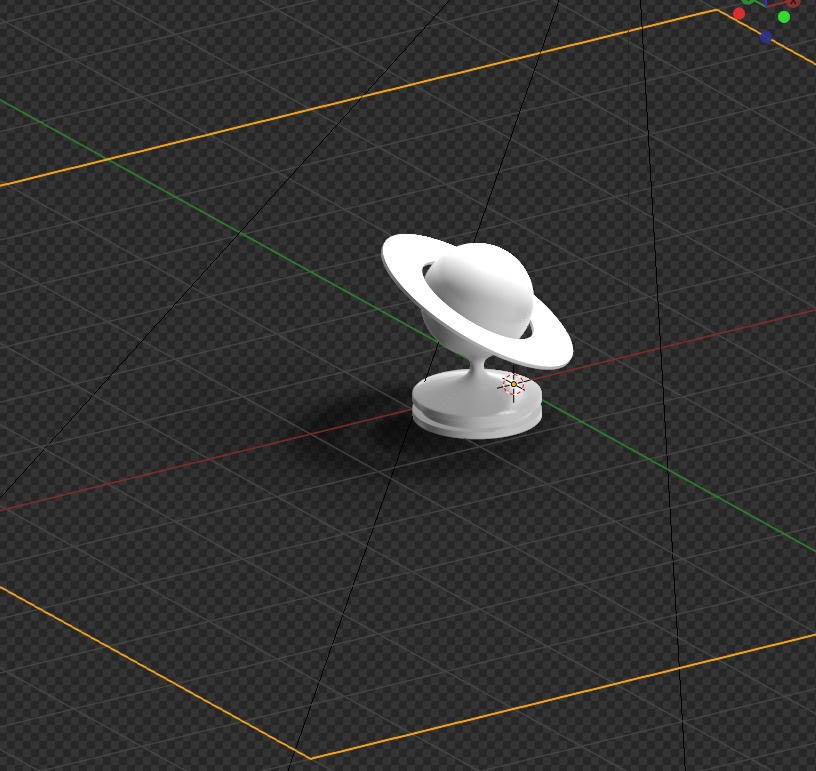
- At first, let’s create a simple scene:
Add a plane which would become the “shadow catcher”
shift+a – Mesh – Plane
and place any object on it.
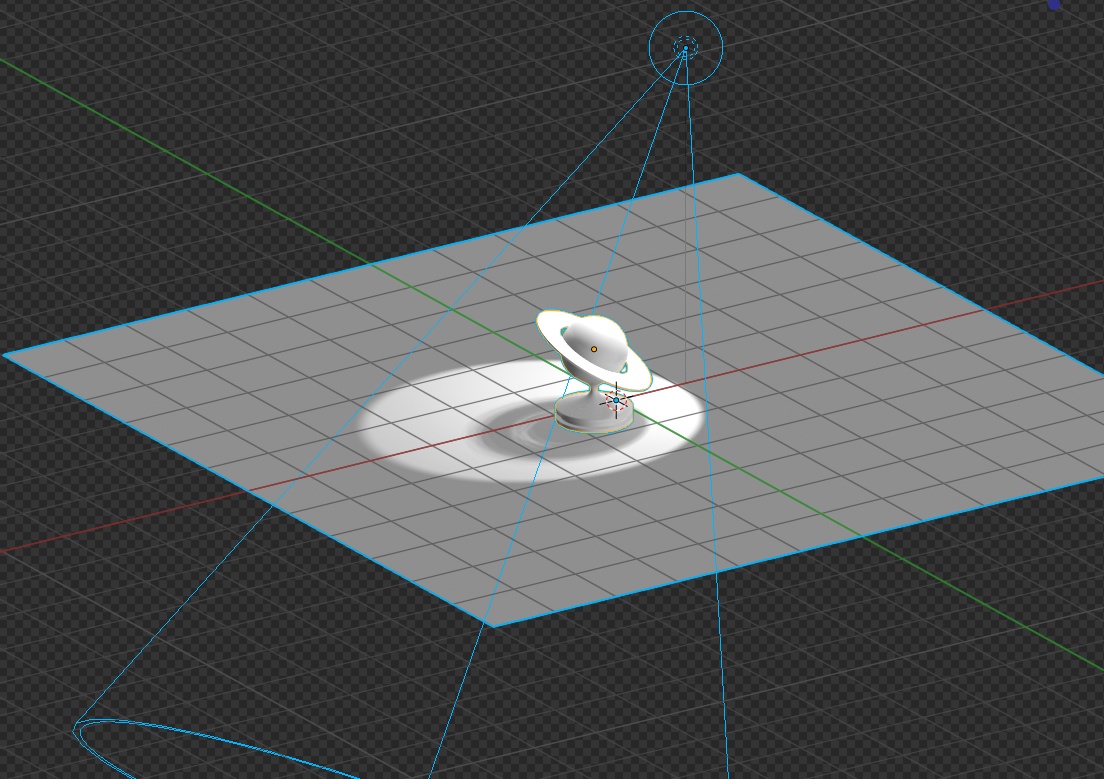
Add a light source
shift+a – Light – Spot
and point it on an object. Set size, and strength to have clearly visible shadows.
Switch to the EEVEE render engine and enable the “Rendered” mode (z – 8).
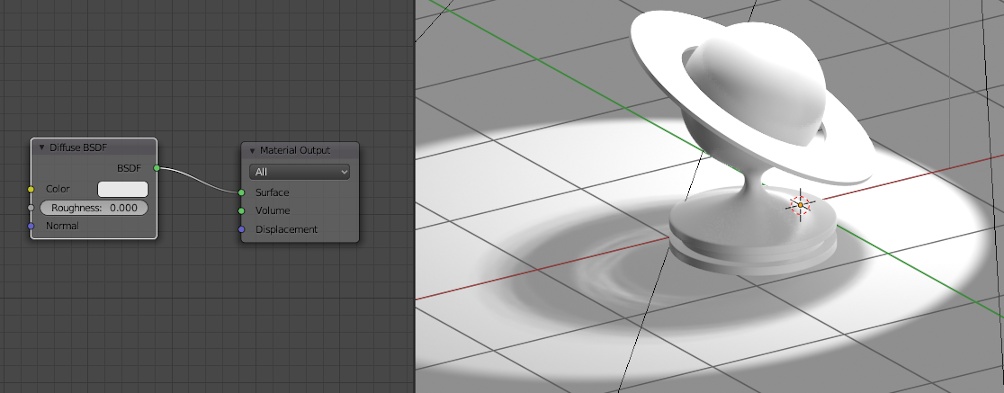
- Open the Shader Editor window and add a new material for the plane.
Replace the “Principled BSDF” shader with the “Diffuse” shader.
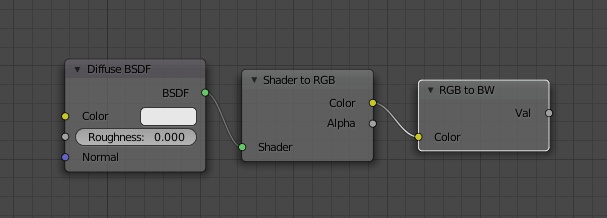
- EEVEE has a very useful “Shader to RGB” node, that translates the resulting shader, with calculated highlights and shadows, into a color. This node is usually used for color correction, but we will make our “shadow catcher” on the base of it.
Add the “Shader to RGB” node
shift+a – Converter – Shader to RGB
and place it after the “Diffuse BSDF” node.
At the “Color” output of this node, we have exactly what we see on the prerender’s screen – a white circle from the lighting and a shadow cast by the object.
Add the “RGB to BW” node to exclude colors and get the only black and white mask.
shift+a – Converter – RGB to BW
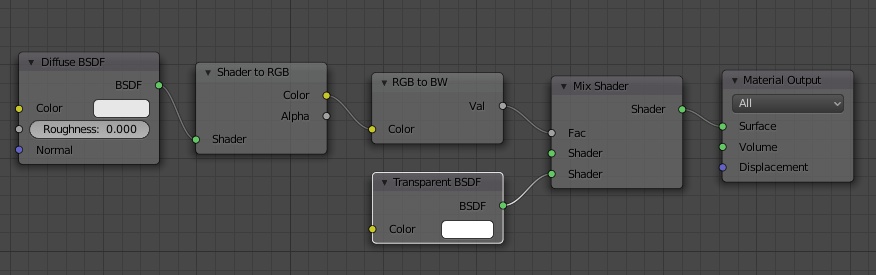
 Add two more nodes – “Mix Shader” and “Transparent BSDF”
shift+a – Shader – Mix Shader
shift+a – Shader – Transparent BSDF
and connect them as follows, using the resulting mask as the mixing factor of the transparent and empty node.
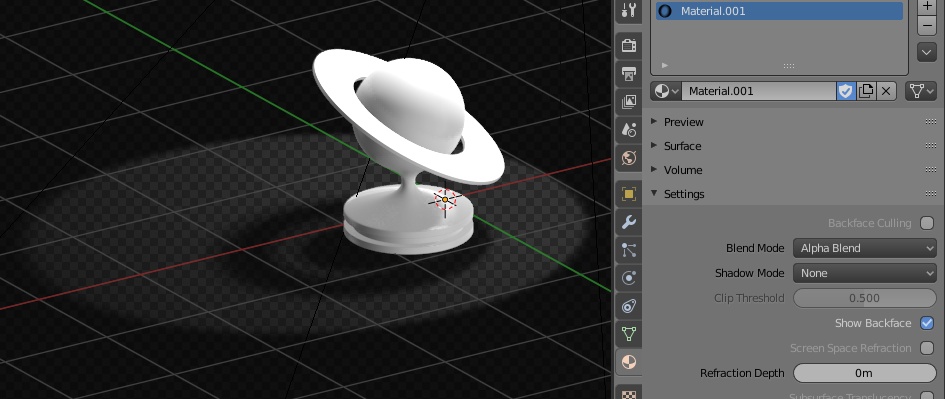
 To get our node tree working properly set the “Blend Mode” value to “Alpha Blend” in the material properties.
 For sharper shadows set the “Shadow Mode” value to “None”.
As we can see our “shadow catcher” already works. If we use only lamps with a “Sun” type, which don’t produce a light spot, no more changes are required.
- But for other lamp types, we need more improvements. Let’s make the black area around light spot transparent too.
Mix the “Transparent BSDF” node one more time with what we already have, taking a regular circle as a mask.
Add “Texture Coordinate”, “Mapping”, “Gradient Texture” and “Invert” nodes to our node tree:
shift+a – Input – Texture Coordinate
shift+a – Vector – Mapping
shift+a – Texture – Gradient Texture
shift+a – color – Invert
and connect them as follows. Switch the “Gradient Texture” node mode to “Spherical”. Change the Location and Scale parameters of the “Mapping” node to place the gradient circle so that it matches the boundaries of the light spot.
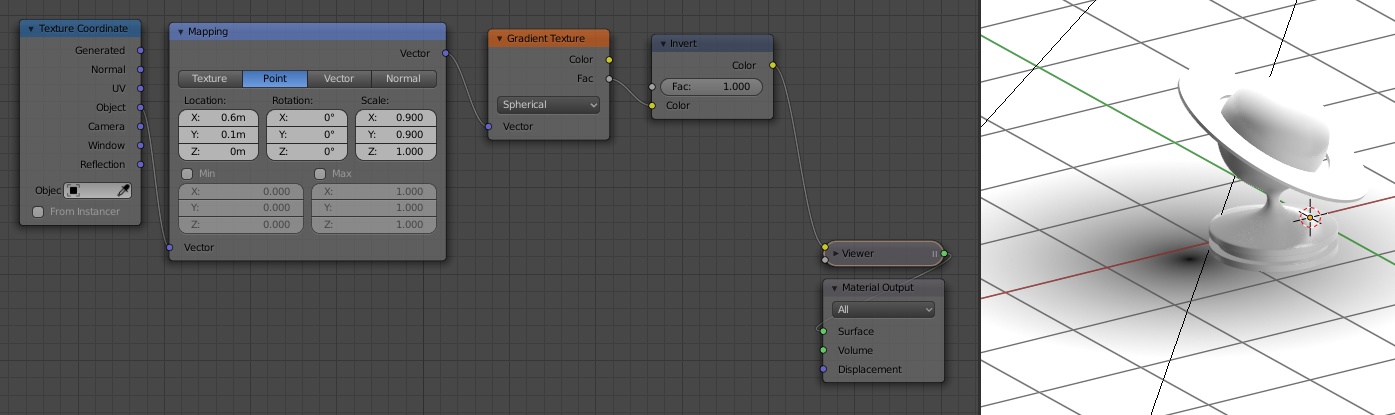 Everything outside the black gradient we will make transparent.
Select the “Mix Shader” node and duplicate it (shift+d).
Connect the new “Mix Shader” node with the existing node tree and with the “Transparent BSDF” node, using the gradient circle as a mixing factor.

So we cut off all the blackness around the light spot, and have only a shadow for rendering.