In general, gizmos looks like arrows and circles on a 3D object with which we can move, rotate and scale the mesh. However, in Blender, the gizmo object is more versatile and can be used to suit our needs in different workspaces. For example, we can create a gizmo to adjust the start and end points of the timeline.
 .blend file on Patreon
Source code author: Yann Lanthony (yann-lty).
First, we need to create a gizmo object. Let’s define a class for this and inherit it from bpy.types.Gizmo.
|
1 |
class GIZMO_GT_RectMouseArea(bpy.types.Gizmo): |
In the class define the “setup” function. Here we define the external shape of our gizmo – a rectangle consisting of two triangles. We set the coordinates for each gizmo point as if we were creating a mesh in the 3D viewport area.
|
1 2 |
def setup(self): self.custom_shape = self.new_custom_shape('TRIS', ((0, 0), (0, 1), (1, 1), (0, 0), (1, 1), (1, 0))) |
In order for the gizmo to be drawn at the given coordinates, define the “draw” function.
|
1 2 |
def draw(self, context): self.draw_custom_shape(self.custom_shape) |
We also need to check if the mouse cursor is over our gizmo controller, in order to process the user interaction with it. To do this, we define the “test_select function”.
|
1 2 3 4 5 6 7 8 |
def test_select(self, context, co): left_top_corner = self.matrix_world @ Vector((0, 1, 0, 1)) right_bottom_corner = self.matrix_world @ Vector((1, 0, 0, 1)) # check if co is inside gizmo shape (left_top and right_bottom coordinates) if (left_top_corner[0] <= co[0] <= right_bottom_corner[0]) and (right_bottom_corner[1] <= co[1] <= left_top_corner[1]): return 0 else: return -1 |
First, we define the top left and bottom right corners of our gizmo-element, and then check if the current mouse coordinates passed through the “c0” function parameter fall inside this area. If they hit, we return 0, if not, -1.
Now, create a GizmoGroup object to interact with the operators that will process our control.
Define the TIMELINE_GGT_Handlers class, inheriting it from GizmoGroup.
|
1 2 3 4 5 |
class TIMELINE_GGT_Handlers(bpy.types.GizmoGroup): bl_label = 'Gizmo Handles' bl_options = {'PERSISTENT', 'SHOW_MODAL_ALL', 'SCALE'} bl_space_type = 'DOPESHEET_EDITOR' bl_region_type = 'WINDOW' |
Let’s write the “setup” function, in which we will actually define the gizmo for our controls.
|
1 2 3 4 5 6 7 8 9 10 11 12 13 14 15 16 17 18 19 20 21 |
def setup(self, context): # left gizmo control left_gizmo = self.gizmos.new('GIZMO_GT_RectMouseArea') left_gizmo.color = left_gizmo.color_highlight = 0.0, 1.0, 1.0 left_gizmo.alpha = 0.7 left_gizmo.alpha_highlight = 0.9 left_gizmo.use_draw_modal = True left_gizmo.use_draw_scale = False op = left_gizmo.target_set_operator('scene.range_adjust') setattr(op, 'mode', 'START') self.left_gizmo = left_gizmo # right gizmo control right_gizmo = self.gizmos.new('GIZMO_GT_RectMouseArea') right_gizmo.color = right_gizmo.color_highlight = 0.0, 1.0, 1.0 right_gizmo.alpha = 0.7 right_gizmo.alpha_highlight = 0.9 right_gizmo.use_draw_modal = True right_gizmo.use_draw_scale = False op = right_gizmo.target_set_operator('scene.range_adjust') setattr(op, 'mode', 'END') self.right_gizmo = right_gizmo |
Here we have created two controls: the left one is for the beginning of the timeline, and the right one is for its end. For each of them we set the color, transparency, highlighting when hovering, the ability to be rendered modally and transform with the Blender UI.
We also assigned a control operator with the ‘scene.range_adjust’ idname to each element. This operator will be responsible for the actual operation of the controller.
To distinguish between left and right control elements when controlling them with the operator, we added the ‘START’ property to the left one, and the ‘END’ property to the right one.
Now define the “draw_prepare” function, which will be responsible for drawing our controls in the TimeLine area.
|
1 2 3 4 5 6 7 8 9 10 11 12 13 14 15 16 17 |
def draw_prepare(self, context): # get area coordinates of frame_start and frame_end frame_start = context.region.view2d.view_to_region(context.scene.frame_start, 0, clip=False)[0] frame_end = context.region.view2d.view_to_region(context.scene.frame_end, 0, clip=False)[0] # correct size by UI width = 10 * context.preferences.system.ui_scale height = 35 * context.preferences.system.ui_scale # left gizmo self.left_gizmo.matrix_basis[0][3] = frame_start - 0.5 * width self.left_gizmo.matrix_basis[1][3] = 0 self.left_gizmo.matrix_basis[0][0] = width self.left_gizmo.matrix_basis[1][1] = height # right gizmo self.right_gizmo.matrix_basis[0][3] = frame_end - 0.5 * width self.right_gizmo.matrix_basis[1][3] = 0 self.right_gizmo.matrix_basis[0][0] = width self.right_gizmo.matrix_basis[1][1] = height |
Here we get the actual position of the timeine start and end points in screen coordinates. Adjusting size to our control elements so that they correspond to the overall scale of the Blender UI, and also set their own dimensions to 10 x 35. And apply the resulting coordinates to the left and right elements.
Now define an operator that will work in modal mode and implement control functions for our gizmo-controls.
|
1 2 3 4 |
class SCENE_OT_range_adjust(bpy.types.Operator): bl_idname = 'scene.range_adjust' bl_label = 'Adjust Scene Range' bl_options = {'GRAB_CURSOR_X', 'BLOCKING', 'UNDO'} |
Add two input parameters for the operator: “mode” and “offset”. The “mode” parameter is necessary to understand which of the controllers is currently being processed, left or right, and the “offset” indicates the value of the current offset of the control element by the user.
|
1 2 3 4 5 6 7 8 9 10 11 12 13 |
offset: IntProperty( name='Offset', options={'SKIP_SAVE'}, ) mode: EnumProperty( name='Mode', items=( ('START', 'Start', 'Start frame'), ('END', 'End', 'End frame') ), default='START', options={'SKIP_SAVE'} ) |
Define the common operator functions: “invoke”, “execute”, “modal”, “cancel”.
In the “invoke” function, we define the starting point of the operator.
|
1 2 3 4 5 6 7 8 9 10 11 |
def invoke(self, context, event): self.start_mouse_coords = context.region.view2d.region_to_view( x=event.mouse_region_x, y=event.mouse_region_y ) self.frame_start = context.scene.frame_start self.frame_end = context.scene.frame_end # run as modal context.window.cursor_modal_set('MOVE_X') context.window_manager.modal_handler_add(self) return {'RUNNING_MODAL'} |
Here, we save the coordinates of the initial mouse click, set the current start and end values of the timeline, and switch the operator to the modal mode.
In the “modal” function, we define what an operator should do when certain events occur.
|
1 2 3 4 5 6 7 8 9 10 11 12 13 14 15 16 17 18 19 20 21 22 23 |
def modal(self, context, event): # Cancel if event.type in {'RIGHTMOUSE', 'ESC'}: context.scene.frame_start = self.frame_start context.scene.frame_end = self.frame_end context.window.cursor_modal_restore() return {'CANCELLED'} # Finish if event.type in {'LEFTMOUSE'} and event.value in {'RELEASE'}: context.window.cursor_modal_restore() return {'FINISHED'} # Update if event.type in {'MOUSEMOVE'}: # Recalculate new offset mouse_coords = context.region.view2d.region_to_view( x=event.mouse_region_x, y=event.mouse_region_y ) offset = int(mouse_coords[0] - self.start_mouse_coords[0]) if offset != self.offset: self.offset = offset self.execute(context) return {'RUNNING_MODAL'} |
Here we handle three events: “cancel” – if the user cancels his action by pressing the right mouse button or ESC key, “completion” – if the user left-clicks the mouse button, and “update” – called every time the user moves the gizmo controller.
When “cancel” occurs, we return the timeline values to their original state.
When “updating” occurs, we update the current cursor position and recalculate the offset of the control element.
When “completion” occurs, we set the current offset of the control element from its original position.
The “execute” function executes after the “completion” event occurs.
|
1 2 3 4 5 6 |
def execute(self, context): if self.mode == 'START': context.scene.frame_start = min(self.frame_start + self.offset, self.frame_end) else: # 'END' context.scene.frame_end = max(self.frame_end + self.offset, self.frame_start) return {'FINISHED'} |
Here we set the new values for the timeline. If the left control element was moving (‘START’) – for its beginning, and if the right one (‘END’) – for its end.
All we have to do is register all the classes we have defined in the “register” function and execute the code.
|
1 2 3 4 |
def register(): bpy.utils.register_class(SCENE_OT_range_adjust) bpy.utils.register_class(GIZMO_GT_RectMouseArea) bpy.utils.register_class(TIMELINE_GGT_Handlers) |
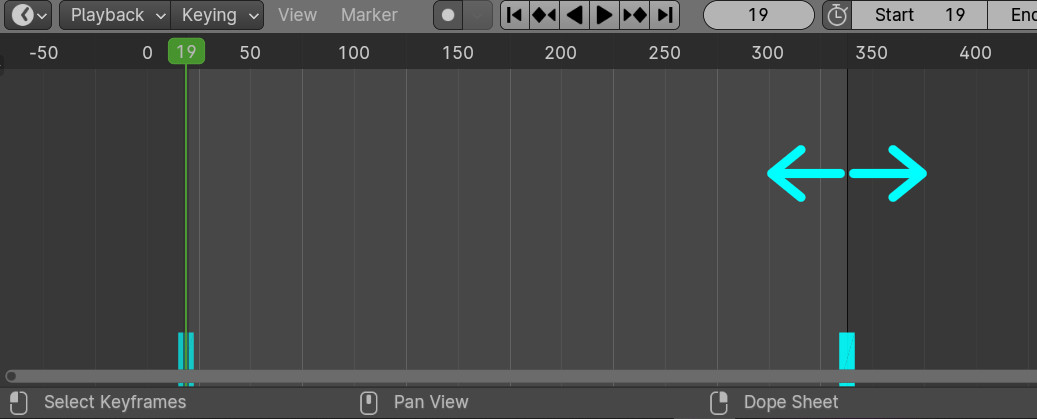
After running the code, two additional rectangles appear in the TimeLine area. These are our control gizmo elements. If we hold down any of them and move the mouse, the start or end point of the timeline will visually change.