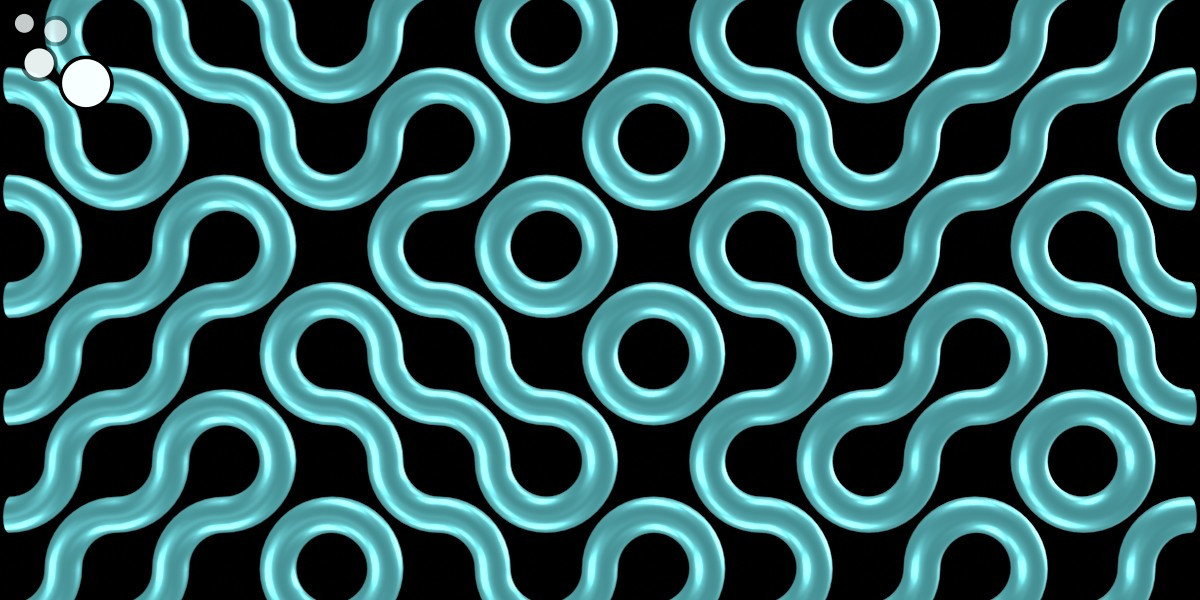
With Blender Geometry Nodes, we can create seamless patterns by arranging and combining separate elements in the desired way. This principle is named the “Truchet tiles”. For example, let’s create a seamless procedural pattern of a classic labyrinth with rounded corners.
 .blend file on Patreon
To start, add a cube to the scene (shift + a – Mesh – Cube), append a Geometry Nodes modifier to it and create the initial tree of nodes by clicking on the “New” button.

We don’t need the original geometry of the cube, and we can detach the Group Input node.
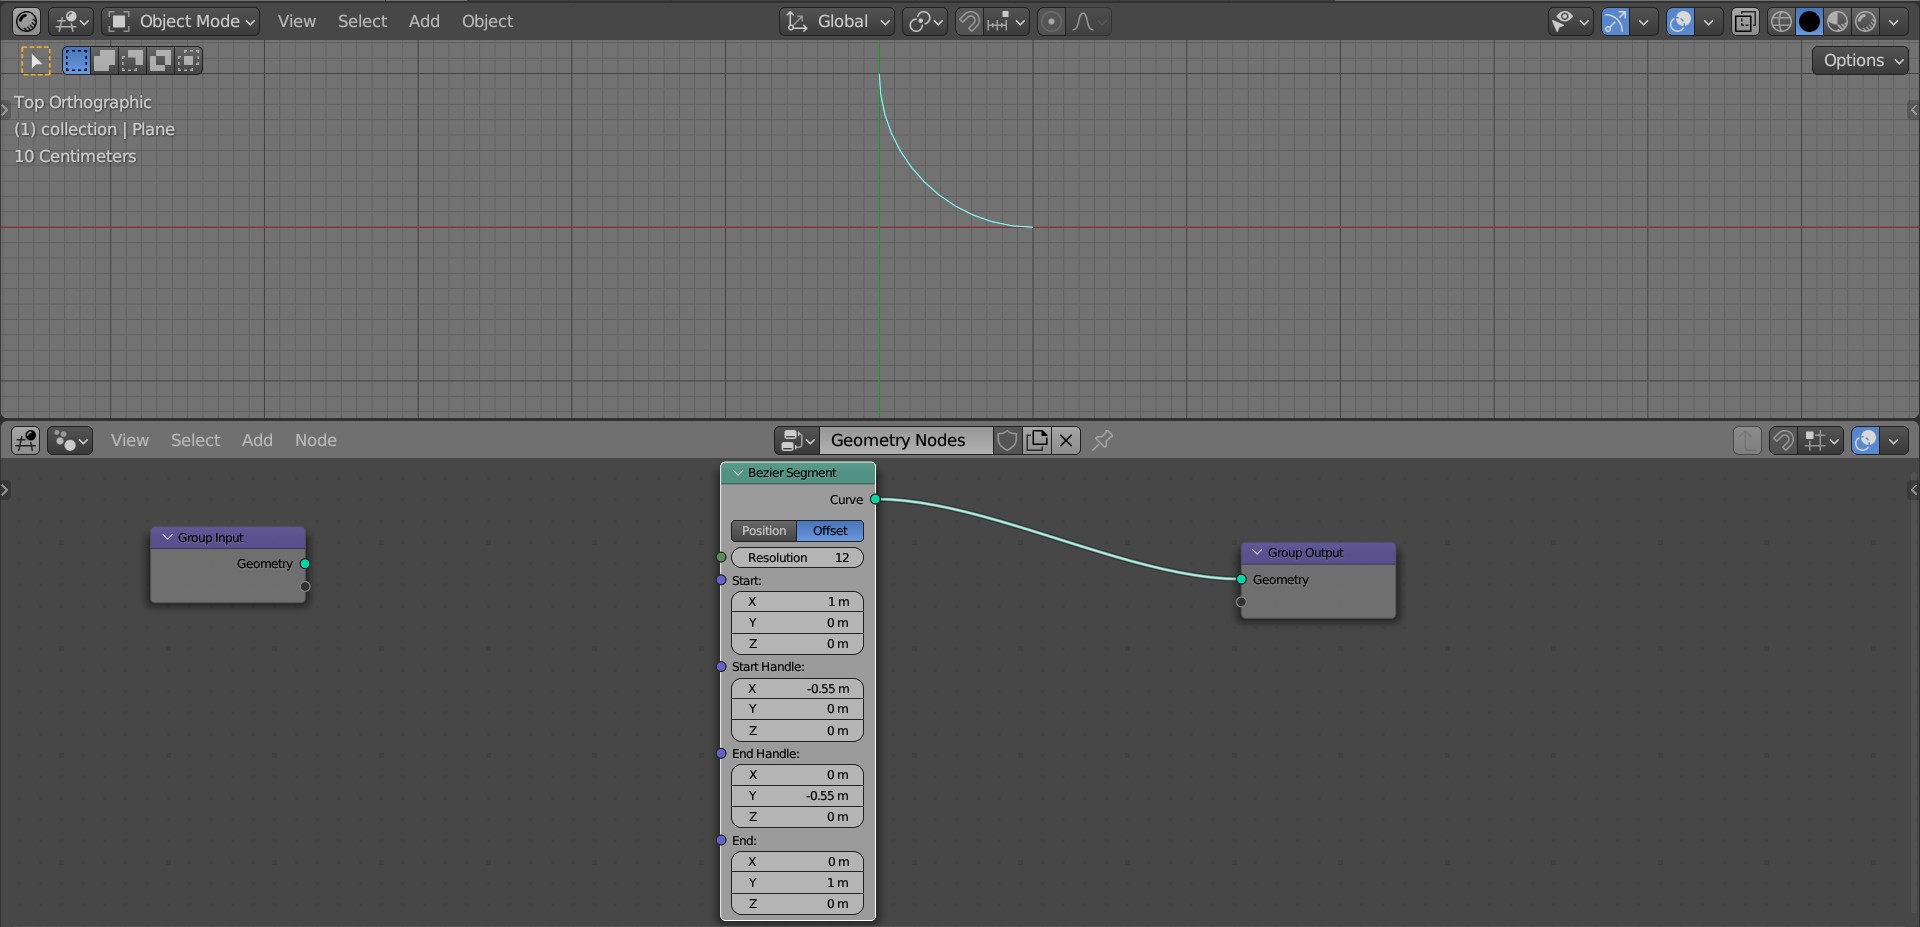
First, let’s create a separate element, from which the pattern will be formed in the future.
Add a Bezier Segment node (shift + a – Curve – Primitives – Bezier Segment) to the main node tree branch. Switch it to the “Offset” mode. Set the “Resolution” to 12.
For the start point, in the “Start” field, set the following coordinates: X = 1, Y = 0, Z = 0. For its control point, in the “Start Handle” field, set the following coordinates: X = -0.55, Y = 0, Z = 0.
For the end point, in the “End” field, set the following coordinates: X = 0, Y = 1, Z = 0. For its control point, in the “End Handle” field, set the following coordinates: X = 0 Y = -0.55, Z = 0.
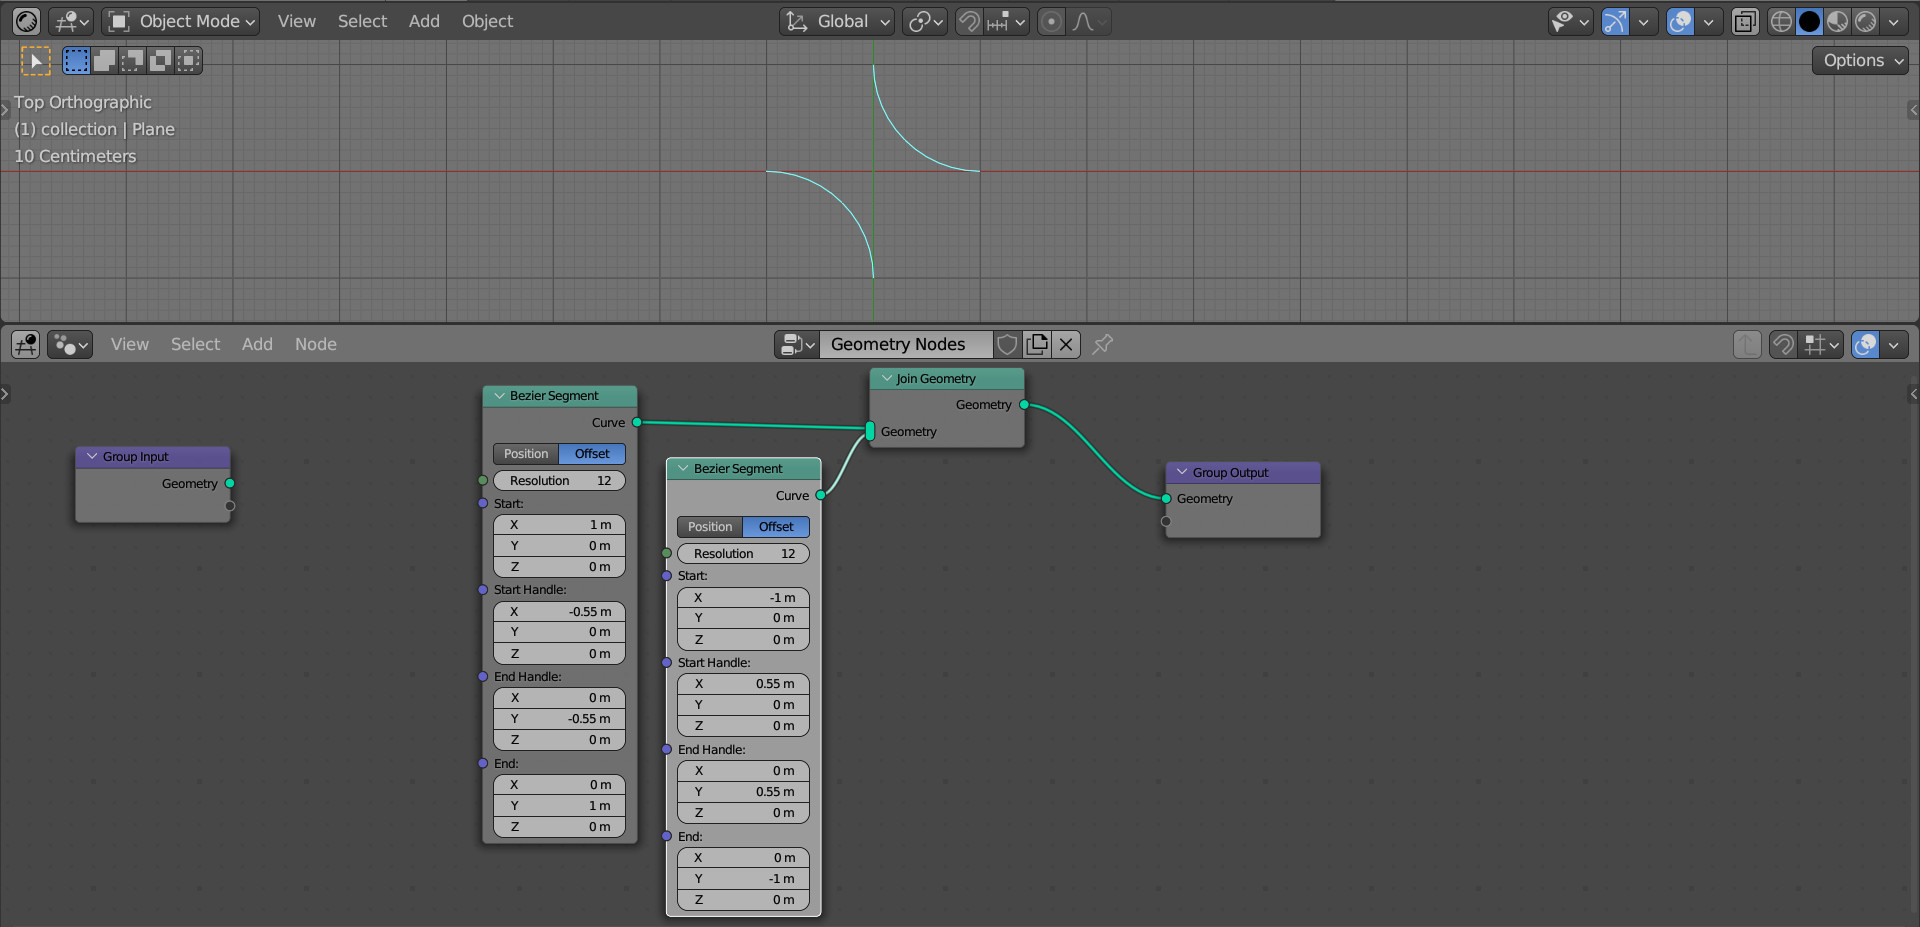
To create a symmetrical part of the pattern, duplicate the Bezier Segment node – select it and press shift + d.
Since we need symmetry, we can simply change the signs of the set values for the start, end and control points:
Start: X=-1, Y=0, Z=0
Start Handle: X=0.55, Y=0, Z=0
End: X=0, Y=-1, Z=0
End Handle: X=0 Y=0.55, Z=0
Add a Join Geometry (shift + a – Geometry – Join Geometry) node to the main branch of the node tree and connect both Bezier Segment nodes to its input to merge the two parts of the pattern into one.
To give volume to the curves, we can use the Curve to Mesh node. Add it to the main branch of the node tree (shift + a – Curve – Operations – Curve to Mesh).
Add a Curve Circle node (shift + a – Curve – Primitives – Curve Circle). This circle will serve as a profile for the curves of our pattern. Link its “Curve” output with the “Profile Curve” input of the Curve to Mesh node.
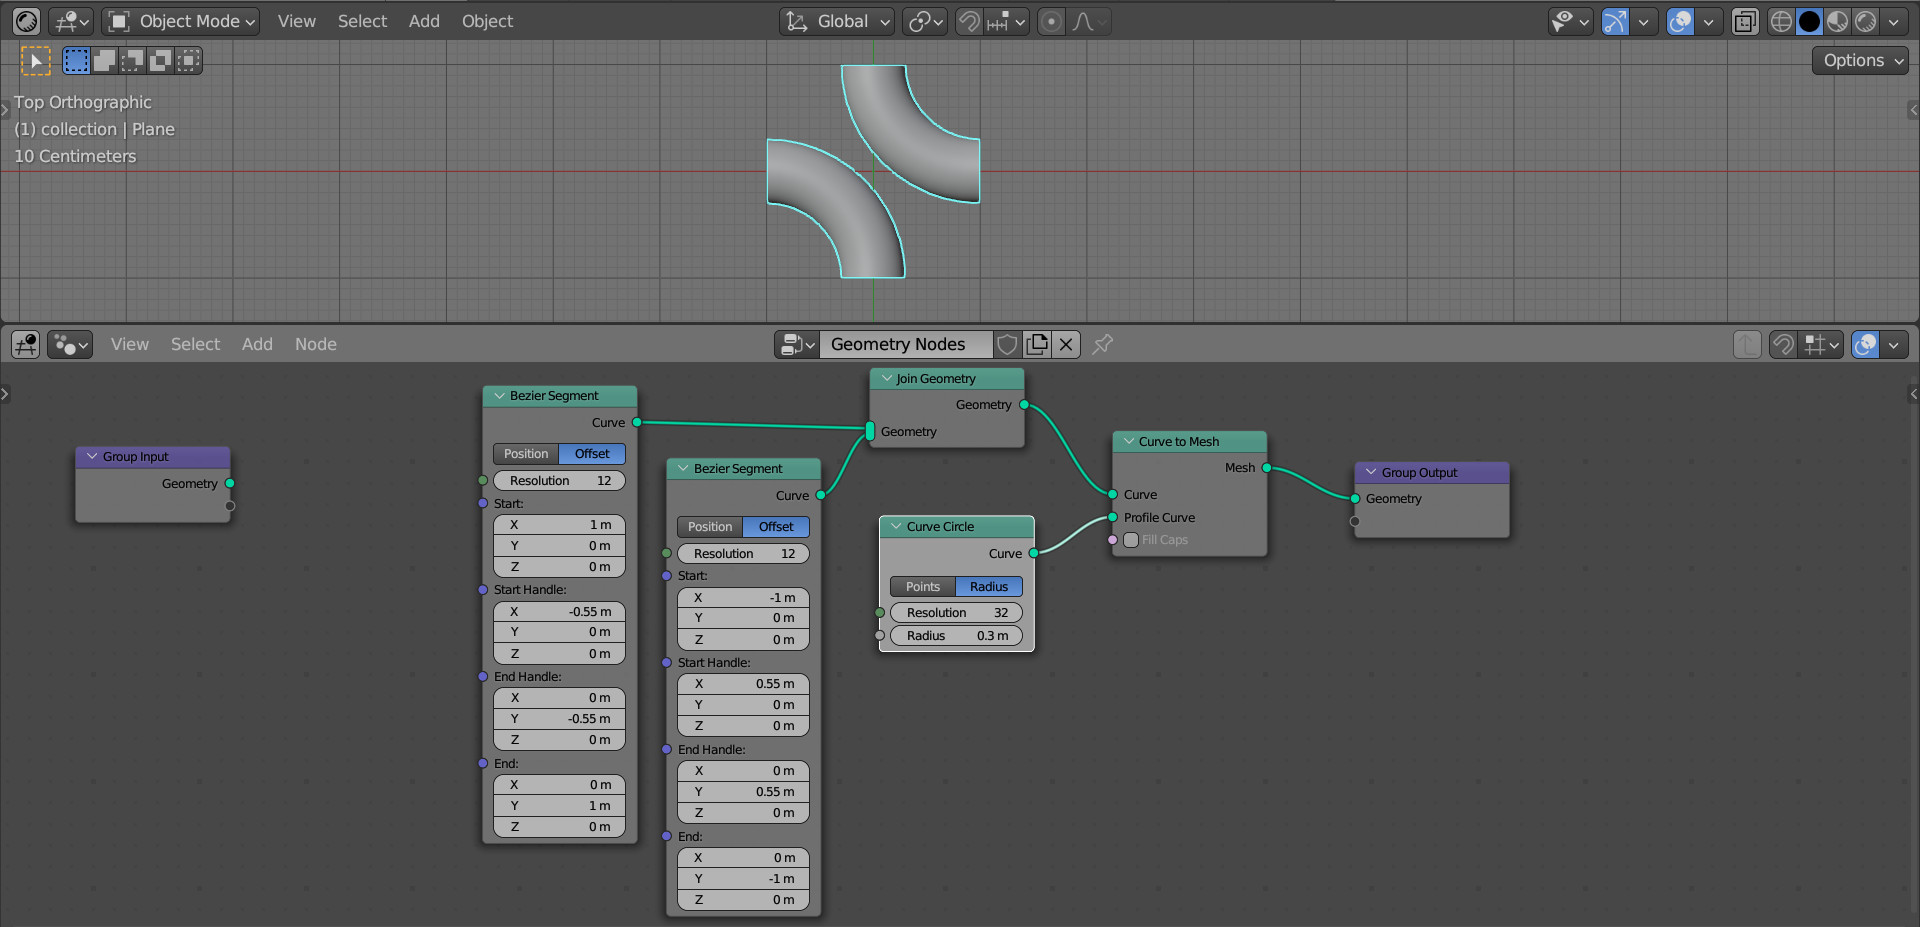
Now we have a final pattern element.
Let’s multiply it horizontally and vertically, placing the element at the points of the grid.
Add an Instance on Points node to the main branch of the tree (shift + a – Instances – Instance on Points). Switch the output of the Curve to Mesh node to its “Instance” input.
Add a Grid node (shift + a – Mesh – Primitives – Grid). Link its “Mesh” output with the “Points” input of the Instance on Points node.
Now, at each point of the rectangular grid created by the Grid node, we place an instance of the previously created pattern element.
To match the scale, in the Grid node, set the size of the grid sides “Size X” and “Size Y” to 10, and the number of grid points “Vertices X” and “Vertices Y” to 6 (10 / 2 + 1).
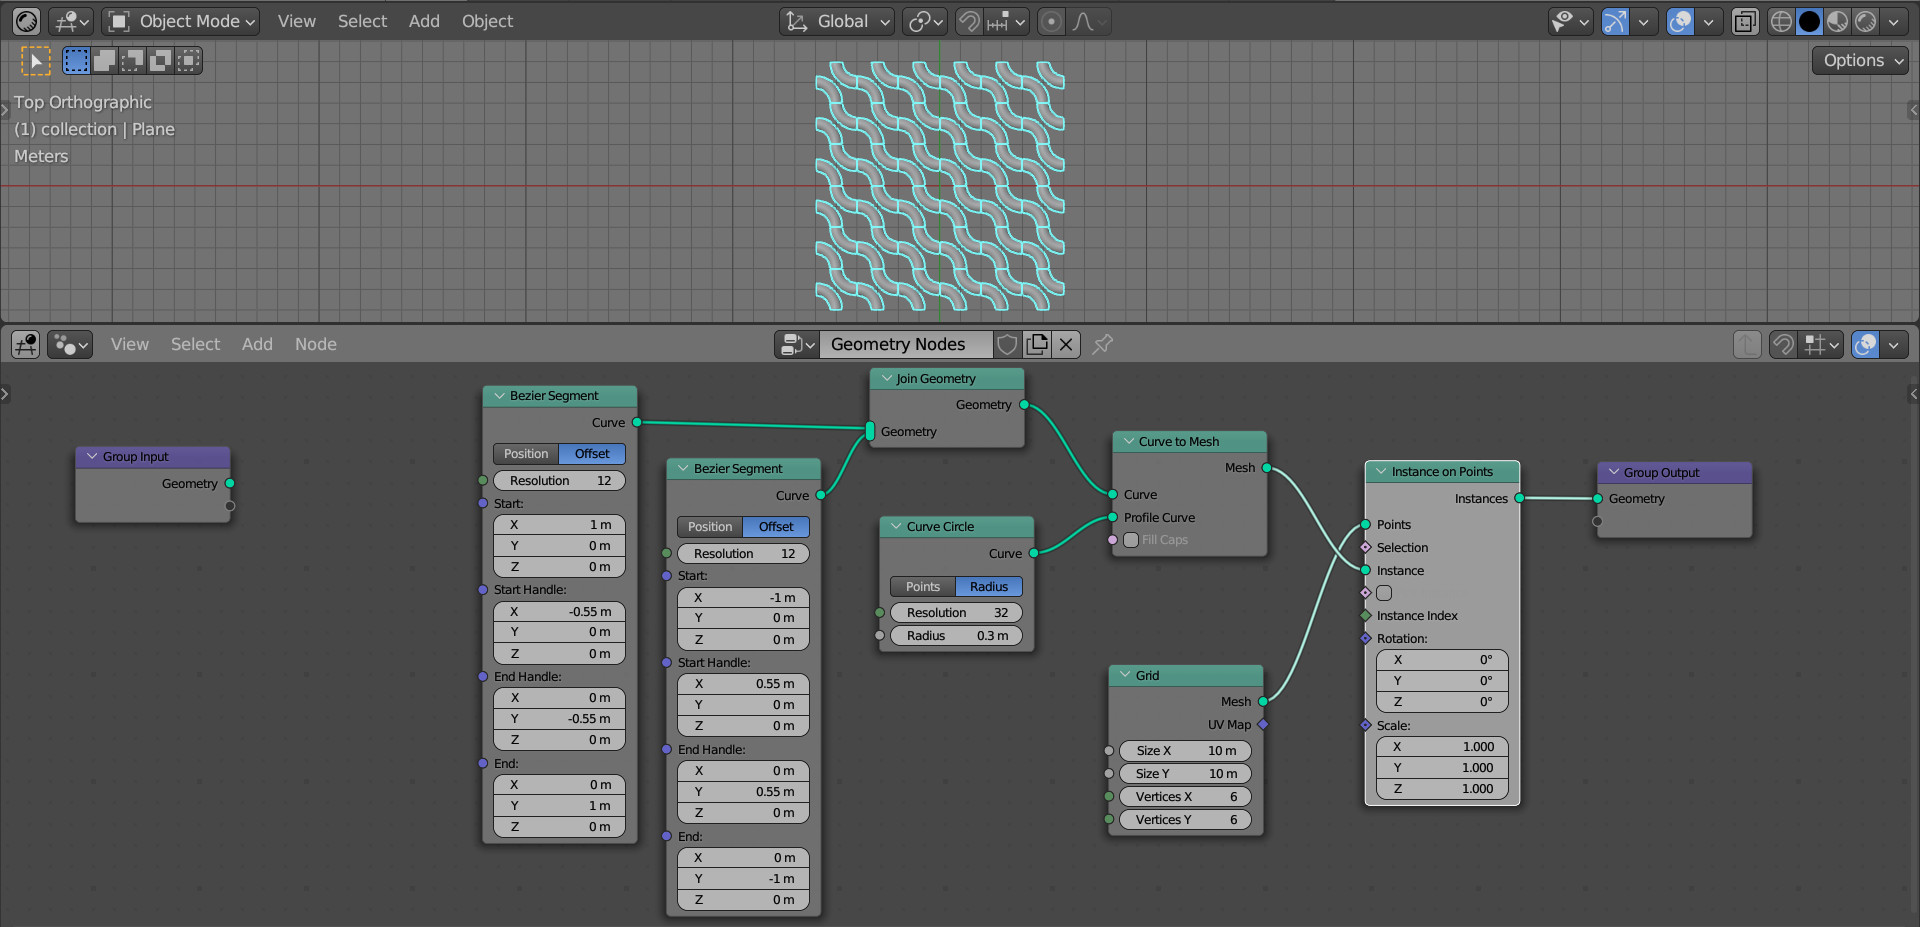
We got a uniform distribution of the pattern over the area.
To create a maze, we need to rotate each element randomly by 90 degrees around the Z axis.
Add a Combine XYZ node (shift + a – Utilities – Vector – Combine XYZ) to control the rotation for only one Z axis. Link its output with the “Rotation” input of the Instance on Points node, which is responsible for the rotation of each instance.
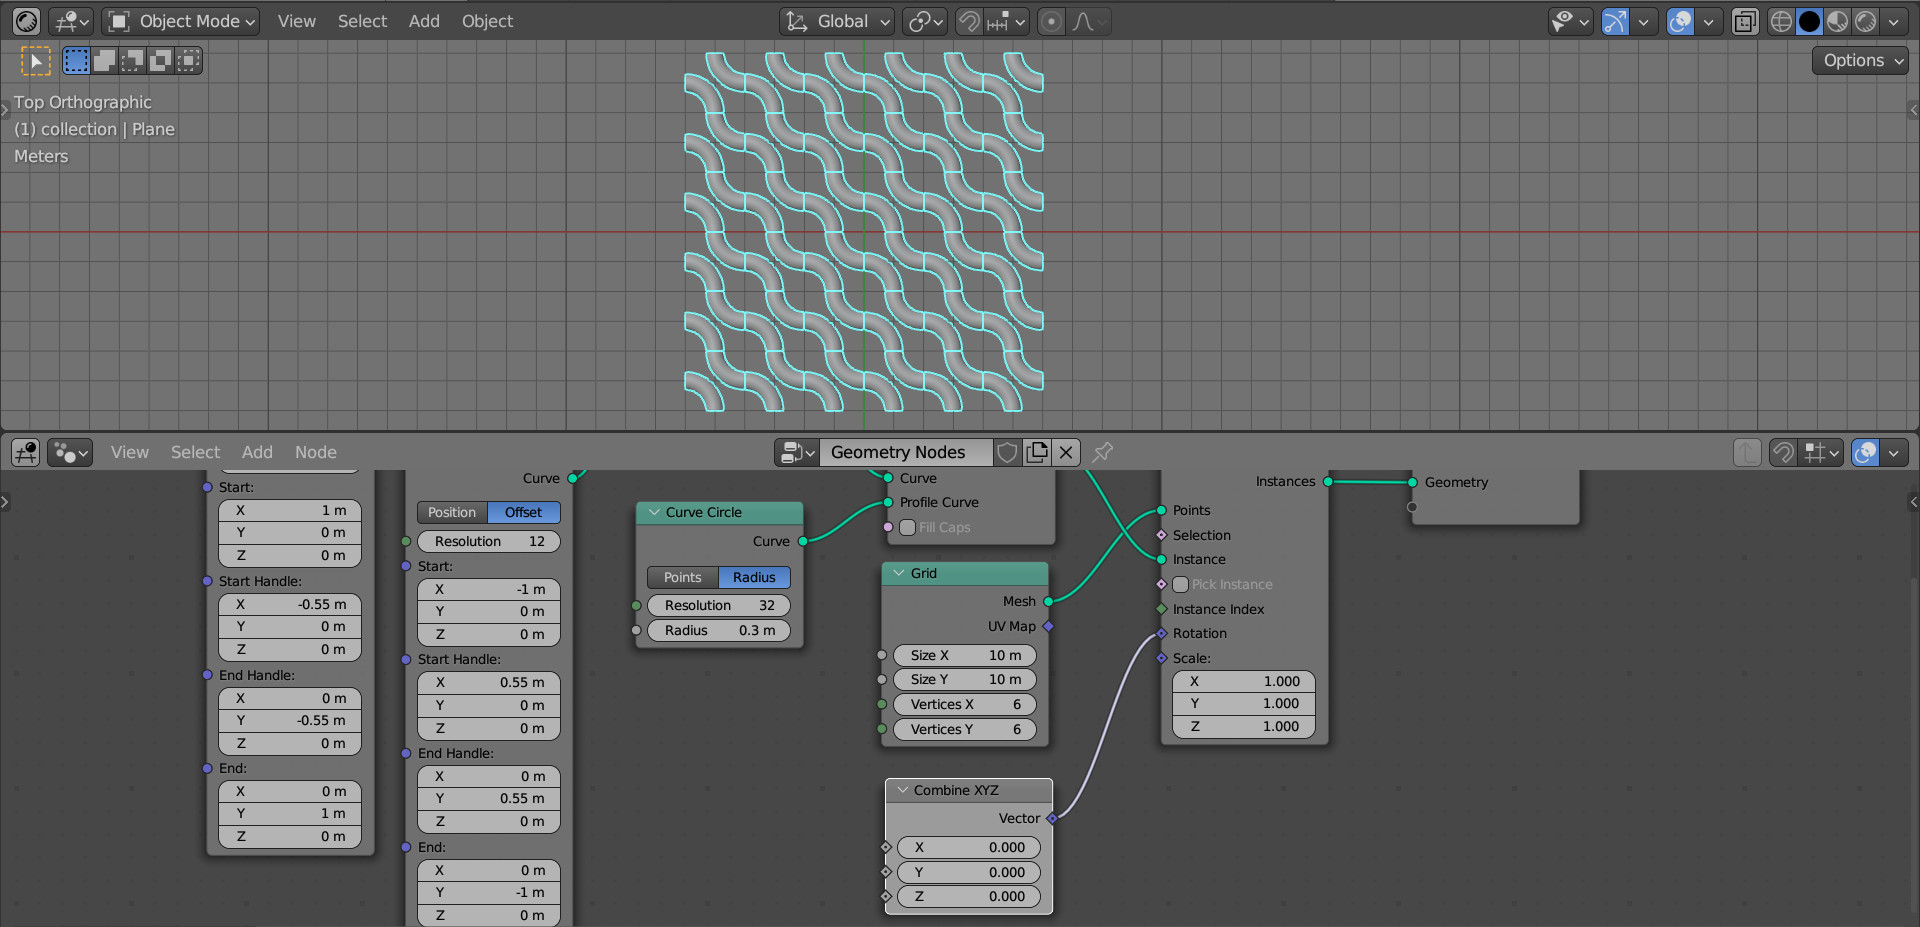
Random value – how many times we need to rotate the pattern, we can get using the Random Value node. Add it (shift + a – Utilities – Random Value), switch to the “Integer” mode, and link its “Value” output with the “Z” input of the Combine XYZ node.
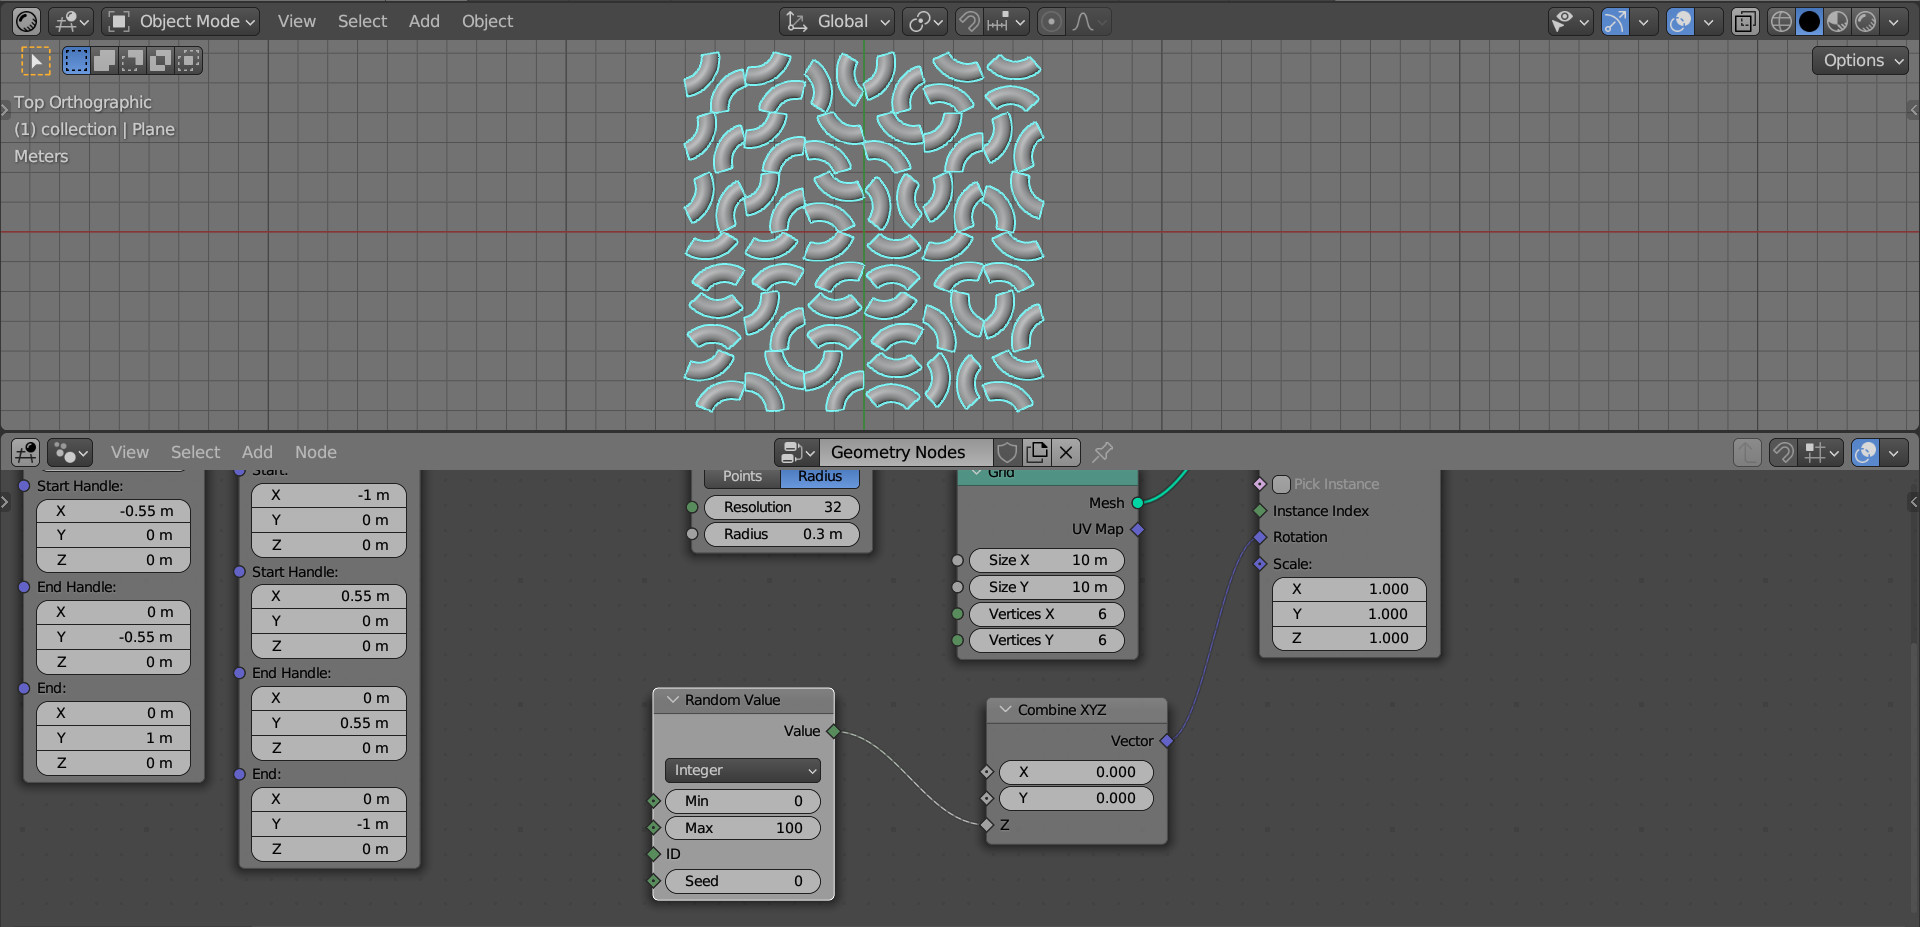
Now each element of the pattern is rotated around the Z axis by an integer. To limit the rotation to only 90 degrees, we need to multiply this number by 90 degrees. Since Blender counts rotations in radians, we will convert 90 degrees to radians and get PI/2 or 1.5708.
Insert a Math node between the Random Value and Combine XYZ nodes (shift + a – Utilities – Math – Math). Switch it to the “Multiply” mode and enter the pi/2 expression into the lower field.
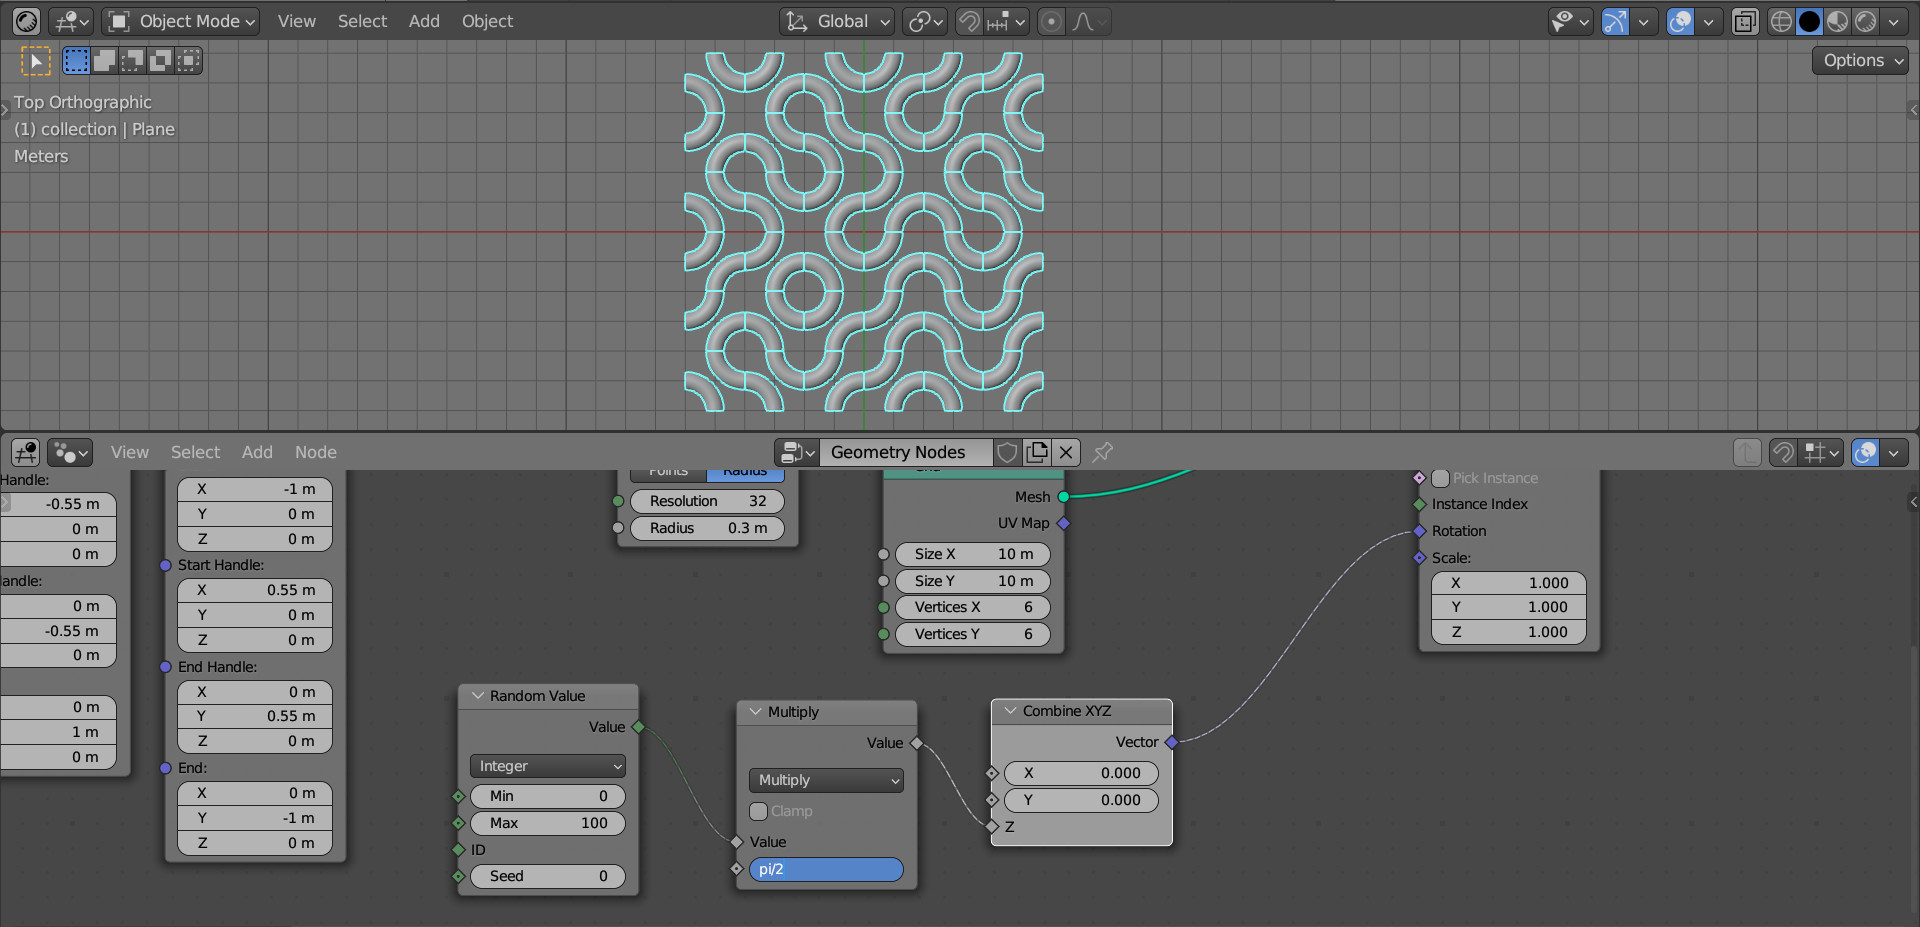
Now each random value from 1 to 100 received from the Random Value node is multiplied by 90 degrees and each element of the pattern is rotated by the result of this multiplication, that is, from one to one hundred times 90 degrees.
As a result, we got a maze.
We can choose a suitable combination by changing the value in the “Seed” field of the Random Value node.
To hide the seams, we can add two nodes to the end of the node tree. Realize Instance (shift + a – Instances – Realize Instance) will turn the pattern element instances into real geometry. And the Merge by Distance (shift + a – Geometry – Operations – Merge By Distance) will connect the matching points of individual elements to eliminate seams.

The maze pattern is ready.