With Blender Geometry Nodes we can create one-, two- and three-dimensional arrays of objects, just like we created them with the Array modifier. And even better, the arrays created with Geometry Nodes do not multiply the geometry, which affects the viewport speed, memory consumption and scene size.
 .blend file on Patreon
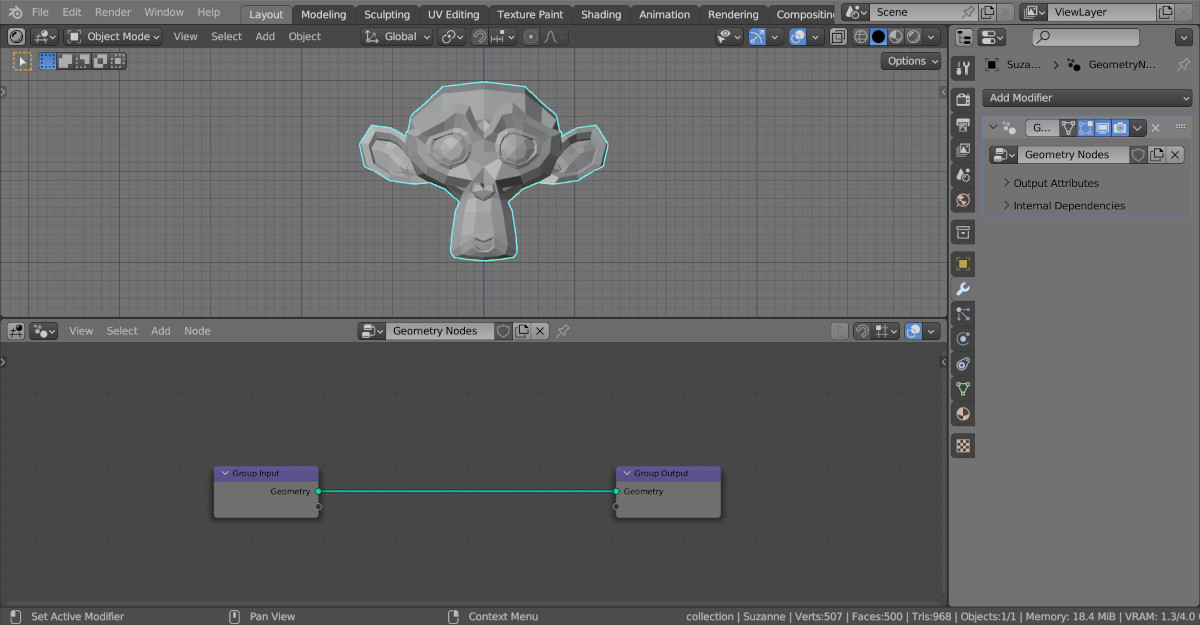
Add “Suzanne” to the scene (shift + a – Mesh – Monkey), assign a Geometry Nodes modifier to it, and initialize the node tree by clicking on the “New” button.
One-dimensional array
In order to create a simple one-dimensional array, we only need two nodes: Grid and Instance on Points.
Add an Instance on Points (shift + a – Instances – Instance on Points) node to the main branch of the node tree. Relink the geometry link from the “Points” input to the “Instances” input so that the original geometry is used as instances located at the desired points in the scene.
Add a Grid node (shift + a – Mesh Primitives – Grid). Link its “Mesh” output with the “Points” input of the Instance on Points node.
Set the value in the “Vertices X” field to 1.
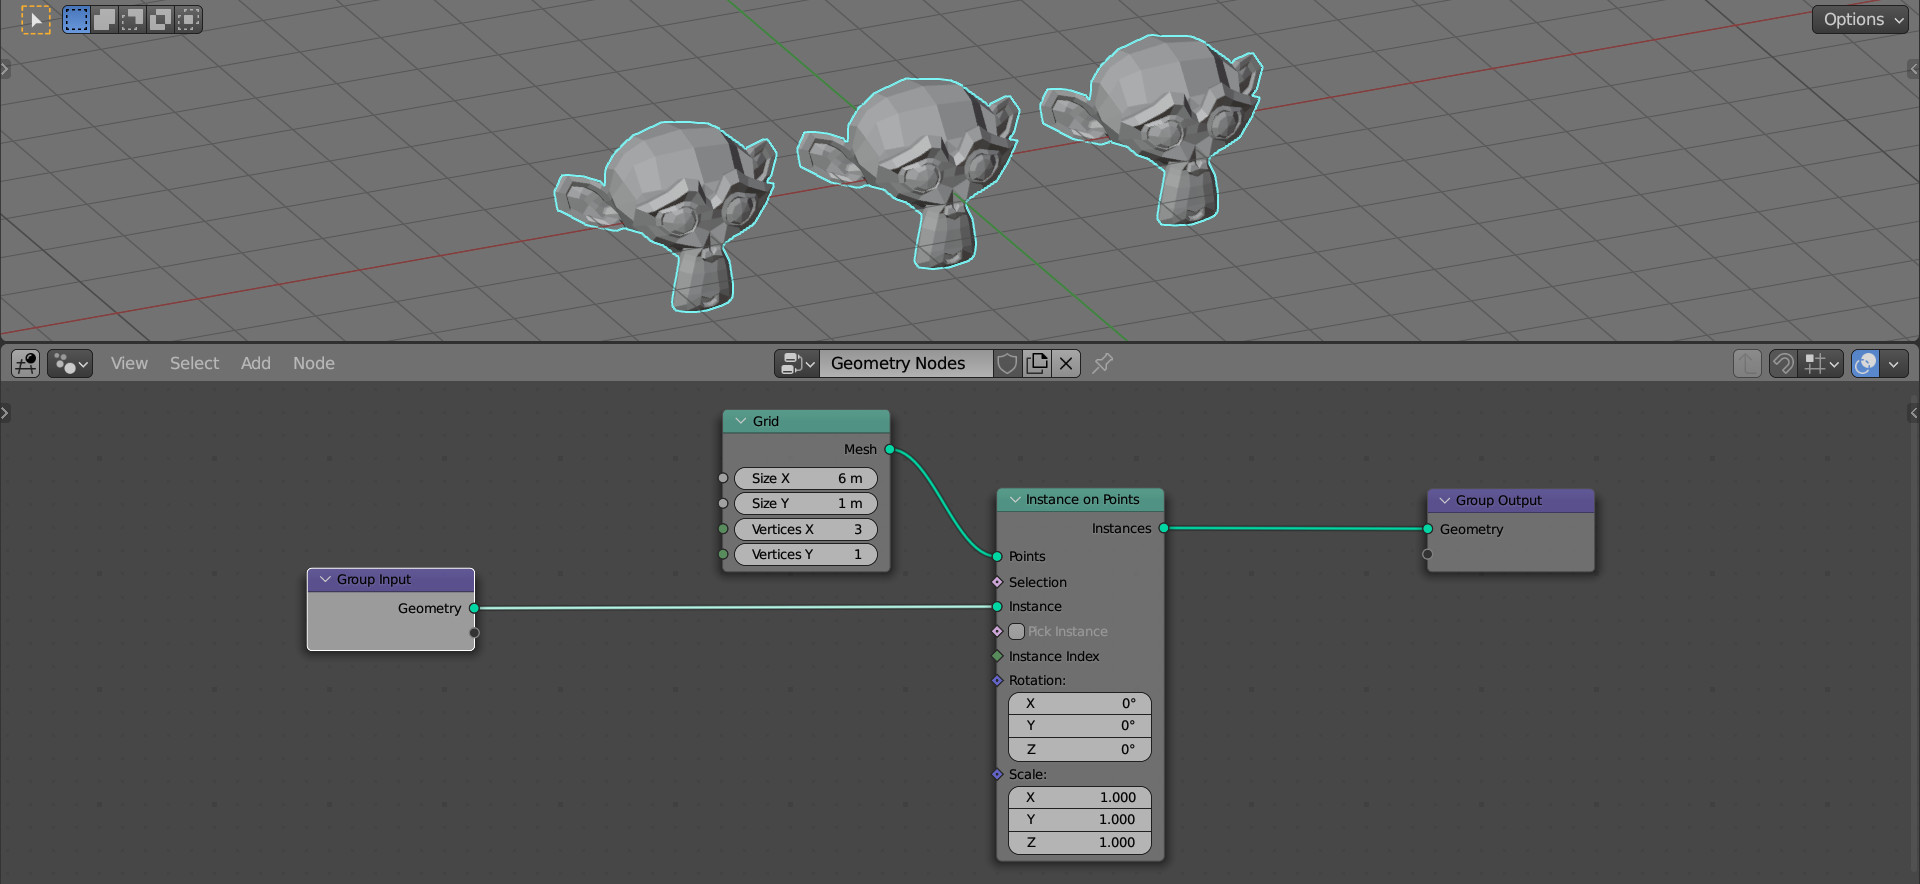
Now, we have created the simplest one-dimensional array.
With the Grid node, we create the required number of points in a row, and using the Instance on Points node, we place an instance of the original mesh geometry at each point.
The distance between array elements can be adjusted by changing the value in the “Size X” field of the Grid node. And the number of elements – by changing the value of the “Vertices X” field of this node.
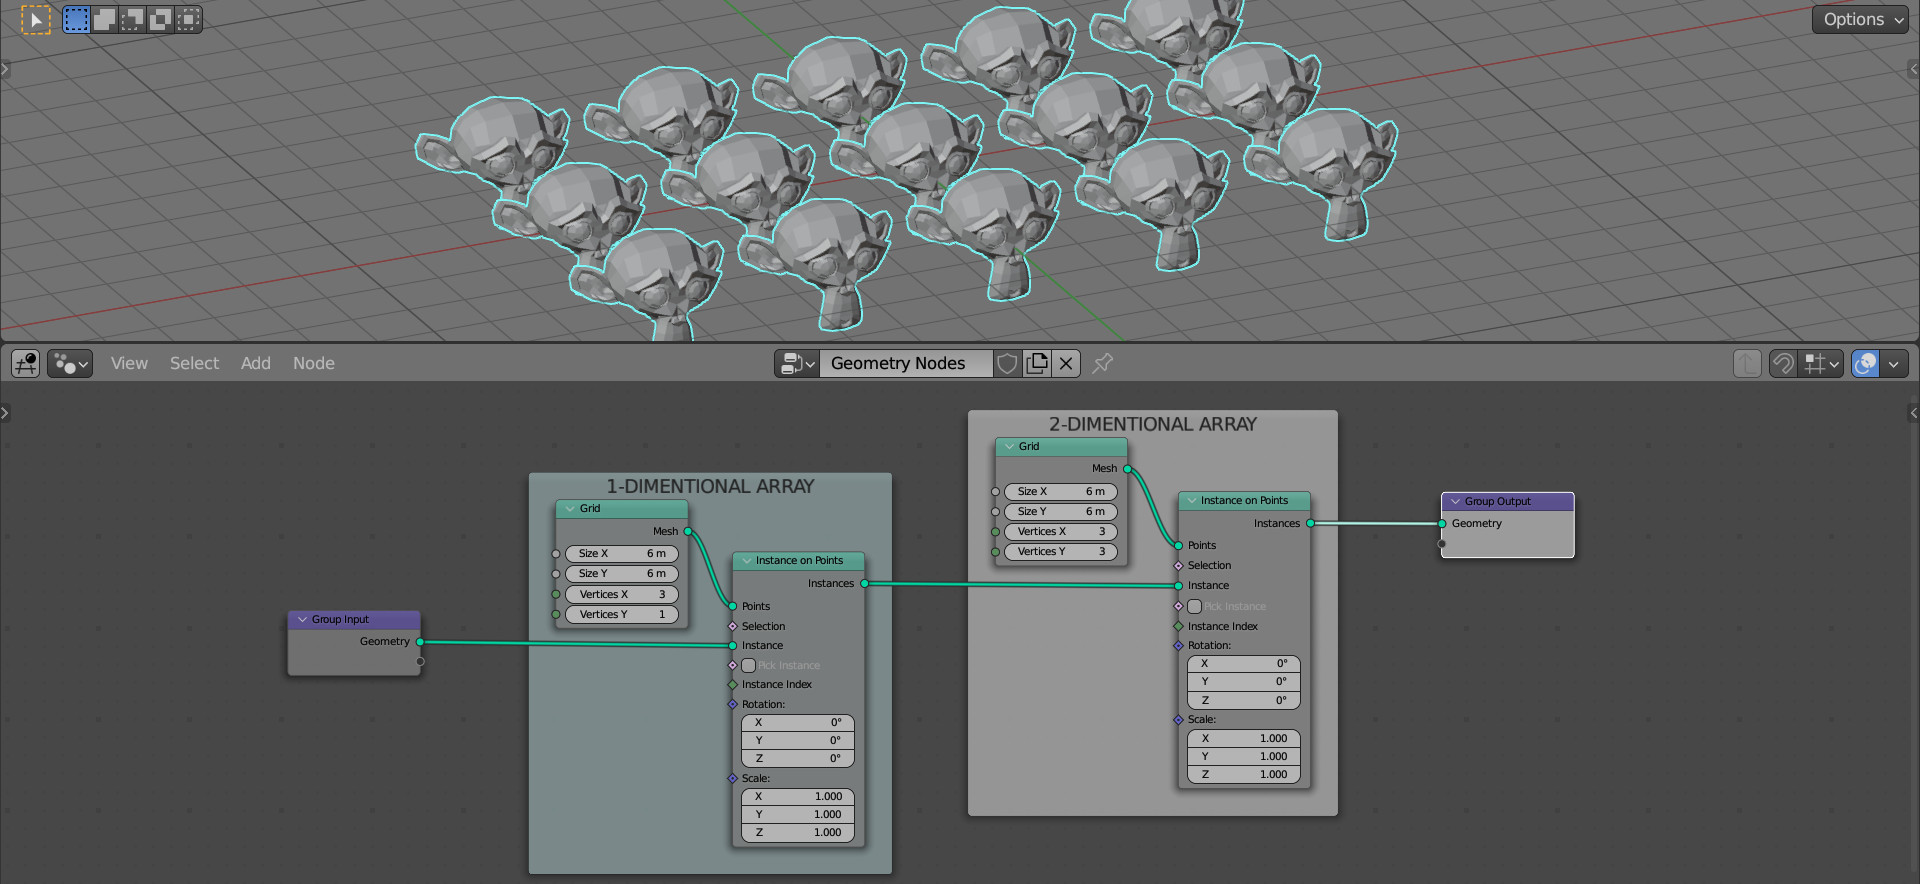
Two-dimensional array
To create a two-dimensional array, it is enough to specify a number greater than 1 in the “Vertices Y” field of the Grid node. Through it, we can adjust the number of array rows.

We can adjust the distance between rows by changing the “Size Y” value in the Grid node.
Three-dimension array
Unfortunately, the Grid node does not have the ability to create points along the third dimension of Z-axis. However, it is still possible to create a three-dimensional array.
We can use the programmer’s trick – if it is not possible to directly create a multidimensional array, make an “array of arrays”.
So, let’s create an array, each element of which is in turn an array of elements.
Take the one-dimensional array, which we made at the very beginning. And connect it to our two-dimensional array. Link the “Instances” output of the one-dimensional array with the “Instances” input of the two-dimensional array.
Now, each element of a two-dimensional array is a one-dimensional array.
But the direction of the elements of both arrays along the X-axis is the same. We need to rotate the elements of the one-dimensional array vertically by specifying a value of 90 degrees in the “Rotation – X” field of the Instance on Points node in the two-dimensional array.
To compensate the rotation of the elements themselves, in the same field of the same node in the one-dimensional array we need to specify a value equal to -90 degrees.
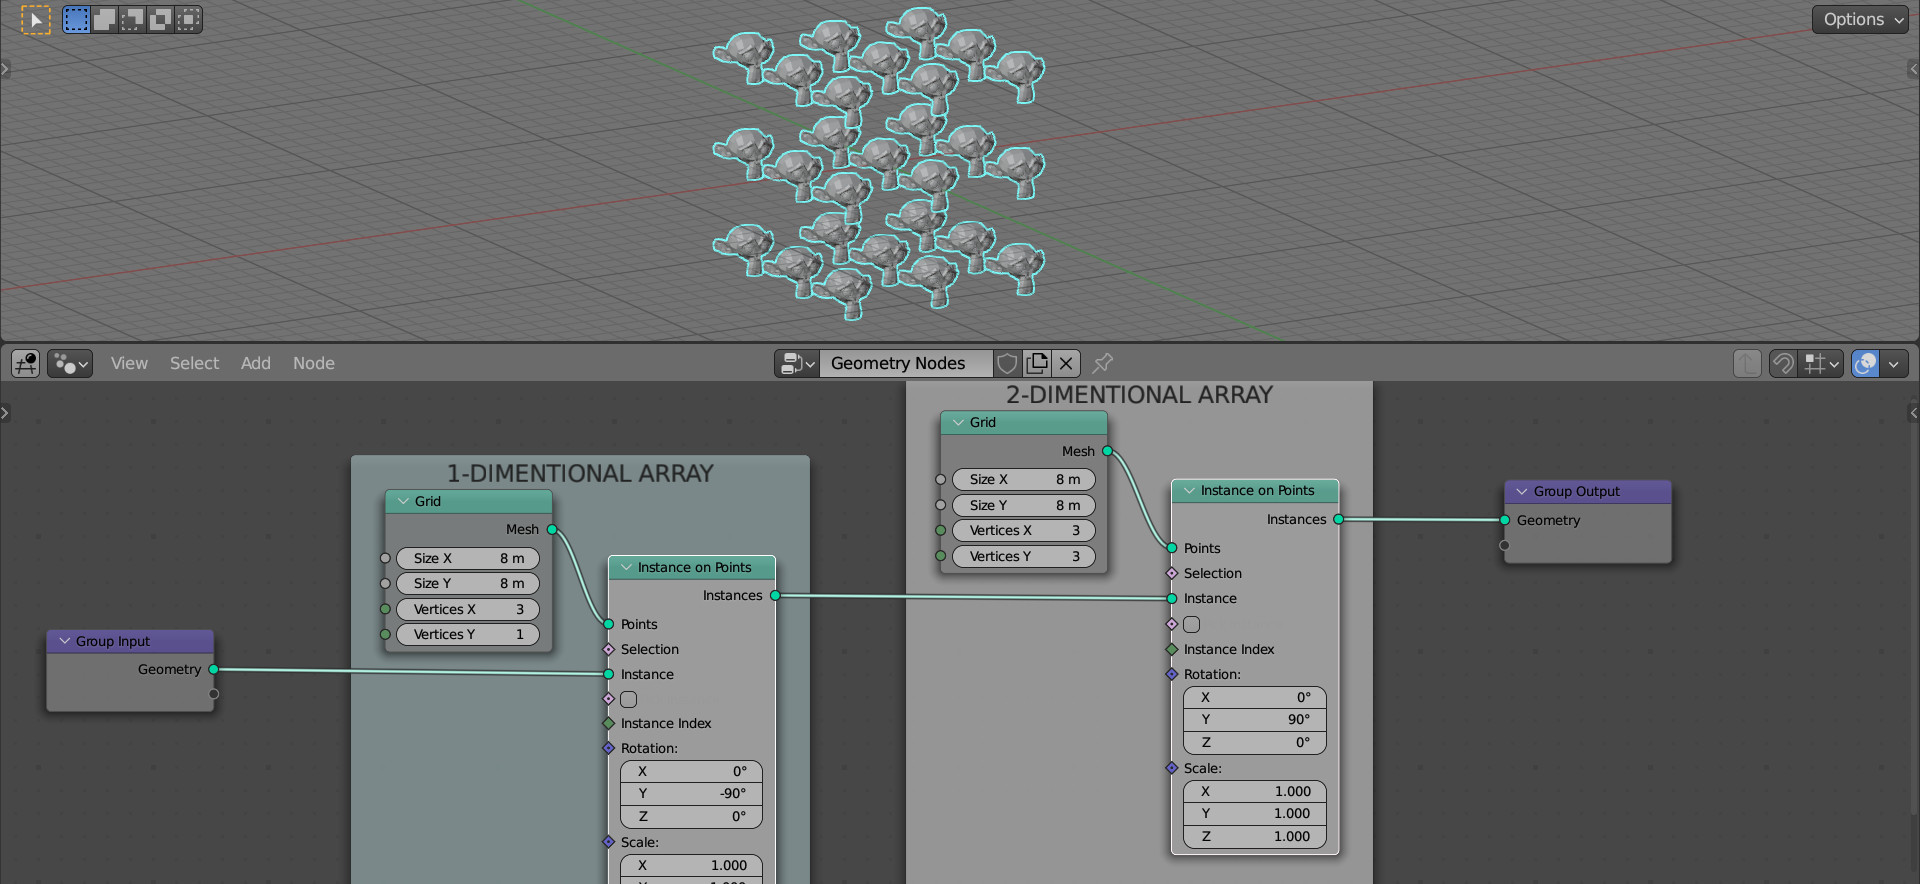
Now we have a fully managed three-dimension array.
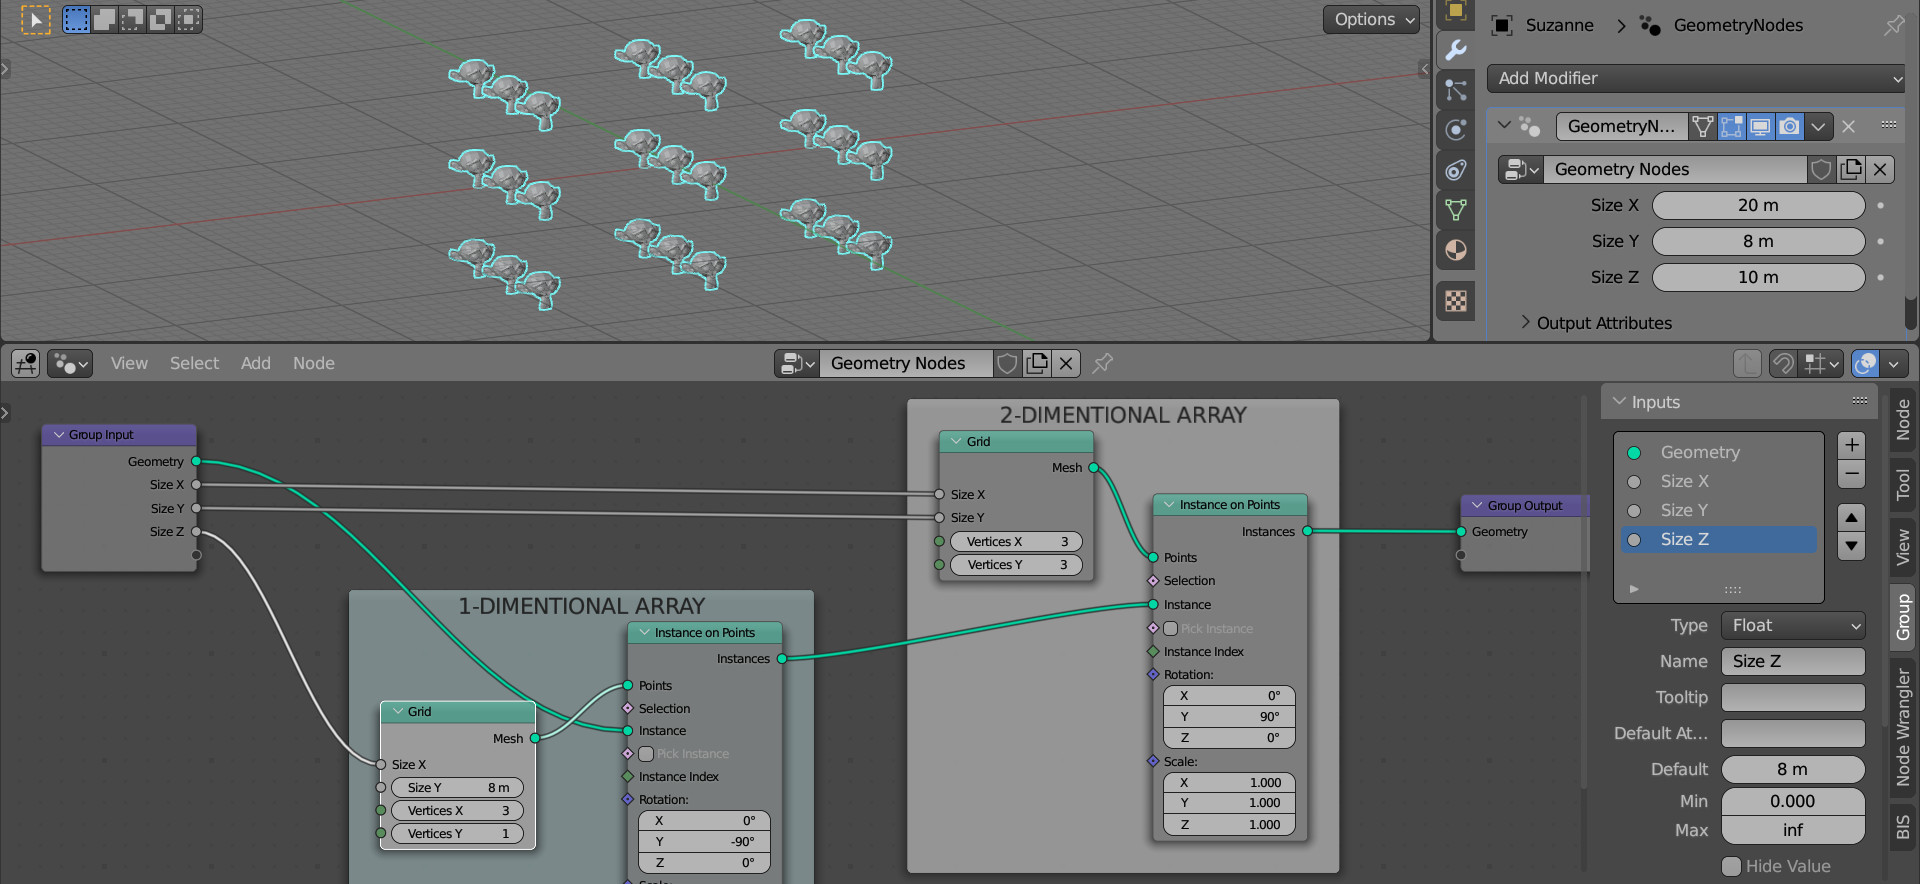
Let’s move the array controllers to the Geometry Nodes modifier parameters. Link the “Size X” and “Size Y” inputs from the Grid node of the two-dimensional array with the empty output of the Geometry Input node. Also link the “Size X” output from the one-dimensional array Grid node and rename it to “Size Z” in the toolbar.
Do the same for the “Vertices X” and “Vertices Y” outputs of the two-dimensional array and “Vertices X” of the one-dimensional array. Don’t forget to rename it too.
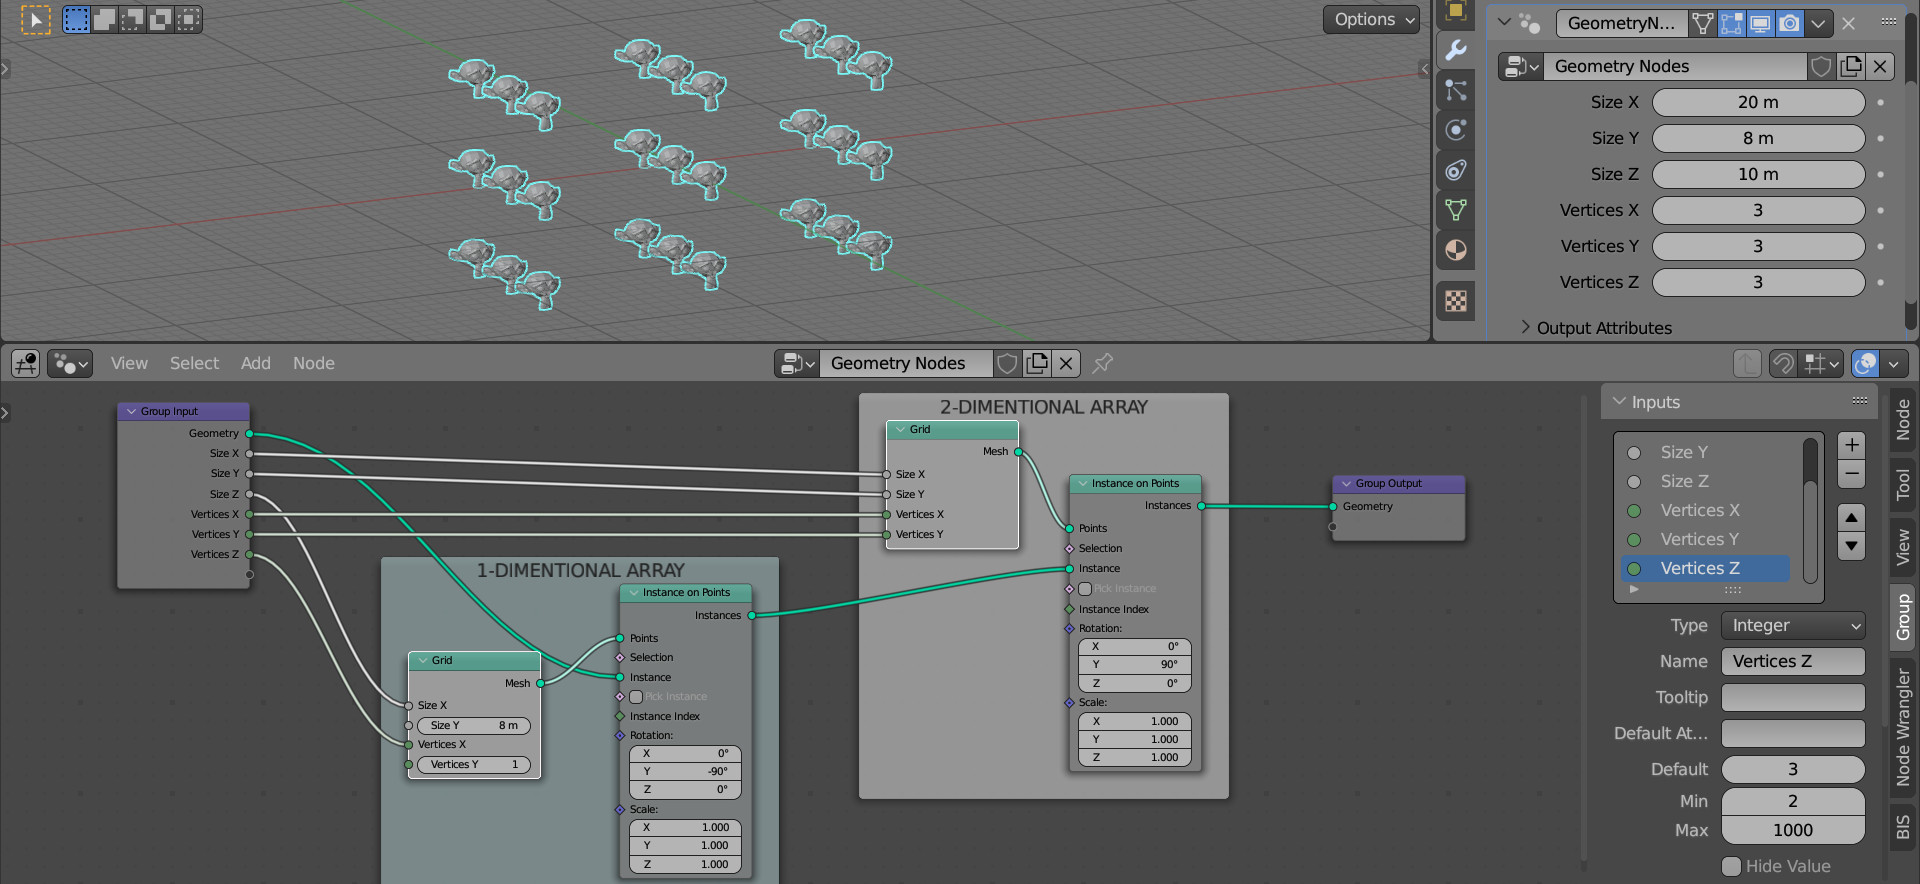
Now we can conveniently and easily control the parameters of our three-dimensional array.