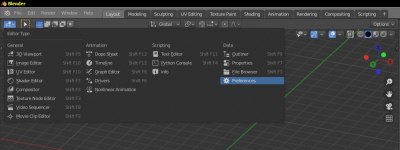
A few settings that can make your work in Blender a little bit convenient.
Viewport window
Remove the default cube. Each time you open a new scene, you delete it. Let’s do it once.
Remove the lamp light source. In most scenes, you will adjust the lighting in a completely new way.
Put the camera in a separate collection and hide it from the viewport (click on the “eye” in the outliner window), now the camera does not interfere with the scene.
Preferences window
In the main menu, click on the icon with the three dashes and uncheck the “AutoSave Preferences” checkbox. To save your settings now you always need to click on the “Save Preferences “button, but you will never break the configured system.
Interface – Temporary Window
Set the “Render In” value to the “Image editor” to render in the current window, rather than opening a new one.
The same for the “File Browser” – set the value to “Full Screen”.
Interface – Display
“Splash Screen” – uncheck not to show the splash screen. Do you really need to see it every time?
“Python ToolTips” – check this box if you need the python API tooltips
“Developer Extras” – check this checkbox to enable features that are still considered experimental, but sometimes are useful.
Save and Load – Blend Files
“Save prompt” – uncheck this checkbox not to confirm the program exit.
“AutoRun Python Scripts” – Be sure to uncheck this box for autorunning python scripts and add-ons! This is necessary if you often open third-party blend files, so that when you open the file, a script with possible malicious code is not launched automatically.
“Save version” – set to 2. This is the number of last saved copies of your project file (blend1, blend2, etc.). Usually, two copies of the project are enough to return to the previous save when “something went wrong.”
Themes – Node editor
“Node curving” – set to 5. This value is responsible for curving links in the node editor.
Navigation – Orbit & pan
“Orbit around selection” – check this checkbox. Rotation in the viewport now will always is around the selected object.
“Auto perspective” – uncheck this checkbox. This option is responsible for automatically switching the perspective-orthography mode in the viewport. Automatic switching is not always convenient, and you can switch the display mode manually at any time.
Navigation – Zoom
“Zoom to Mouse position” – check this checkbox. Now, when you scale the viewport, the focus point will always be under the mouse cursor.
System – Cycles render Device
If you have a video card with CUDA support and you use the “Cycles” render engine, select the “CUDA” and check your video card. Using a GPU instead of a CPU will greatly increase rendering speed.
Properties Window
Render – Device
For the “Cycles” render engine select the “GPU Compute” to enable rendering with GPU.
Film – Transparent
Check the header checkbox. This is necessary for rendering objects with transparency.
For the “Cycles” render engine, also check the “Transparent Glass” checkbox for proper glass transparency.
Color management
Set the “Display Device” option to “sRGB”.
Set the “View Transform” to “Standart”. You need to specially configure your scenes for the “Filmic” color space or you can get the final render with huge “yellowness”.
Enable some useful add-ons
Activate the “Node Wrangler” add-on. It makes making materials in the “Shader Editor” much easier and convenient.
Save your settings
Save your settings by pressing the “Save Preferences” button in the “Preferences” window.
Make the current scene as the default – in the main menu, select “File” – “Defaults” – “Save startup File”.
