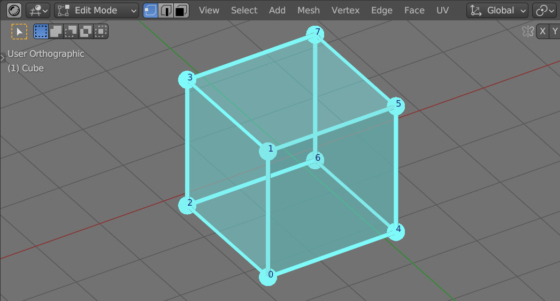
When working with mesh geometry using the Blender Python API, it is often necessary to visually control which vertices are processed by scripts and which are not. Ordinary Blender users may also find it useful to be able to navigate the mesh’s vertices by their numbers.
Enabling showing vertex indices through the settings
To enable the display of vertex indices in the 3D viewport area, we need to:
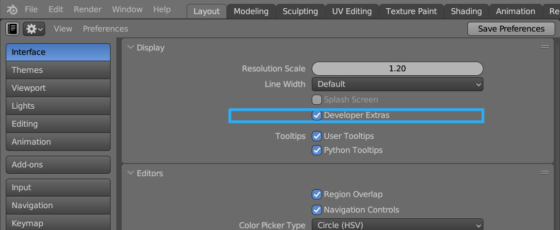
1. Open the Preferences window.
2. In the “Interface” section, in the “Display” block, on the “Developer Extras” checkbox.
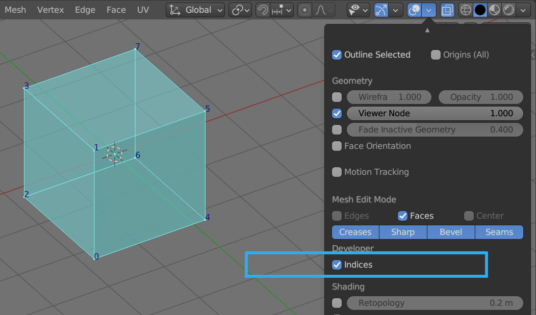
3. In the 3D viewport area, in the header menu, click the “Viewport Overlays” button. Now the drop-down window displays the “Developer” section with the “Indices” checkbox. Turn it on.
Now the vertex indices will be displayed in the viewport next to the vertices themselves.
Note that vertices indexes are displayed only in mesh edit mode and only for selected vertices.
Enabling display of vertex indices using the Blender Python API
All of these settings can also be enabled using the Blender Python API.
The “Developer Extras” checkbox can be enabled with the following command
|
1 |
bpy.context.preferences.view.show_developer_ui = True |
However, it is not necessary to enable this option for showing indices when we enable it with the Blender API. Although the “Indices” checkbox is not available in the Viewport Overlays window, we can enable the option we need directly.
To do this, we need to override the context on the 3D viewport area and activate the option to display indices through the “overlay.show_extra_indices” property
|
1 2 3 4 |
area = [area for area in bpy.context.screen.areas if area.type == "VIEW_3D"][0] with bpy.context.temp_override(area=area): bpy.context.space_data.overlay.show_extra_indices = True |
Now, indices will be displayed next to the selected points in the edit mode in the 3D viewport.

 .blend file on Patreon
