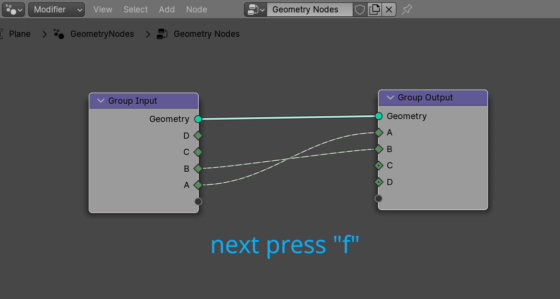
Usually we create links between two nodes by left-clicking the desired socket on the first node and drag-and-drop the link to the desired socket on the second node. This is not always convenient, especially if the nodes are located far from each other. However, in Blender it is possible to quickly connect two nodes with links based on the socket type, simply by pressing the “f” key.
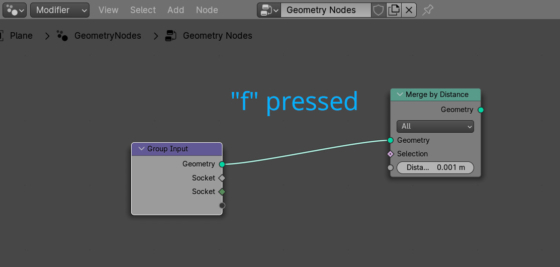
To connect two nodes with a link, we just need to select them (the second node is selected while holding down the shift key) and press the “f” key on the keyboard.
A link is always created between sockets of the same type. That is, the “Geometry” socket on the first node, through which geometry data is transmitted, will be connected to the “Geometry” socket, which receives geometry data, on the second node.
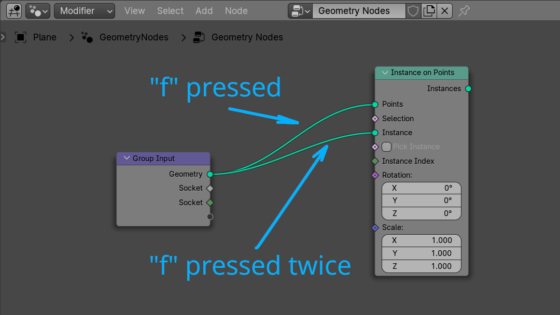
If the second node has several input sockets of the same type, each time you press the “f” key again, a new link will be created from the same socket of the first node to a new socket of the second node.
Please note that the link is created not by the socket name “Geometry” – “Geometry”, but by the type of data being transferred.
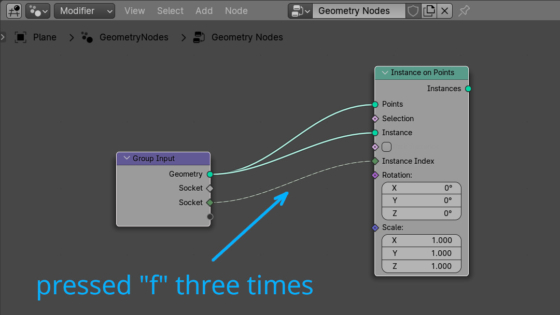
If there are no more matching unconnected sockets between the two selected nodes, further presses of the “f” key are ignored.
If there are also another pair of sockets of the same type in the first and second nodes, pressing the “f” key again will create a link between them.
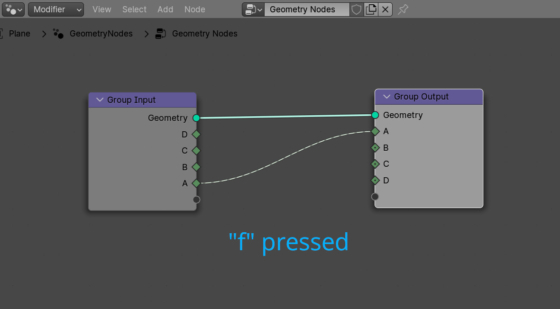
If the first and the second nodes have several sockets of the same type, then the choice of which sockets to connect with a link is made based on their names.
The first time we press “f”, the first pair of sockets with the same type and name in alphabetical order will be connected. Sockets A – A. The relative position of the sockets is not important.
The next press will connect the following pair of sockets of the same type with the same names: B – B.
And so on, with each “f” press, until all pairs of sockets will be connected.
 .blend file on Patreon