In Blender 4.1 and earlier versions, the diffuse glow effect for the EEVEE render engine was simply enabled by checking the special “Bloom” checkbox in the Properties panel on the Render Properties tab. In Blender 4.2, due to the upgrading to the new version of the EEVEE-Next render engine, this tab was removed, and now we can’t enable or disable the bloom effect with one button.
 .blend file on Patreon
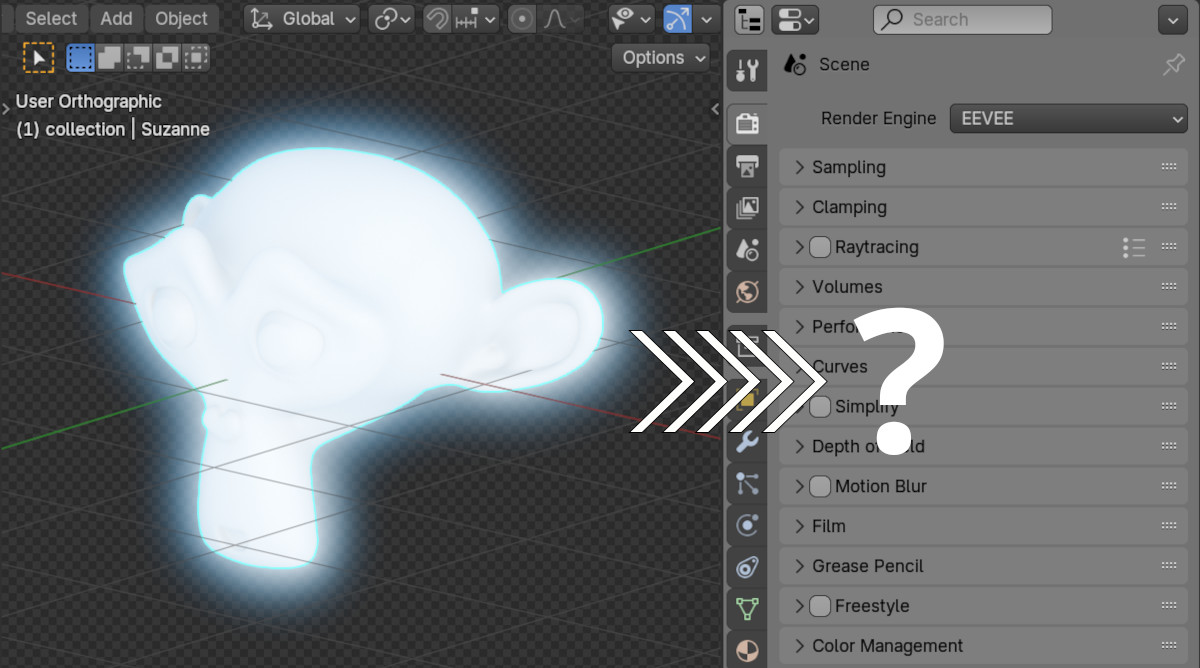
And how can we get the diffuse glow effect now?
Even when trying to enable “Bloom” via the Blender Python API
|
1 |
bpy.context.scene.eevee.use_bloom = True |
the effect itself is not enabled, although the property is still available in the API for now (most likely temporarily, and will be removed in the future).
To get the desired bloom effect, the only way is – use compositing.
For example, let’s add Suzanne to the scene (shift + a – Mesh – Monkey). Open the Shader Editor area, click the “New” button to create a new material (leave the nodes by default) and set the color and emission strength in the “Emission” subsection of the Principled BSDF node.
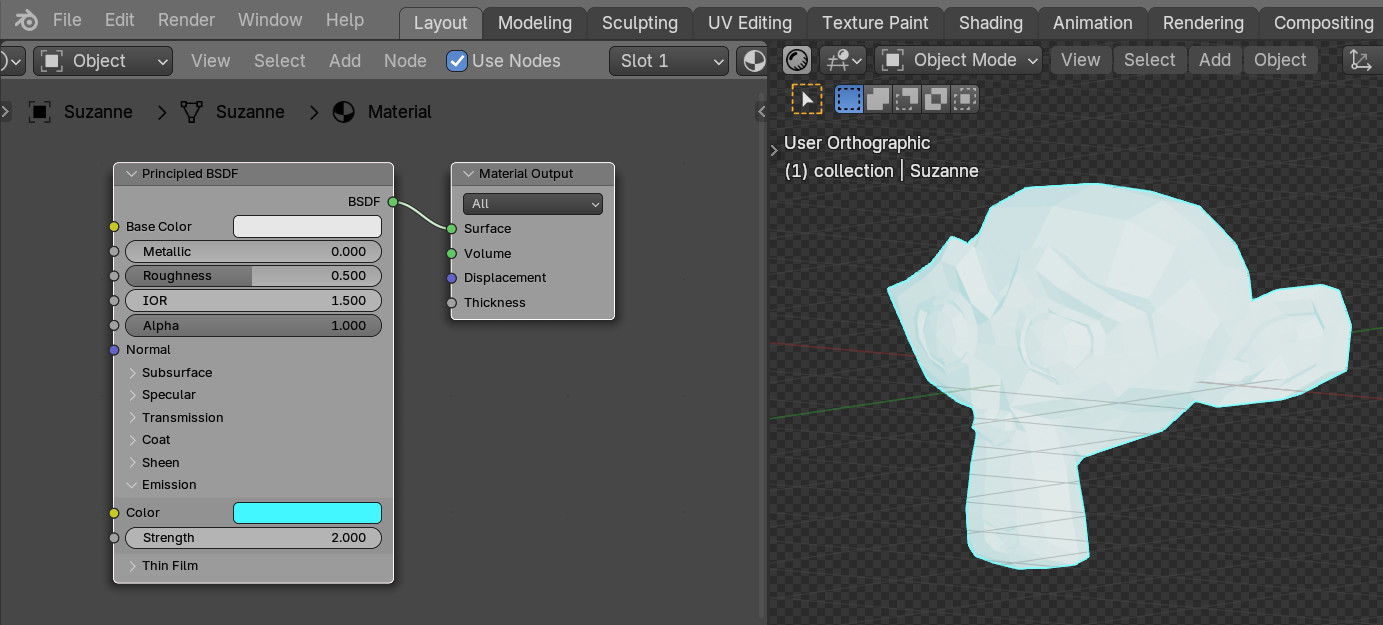
Switch the viewport display to the rendered mode (z – Rendered).
Now, in order to add the bloom effect, we will use compositing.
Switch to the “Compositing” workspace and on the “Use Nodes” checkbox to enable it.
Add the Glare node (shift + a – Filter – Glare) into the default node tree. Switch it to the “Bloom” mode.
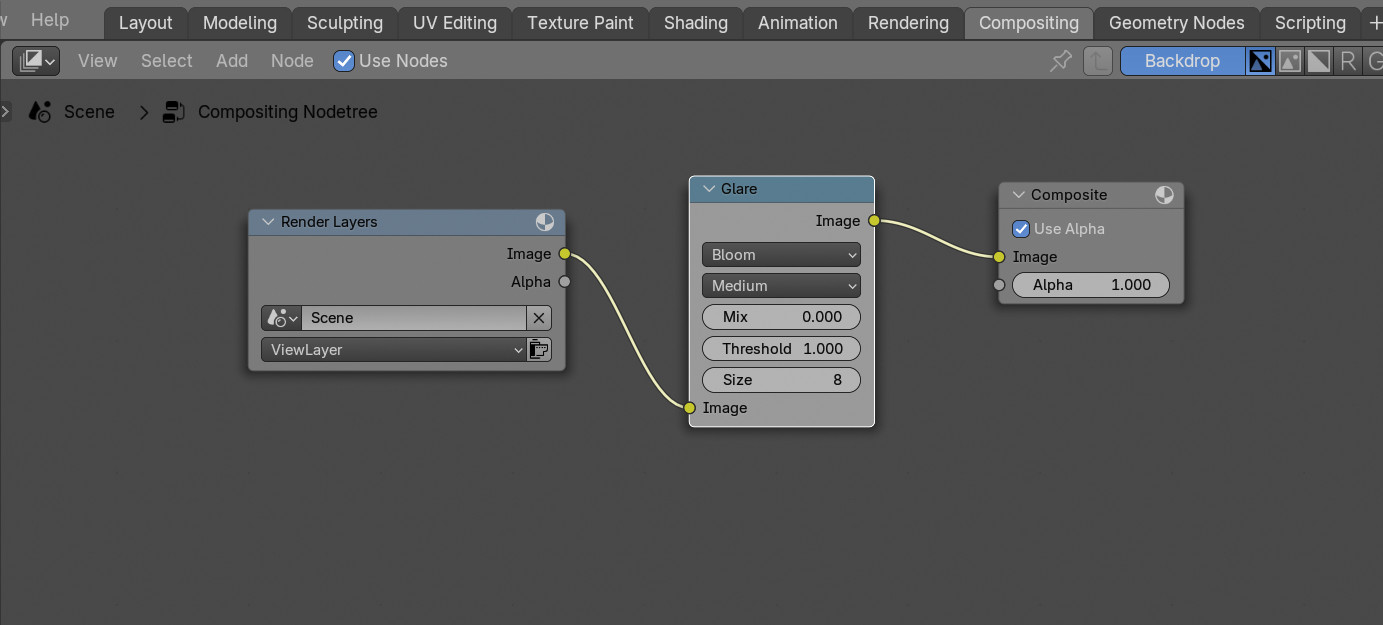
We will change the “Threshold” and “Size” parameters later to adjust the size and attenuation of the bloom with distance.
Switch back to the “Layout” workspace.
Externally, nothing has changed, but if we press the F12 key right now to execute the render, we will see the bloom effect we need around Suzanne.
In order for the bloom to be displayed in the 3D viewport, which will make it much more convenient to configure, we need to switch compositing to real-time mode.
Expand the 3D viewport shading display settings (Shading) and in the “Compositor” subsection, switch to the “Always” value.
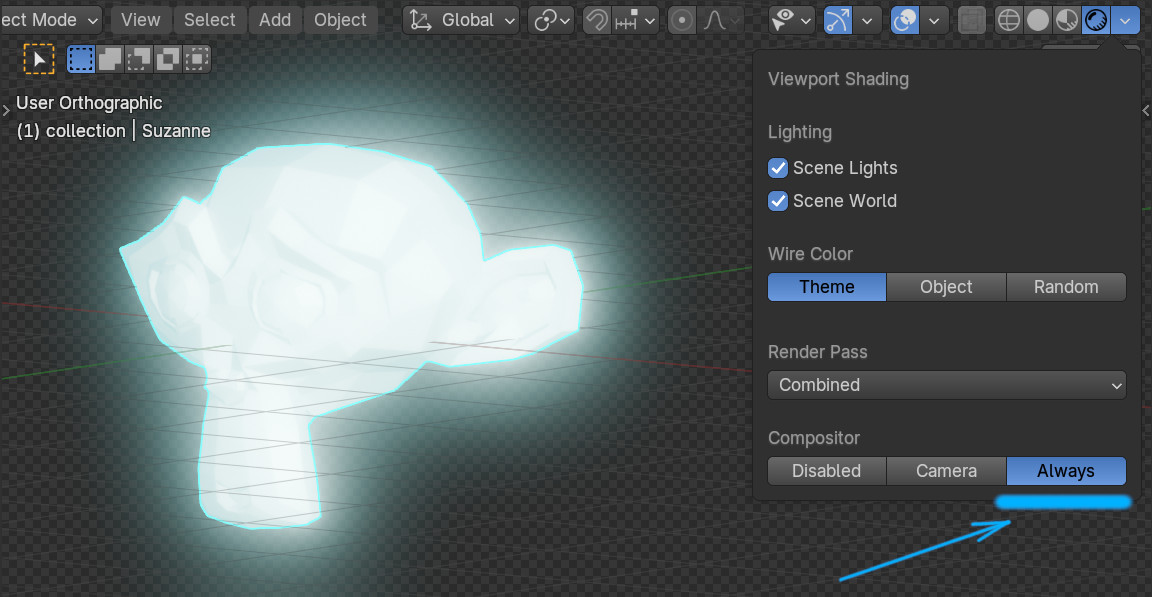
Now we can see the bloom effect around the object right in the viewport. And we can interactively configure it by changing the parameters in the Glare node. For example, set the “Size” parameter to 7, and the “Threshold” to 3.2.
Only the material settings of the object itself are now responsible for the bloom color, in our example – the “Color” parameter of the Principled BSDF node.
It should be noted that this order of creating a bloom around objects has now become the same for both main Blender render engines – EEVEE and Cycles. In both render engines, it works the same now.
Really helped me make my models that include Bloom after the switch from 4.1 to 4.2!