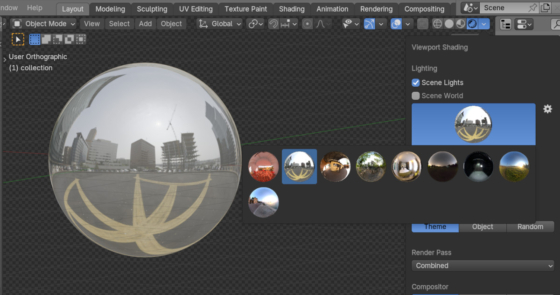
The Blender distribution includes several basic HDRI light maps that we can select from the “Shading” menu of the 3D Viewport area and use to set up fast lighting in the Material Preview or Rendering modes.
Blender has an internal mechanism for adding additional HDRI maps to the system.
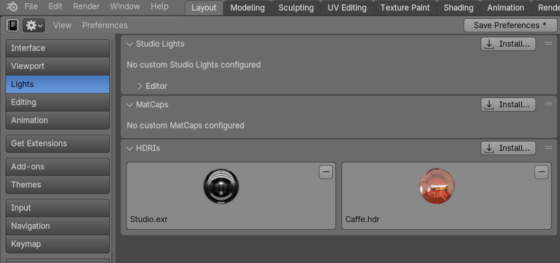
To add a new HDRI light map, we need to:
- Open the Preferences area;
- Switch to the Lights tab;
- In the HDRI’s subsection, click the “Install” button and specify the desired file with the light map.
Light maps added in this way become available for using in the scene, but the files themselves are placed in the user directory
|
1 |
c:\Users\_USER_\AppData\Roaming\Blender Foundation\Blender\4.2\datafiles\studiolights\world\ |
This is not very convenient if we have, for example, a portable version of Blender installed on a flash drive or removable disk.
We may also want to edit, replace or delete system HDRIs.
It is very easy to get the location of system HDRIs – they are placed in the directory where the Blender is installed:
|
1 |
_BLENDER_INSTALLED_DIR_\4.2\datafiles\studiolights\world\ |
Each HDRI in this directory can be edited or deleted if we need. And we can simply copy new HDRIs to this directory, after which they will be available for using in scene lighting. After copying new light maps here, we may need to restart Blender to make them available in the UI.
Paths to the location of system light maps in Linux/macOS operating systems:
Linux, depending on the installation location:
|
1 |
/opt/Blender4.2/4.2/datafiles/studiolights/world/ |
or
|
1 |
/usr/share/Blender/4.2/datafiles/studiolights/world/ |
macOS:
|
1 |
/Applications/Blender/Contents/Resources/4.2/datafiles/studiolights/world/ |

