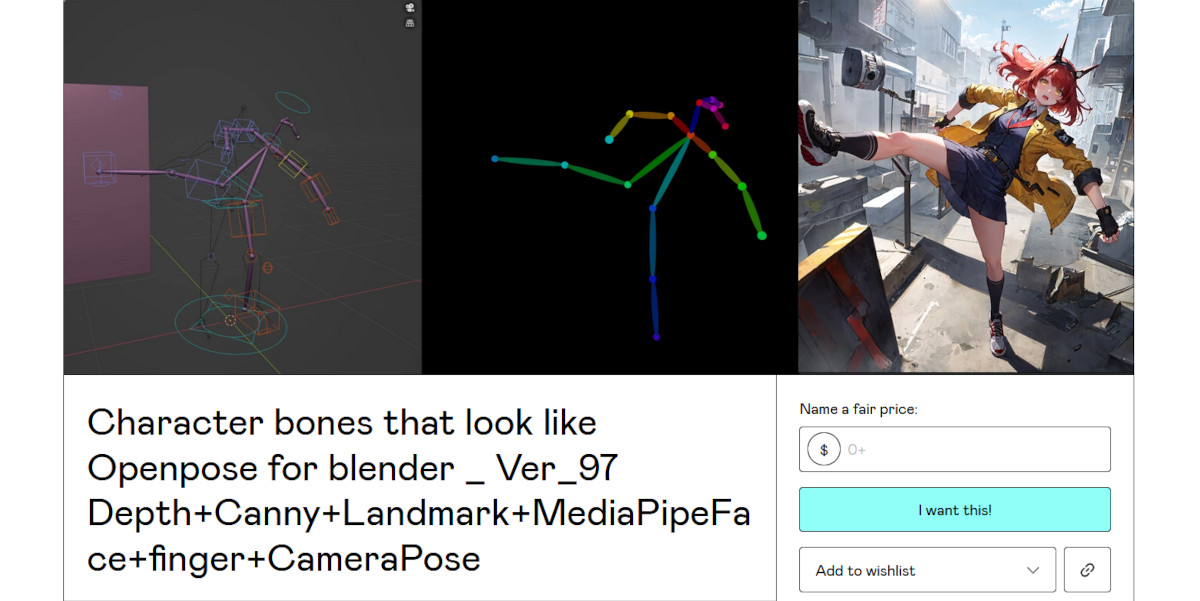
Control-net is one of the tools for simplifying image creation using neural networks / AI image generators. Control-net allows specifying a source image, on the basis of which the neural network will create a new generative image, preserving the general form and content taken from the specified source. The “Character bones that look like Openpose” scene for Blender allows quickly create such source images for further use in the AI generation workflows.
 .blend file on Patreon
Author: toyxyz
Link for download: https://toyxyz.gumroad.com/l/ciojz
The scene for Blender (.blend file) is published on Gumroad and is available for download at the 0+ rate. This means that the file can be downloaded and used absolutely for free. To download it for free – put 0 in the price field. If you want to thank the author, specify the amount you want to donate when purchasing in the price field.
After completing the order, scroll down the list of files and download the latest version. Today it is “OpenPoseBonse_V97”.
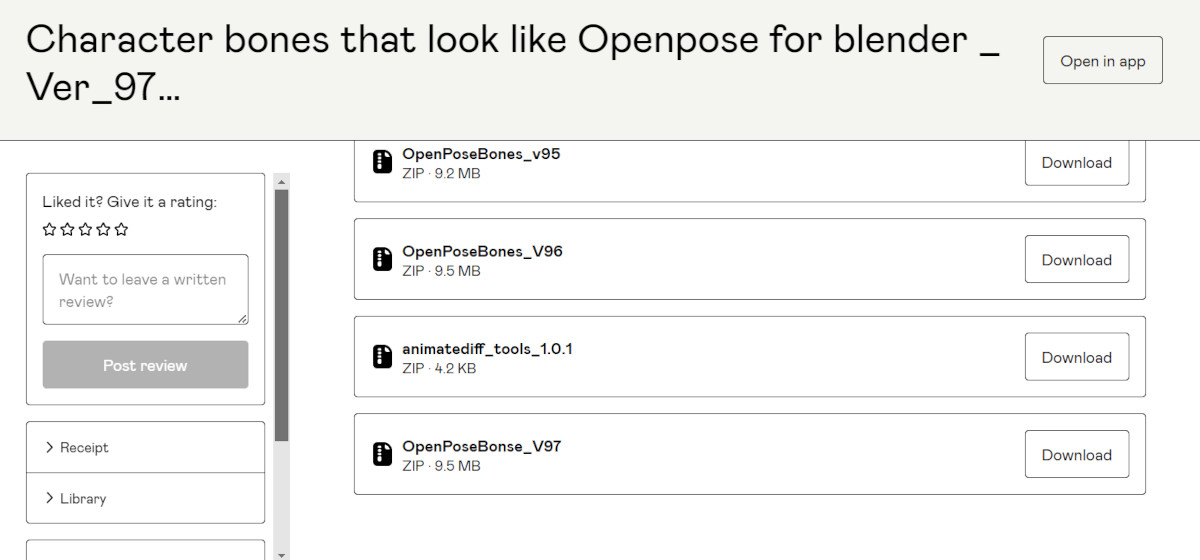
Open the downloaded archive. Here, we need only the “Openpose_bones_ver_097.blend” file. The rest of the files are additional tools that can also be very useful, however, just for creating images for control-net, the main scene will be enough.
Note: the specified .blend file is for Blender version 3.5 and higher.
It is also important to mention that this scene creates control-net source images for humanoid characters. With it, you can create sources for people, elves, furies, etc. The scene has an additional layer to give the characters a monstrous appearance, but still, the general direction is limited to humanoid characters.
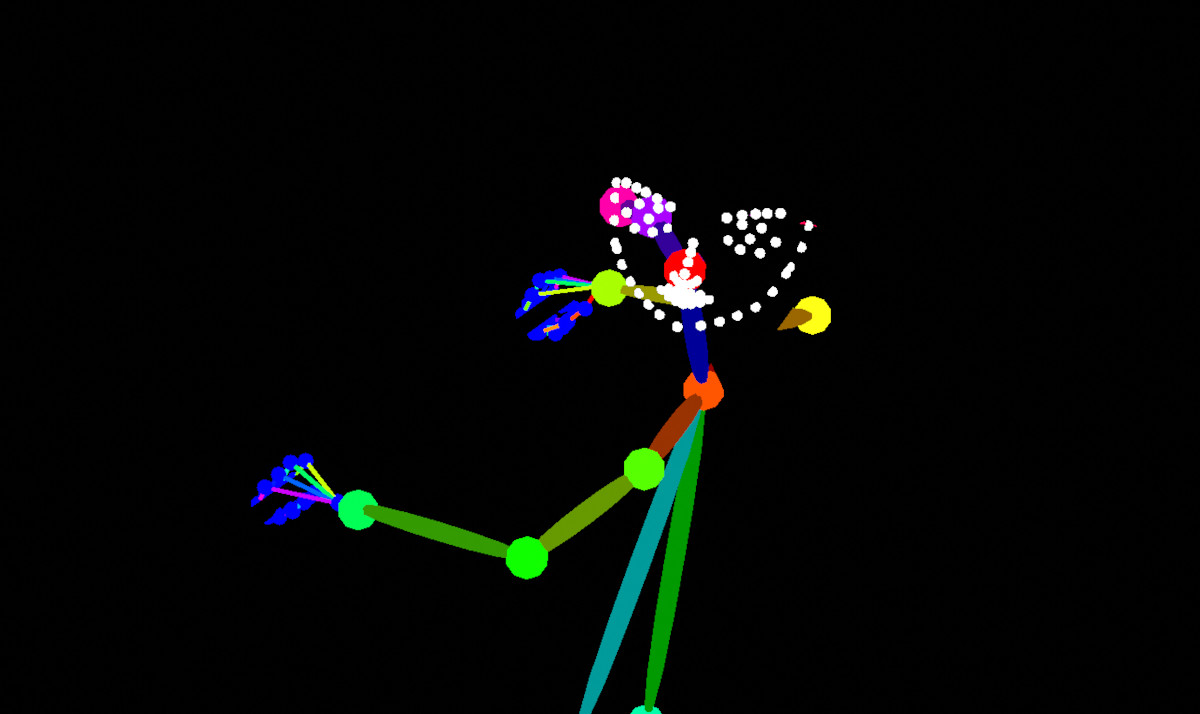
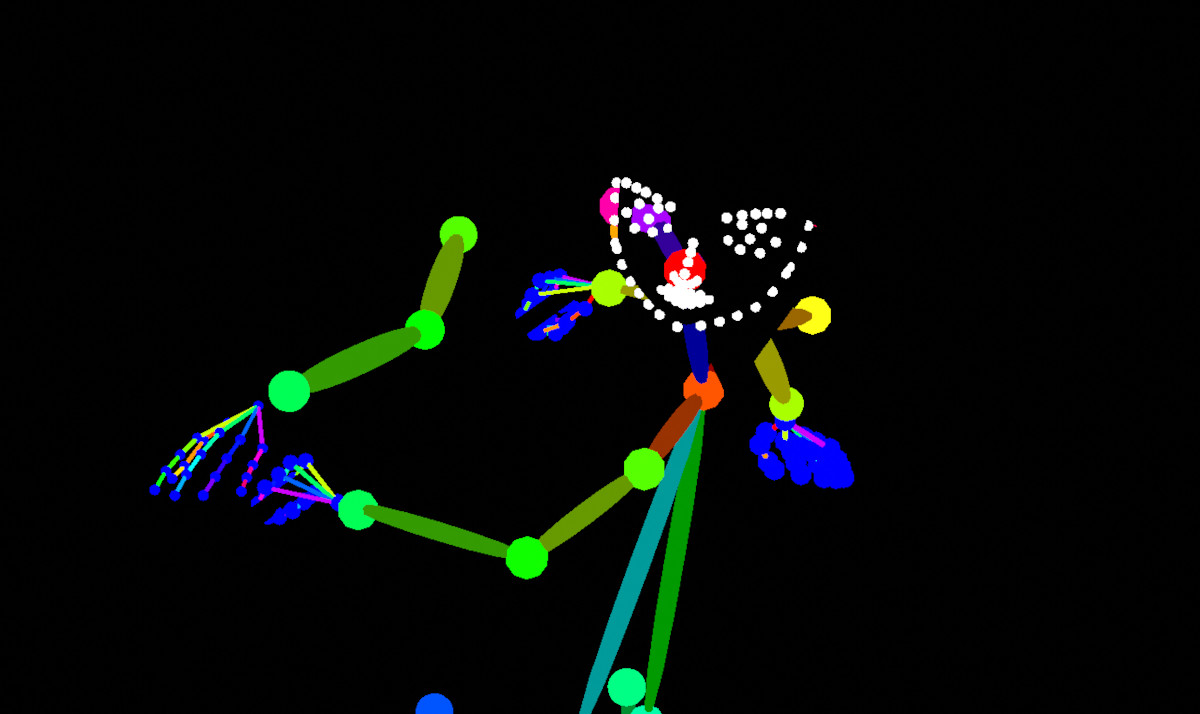
Using of the scene is very simple: open the file in Blender, select the rig, switch to the Pose Mode and set the desired pose.
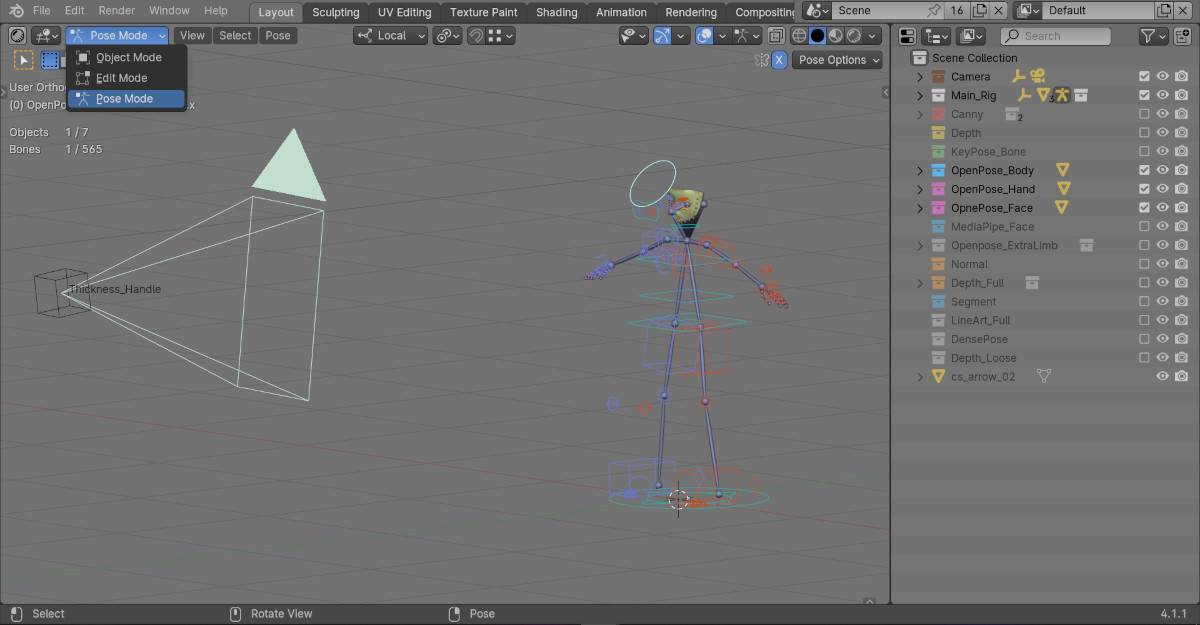
The main actions are performed with the rig, which is placed in the “Main_Rig” collection.
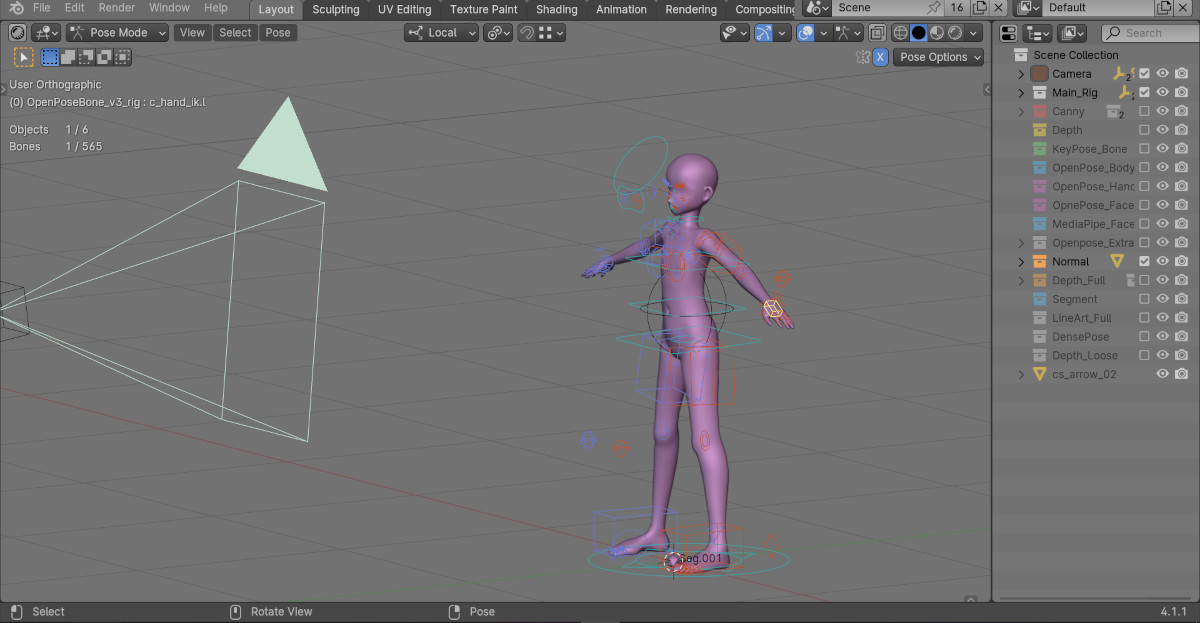
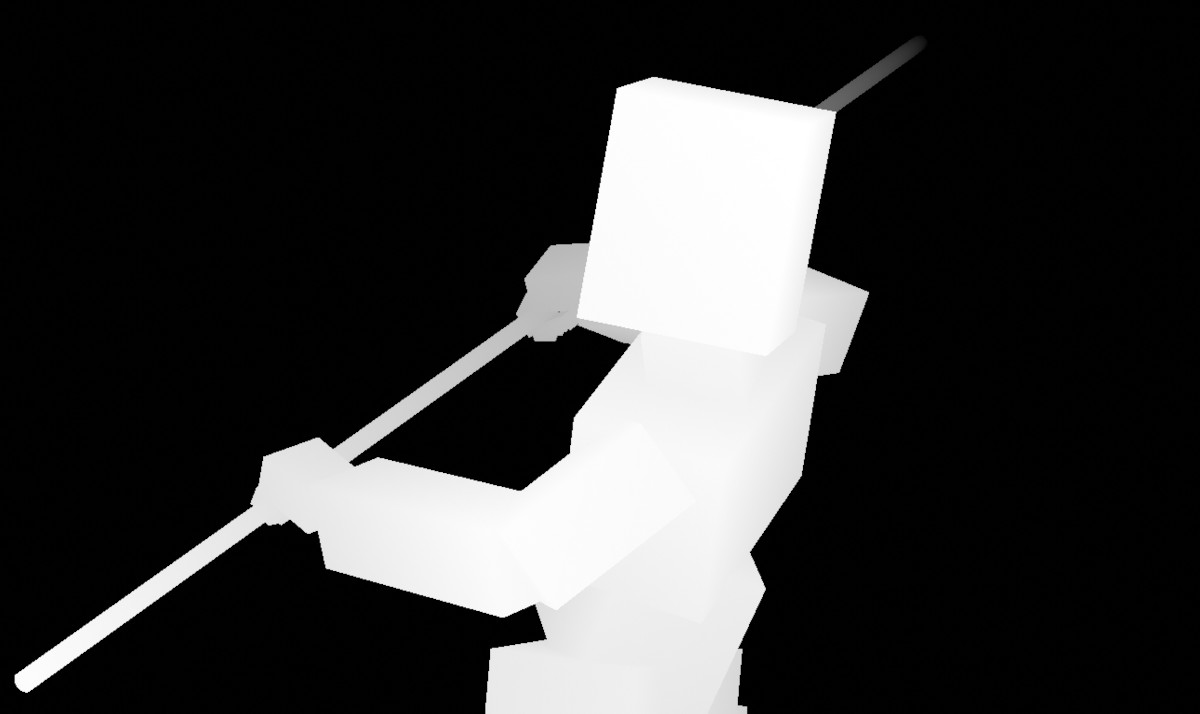
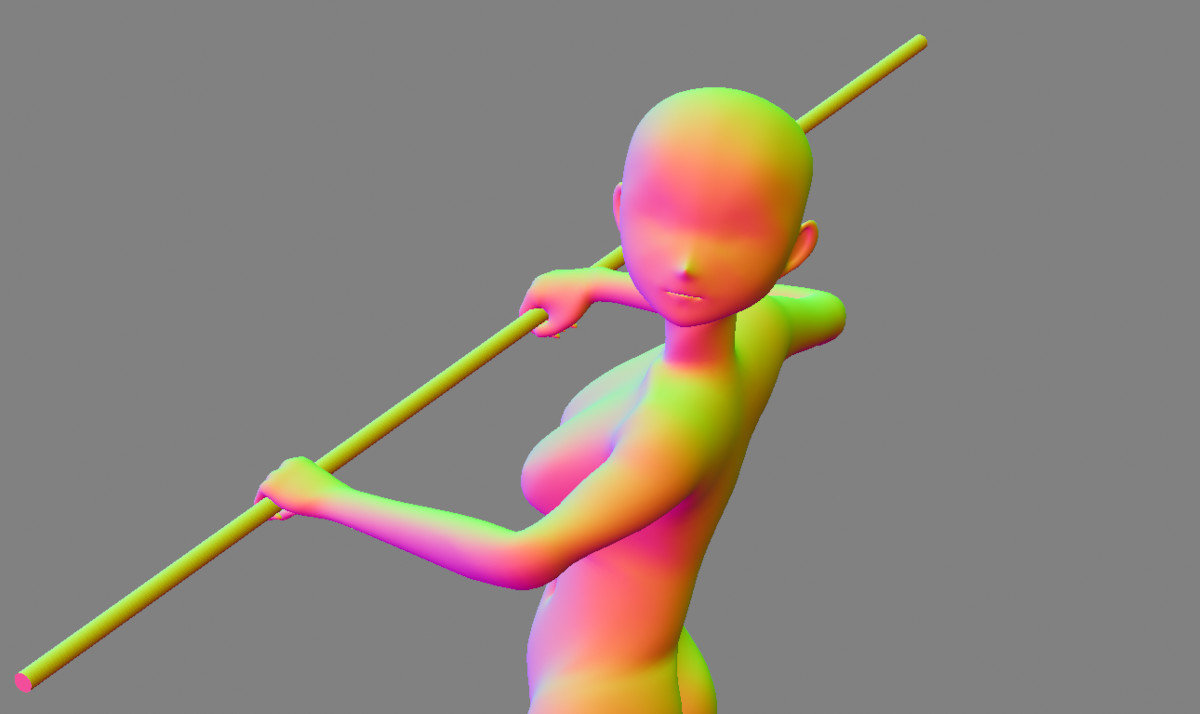
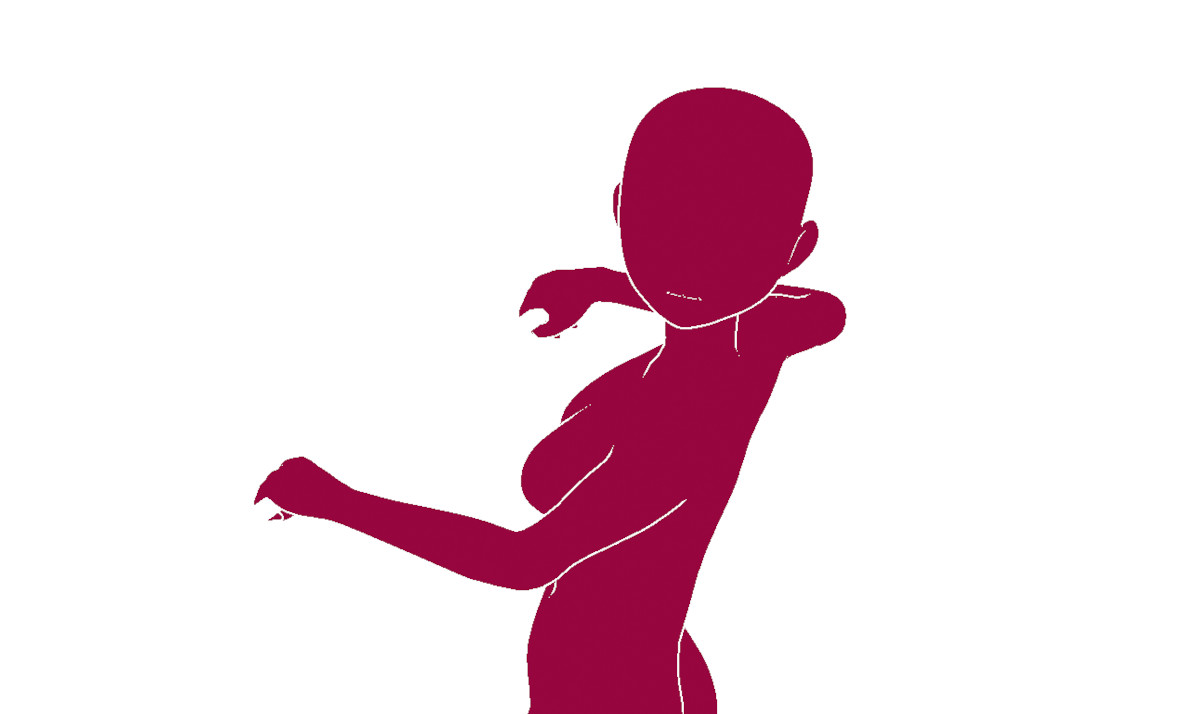
A stylized mesh of a female character is used as the base mesh.
By default, three “Open_Pose” collections are enabled for display in the viewport. For greater clarity, “Open_Pose” collections can be disabled, and instead, the “Normal” collection can be enabled, in which the base mesh of a person is displayed in the 3D viewport.
Using the rig, set the pose you need.
You can also add additional objects to the scene. You can create a separate collection for them and turn it on / off for render if necessary.
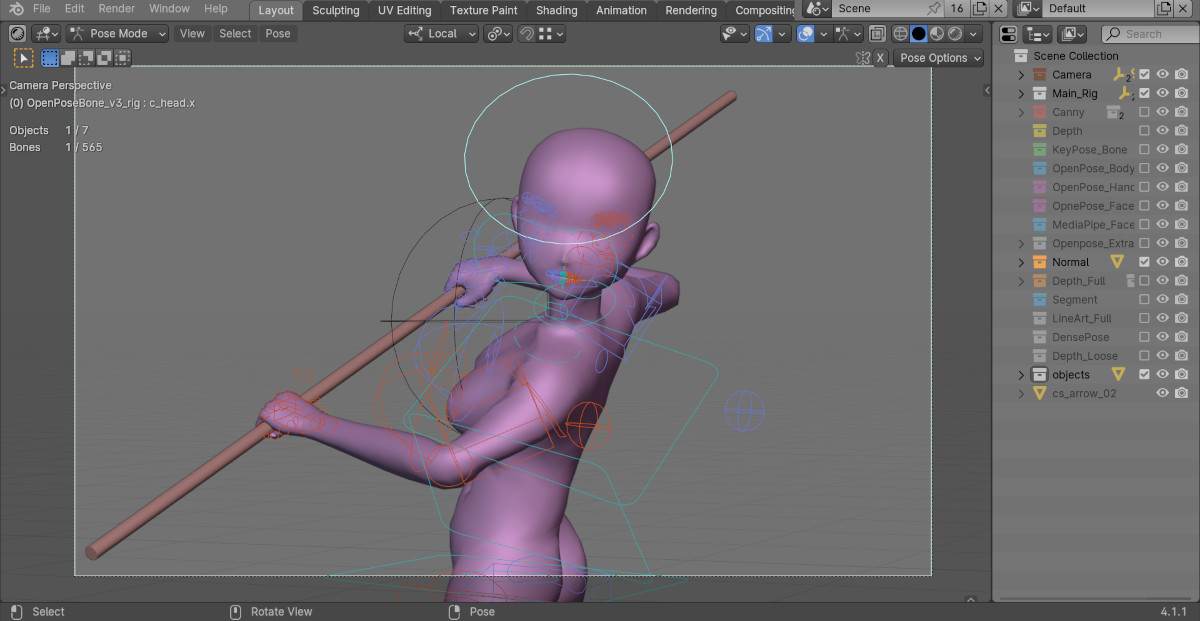
To get control-net templates, just press F12 for rendering.
All finished renders are placed in the “MultiControlnet” directory, which is automatically created in the same place where the .blend file is saved. Each template is in its own subdirectory.
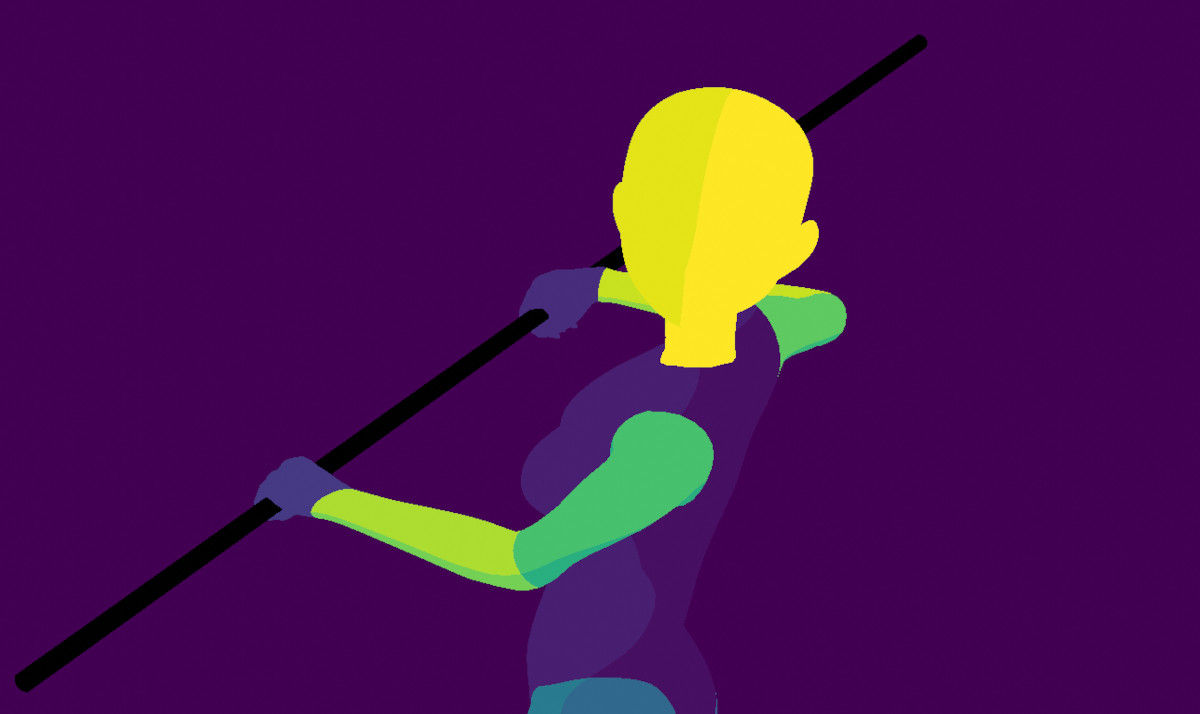
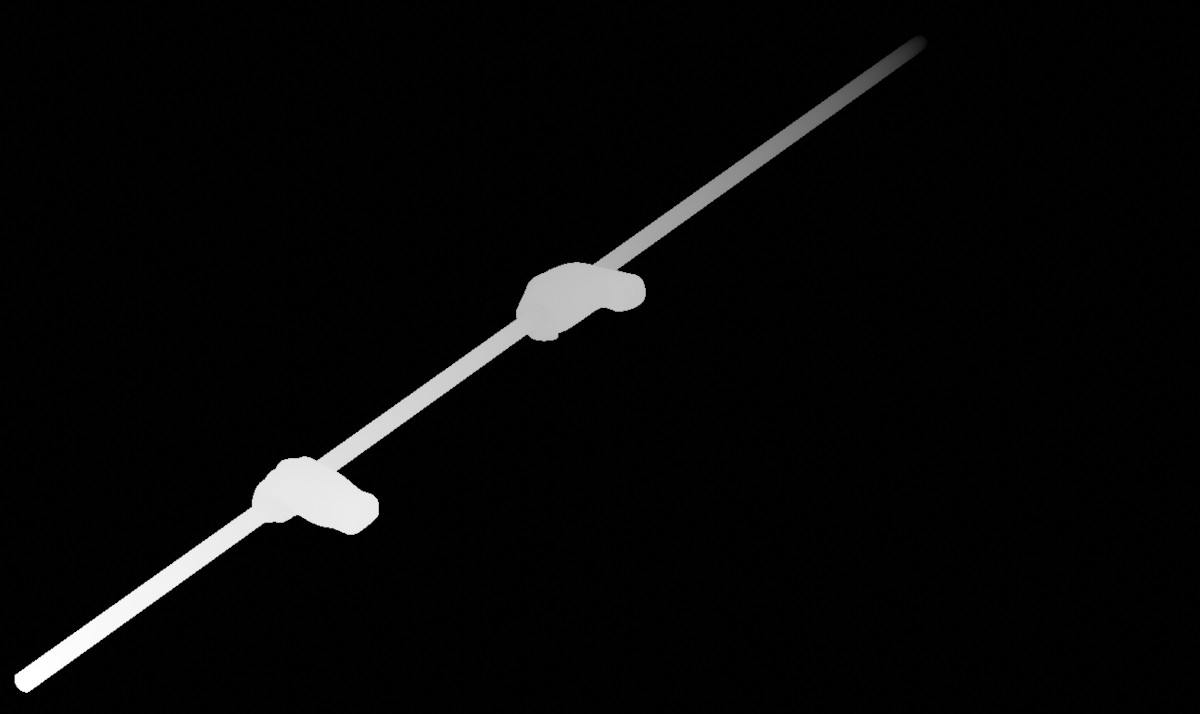
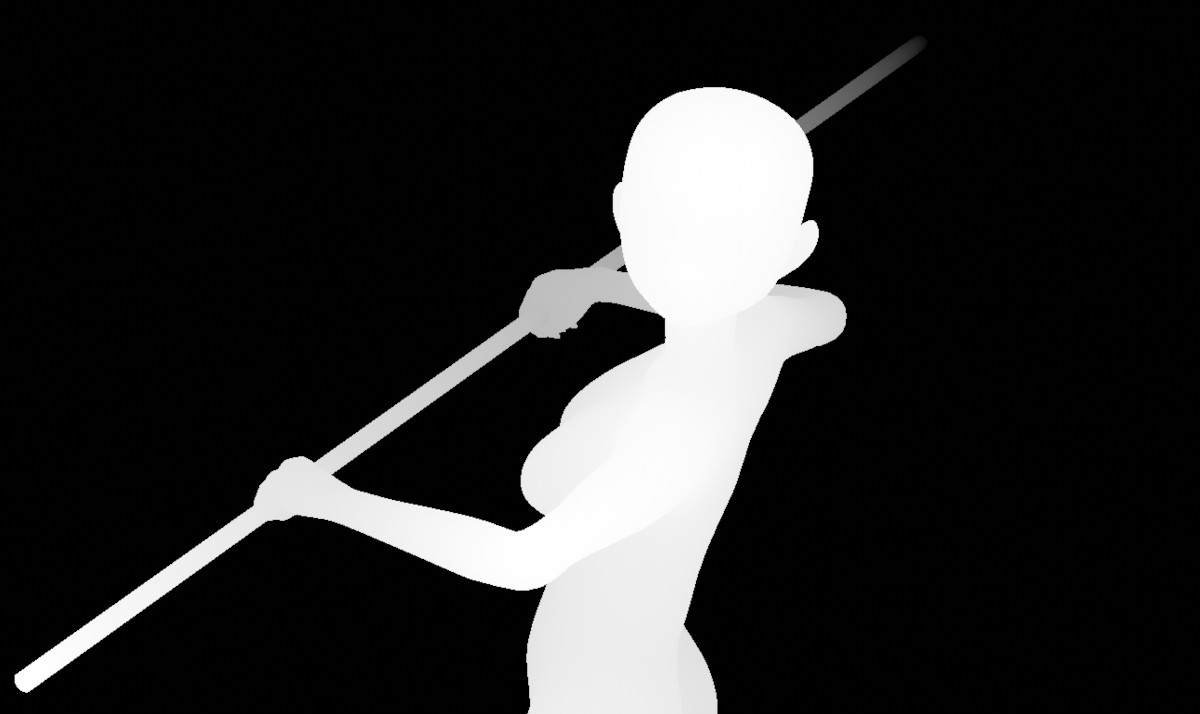
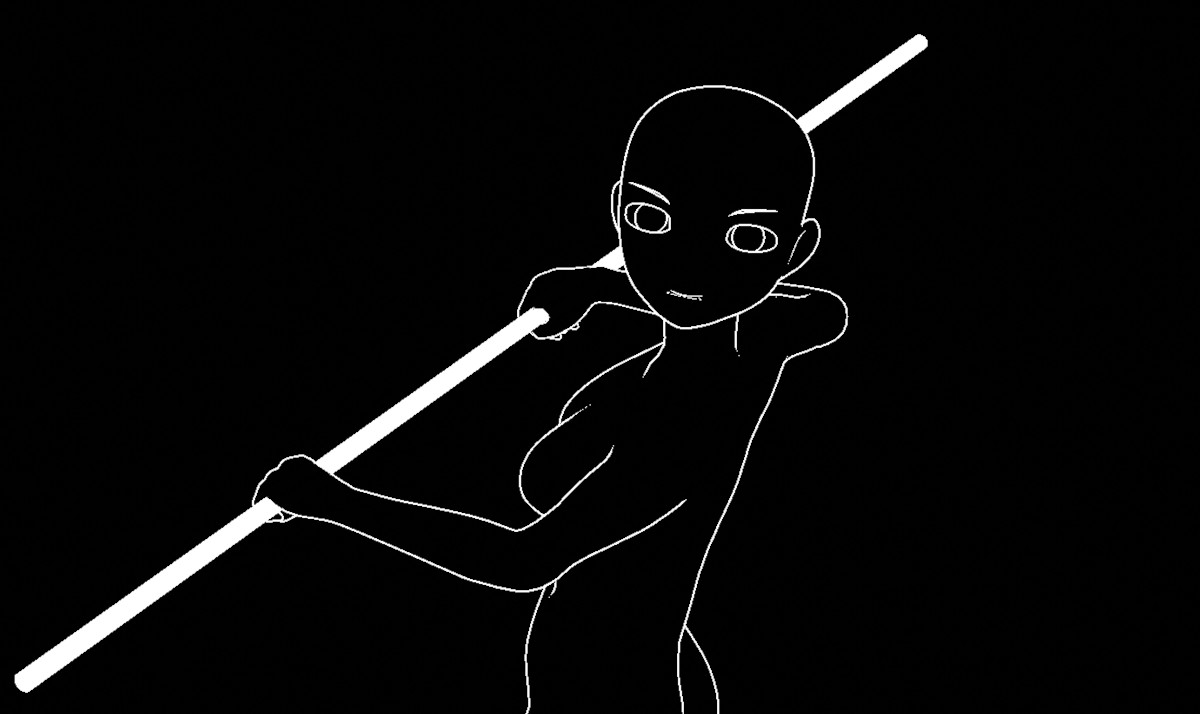
The scene render creates the following control-net templates:
Canny
Classic outline. Only for hands and face.

Dense Pose
Depth
Only hands
Depth Full
One of the most popular control-net templates. Hands + body.
Depth Loose
Key Pose
Lineart
Only hands and face.
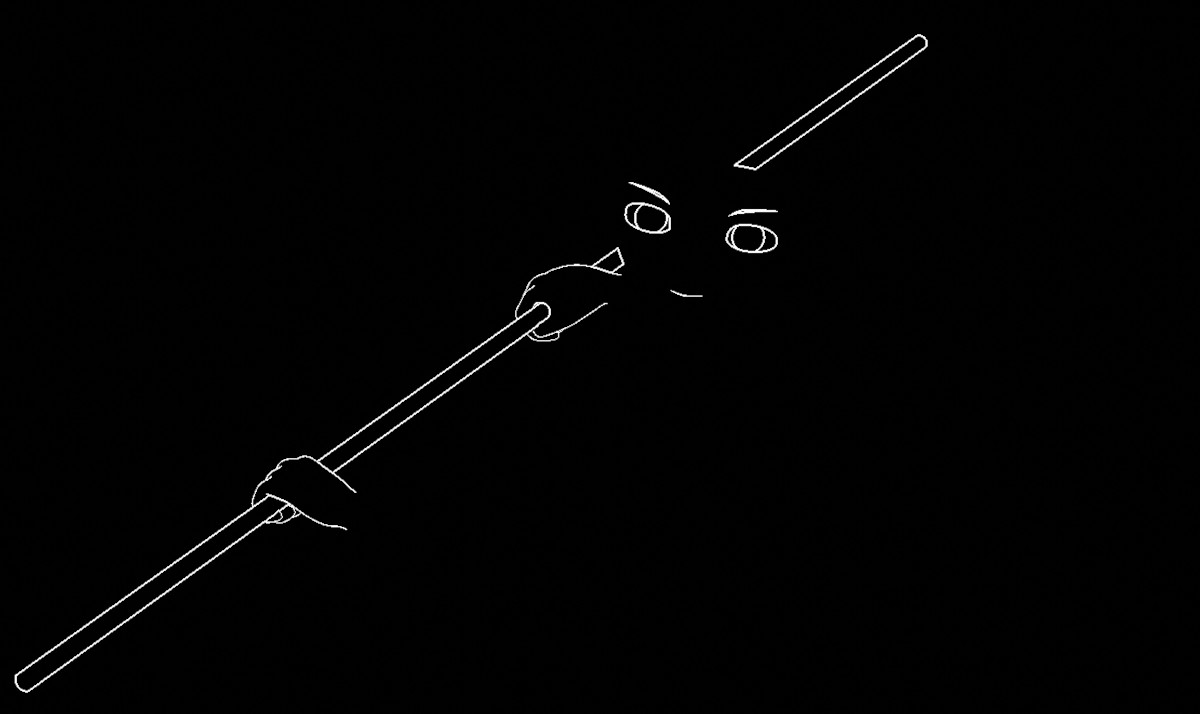
Lineart Full
The second most popular template for control-net. Full body, hands, face.
For additional objects, you may need to adjust their material to create outline.
Media Pipe Face
Normal
Normal map. On my mind, this is one of the best templates, but unfortunately there are not many control-nets that support it.
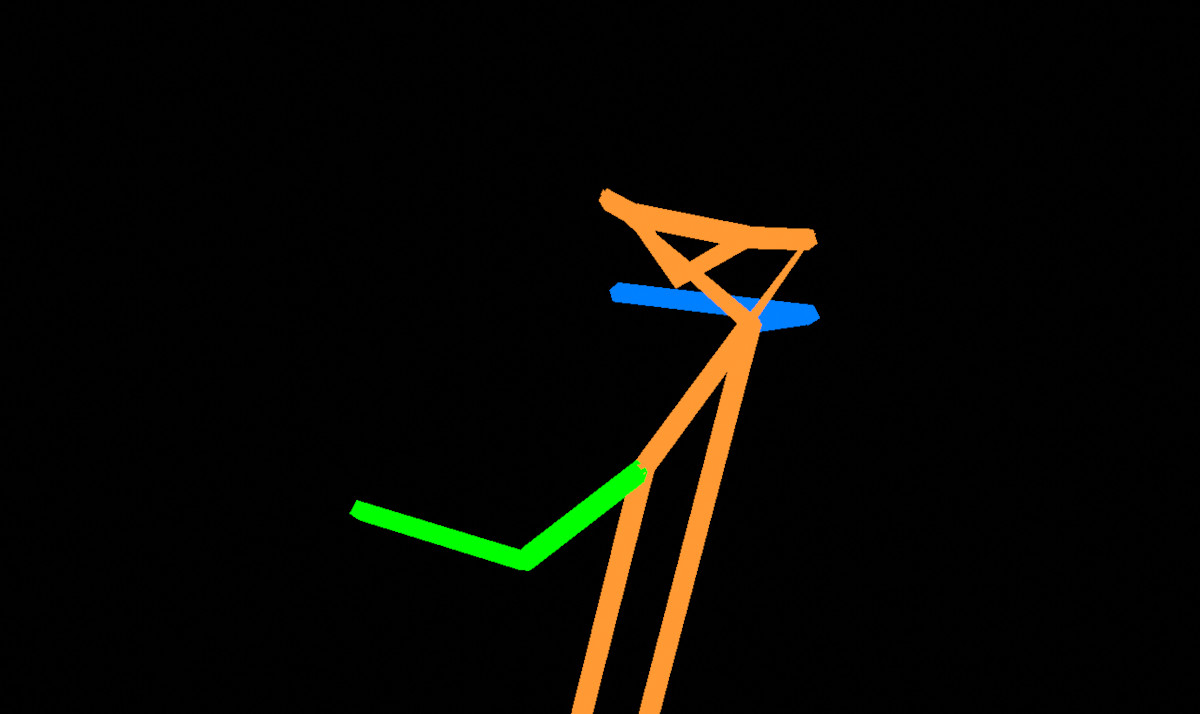
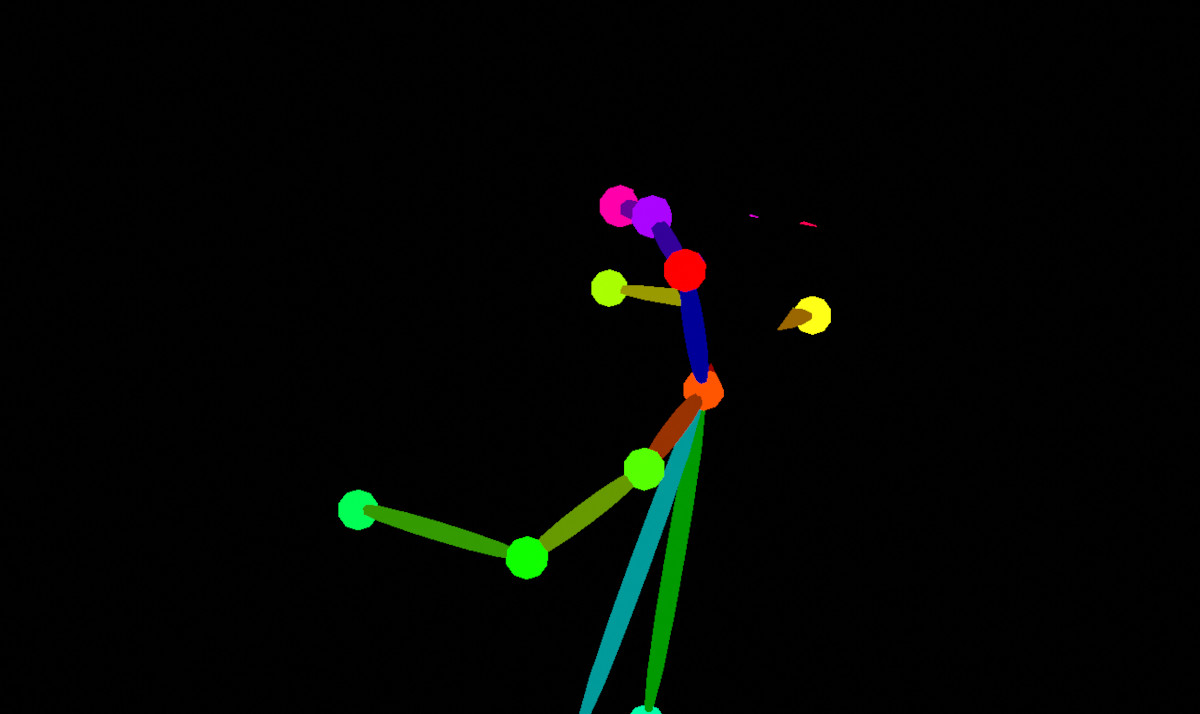
Open Pose
The third of the most popular templates is Open Pose. Only the skeleton, without face and hands.
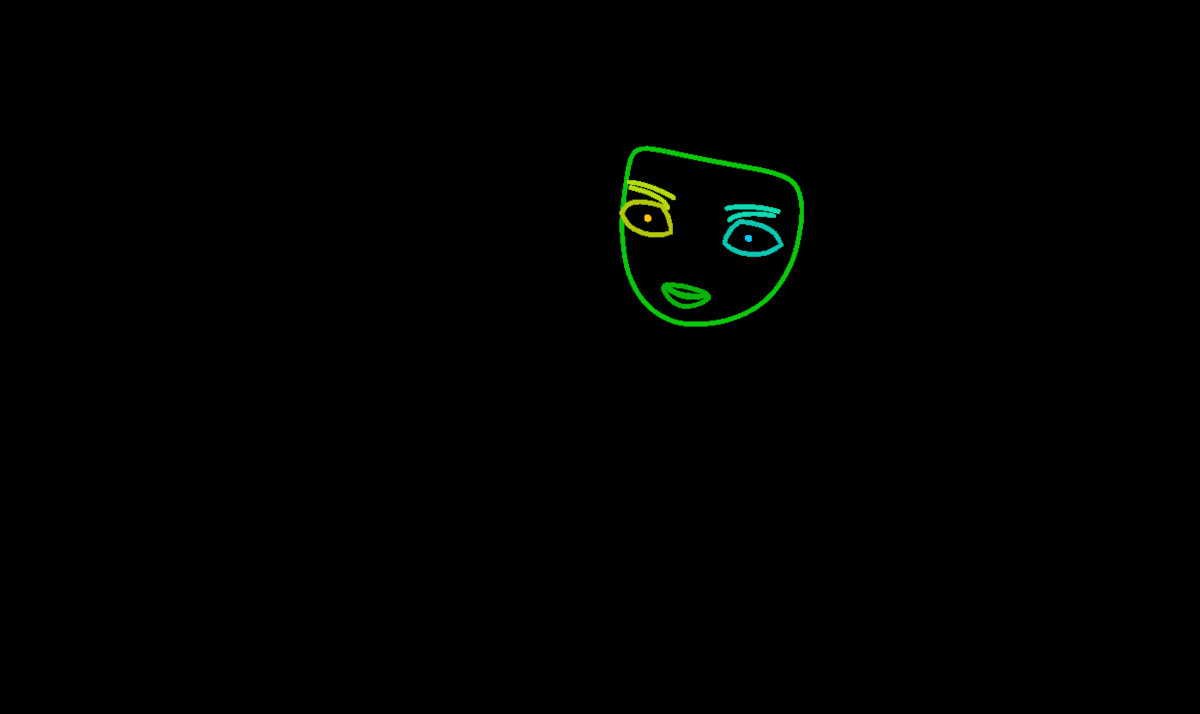
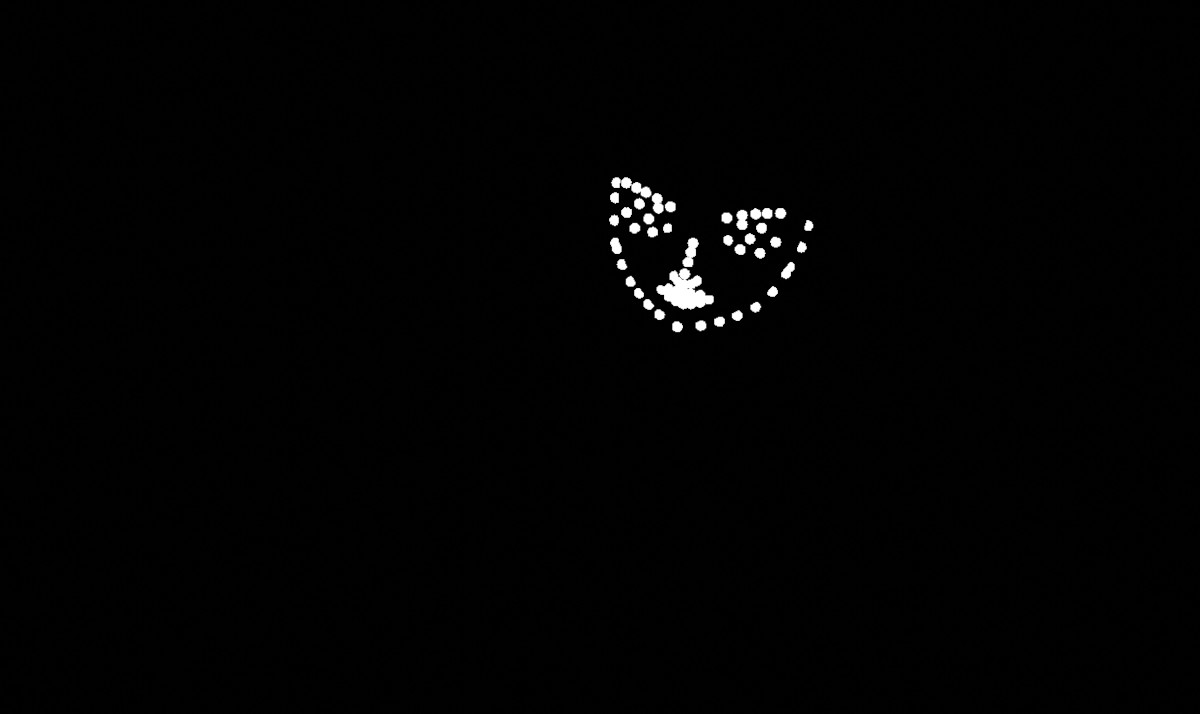
Open Pose Face
Part of the Open Pose template that only applies to the face.
Open Pose Hand
The part of Open Pose responsible for the hands.

Open Pose Full
The full Open Pose template, including the skeleton, hands and face.
Open Pose Full Extra Limb
That extra template for creating monstrous characters.
Seq
And the additional render of the entire base mesh for general control.
We can now use the resulting renders as source images for control-net when generating AI images.
For example, let’s substitute the resulting Normal Map template into the ComfyUI workflow.
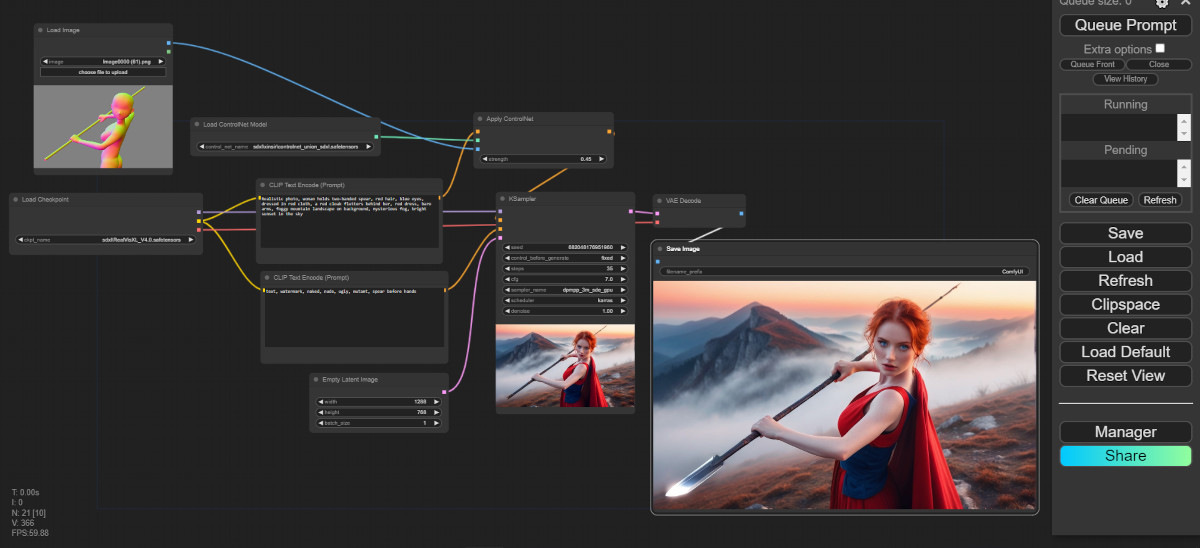
As a result, we get an image in which the character’s pose matches the template we specified.
In my version of the .blend scene file, a camera binding to the rig skeleton is added via an empty. The empty moves after the skeleton, and the camera view follows the empty. Which adds a little convenience when setting poses.
Also, I attached a .blend file with the pose set for rendering control-net templates of this final image.