Blender has an internal text editor to write scripts on Python language. However, this editor is much inferior to specially designed for writing code IDEs. There is no satisfactory autocomplete, comfortable syntax lighting, possibility to organize projects in Blender internal text editor – all those things that determine the speed and ease of code writing. However, it is not difficult to connect and use an external IDE for writing Blender scripts.
At present, there are several IDEs (Integrated Development Environment) for Python language. Each of them has some advantages and disadvantages. Let’s connect Blender with an external IDE PyCharm by the JetBrains company. This is a quite powerful environment that has all basic functions which almost completely covers all the usual requirements for such programs. Also, it has free Community version.
- Download and install PyCharm on your computer
- Download the package from the official website: PyCharm Community Edition.
- Install PyCharm.
- PyCharm requires a separate Python interpreter. It must be downloaded and installed too.
- Download the package from the official Python website. The best is to download and install the same version of the interpreter that Blender use.
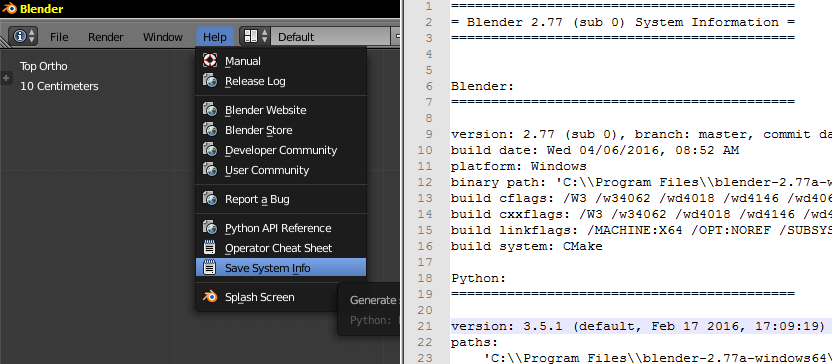
- To learn Blender Python interpreter version – In the main Blender menu choose:
- Help – Save System Info
- Specify place to save the file with current Blender system information.
- Open the saved file and in Python section find the version number.

Learning Blender Python version number - Blender 2.77 use Python version 3.5.1
- Install required version of Python interpreter.
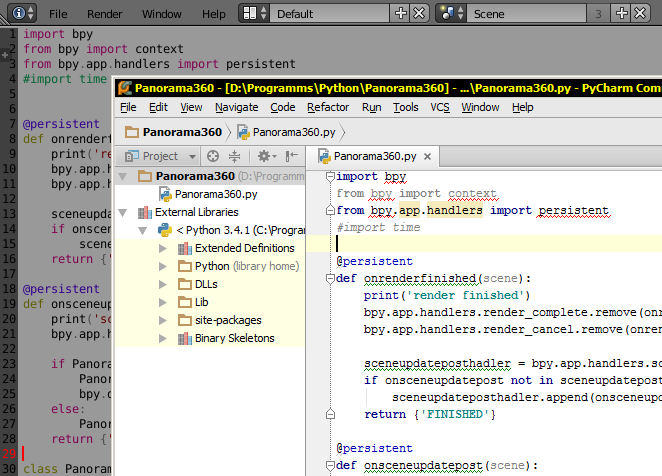
- Now we can create Blender script file in PyCharm:
-
- Run PyCharm
- Create a new project
- Press Create New Project in start-up screen
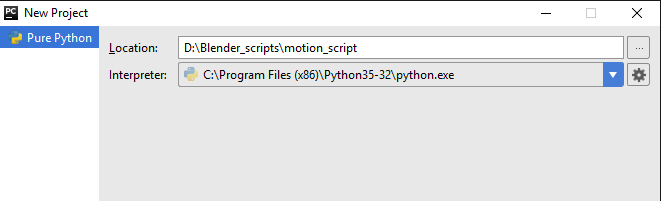
- Specify the project location and choose the interpreter:
- In the “Location” field specify the project location. For example D:/Blender/motion_script
- In the “Interpreter” field specify the Python interpreter.

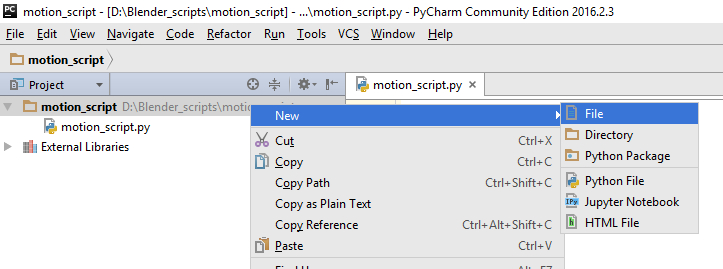
Creating PyCharm project - After creating project right click the project name to open its menu. Select New – Python file to create a new script file. For example name it motion_script.py.
-
The script file is ready.
- To get properly Blender API auto-complete in PyCharm we need to make API description files from Blender and include them in the created project.
- To make auto-complete files for Blender 2.77:
- To export Blender auto-complete description files we can use the utility pypredef_gen.
-
- We need only one file pypredef_gen.py from it. This file is located in the python_api directory.
- Download this file and save it somewhere on your computer, for example in the root of drive D:/
- To execute it create a batch file ppg.cmd with the following content, replacing _BLENDER_PATH_ with the full path to Blender (eg it can be: % ProgramFiles%\blender_2.77, but be sure to write your own):
1"_BLENDER_PATH_\Blender.exe" -b -P "d:/pypredef_gen.py"- Run ppg.cmd file.
- After ppg.cmd execution in the same place where the pypredef_gen.py file is located (in our case in the root of drive D:/) will be created pypredef directory with files describing the Blender API structure. Save this directory in any convenient place.
-
- To make auto-complete files for Blender 2.79, 2.80 and later:
- You can download already build auto-complete files from GitHub: https://github.com/Korchy/blender_autocomplete
- To export Blender auto-complete description files we can use the utility pypredef_gen.
- Now it needs to link auto-complete files to our PyCharm project. Files can be included in all PyCharm projects (once, but this case they will be used, even in projects that are not related to Blender), or you can include them to each new separate project.
-
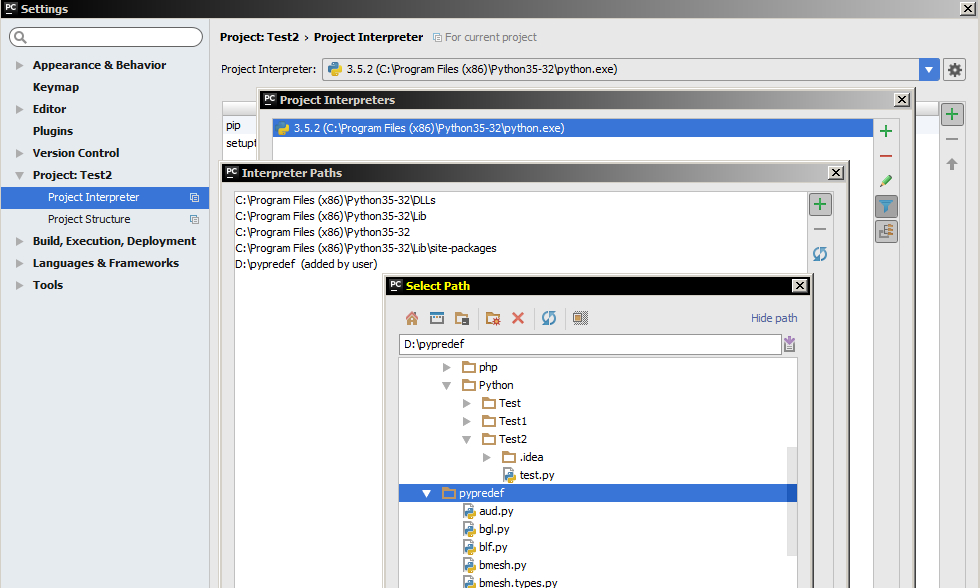
- For a one-time connection to all projects (current and future):
- In the PyCharm main menu select: File – Settings
- Project: The name of the current project – Project Interpreter
- Click the gear icon in the right upper corner of the window – More
- Click Show Paths For The Selected Interpreter
- Click the green positive sign icon and add the directory with auto-complete files to list.
- For a one-time connection to all projects (current and future):

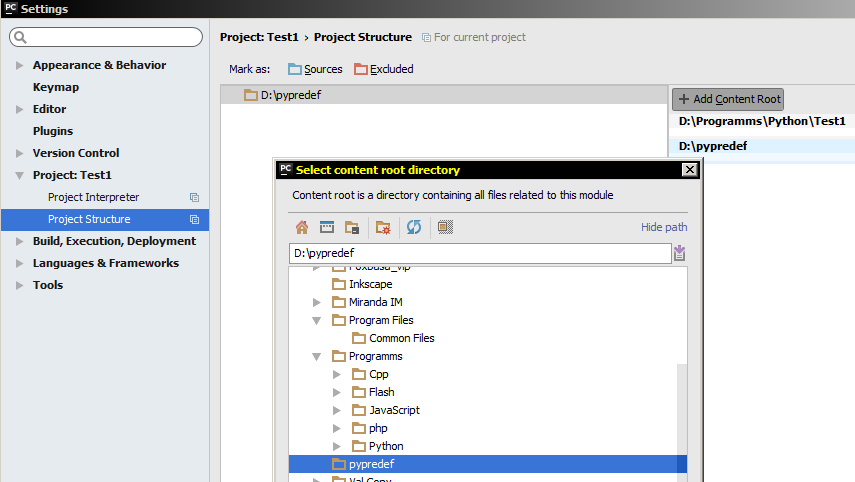
Adding Blender API autocomplete to all PyCharm projects - To connect files only to the current project:
- In the PyCharm main menu select: File – Settings
- Project: The name of the current project – Project Structure
- Click Add Content Root and add the directory with auto-complete files to list.
-
- To make auto-complete files for Blender 2.77:
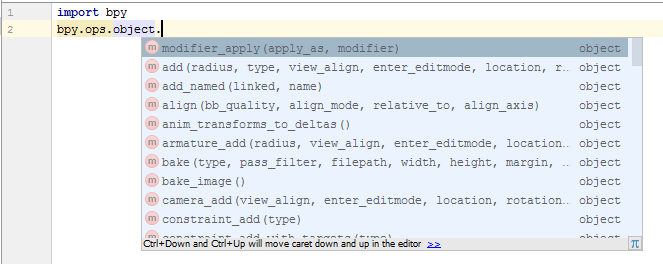
After performing these steps, Blender API autocomplete will work in the PyCharm project.
- Open Blender
- Open internal Blender text editor
- Press the “New” button to create a new file
- Write the following text, replacing _PATH_ with the PyCharm script path (st. 3.3.1.) (in our example D:/Blender/motion_script) and _FILE_NAME_ with the script file name (st. 3.4) (in our example motion_script).
|
1 2 3 4 5 |
import bpy import os filename = os.path.join("_PATH_", "_FILE_NAME_.py") exec(compile(open(filename).read(), filename, 'exec')) |
Everything is ready to write scripts. You can switch to the PyCharm, write a necessary script in the created file, using all the advantages of this IDE. Then return to the Blender and just click the Run Script button to execute the prepared script.
Blender file with this text can be saved in a convenient place as a template, and you can use it to write different scripts in the future.
Bonus script example:
For example, type the following code to the script file created in PyCharm:
|
1 2 3 4 5 6 7 8 9 10 11 12 13 14 15 16 17 |
bpy.ops.mesh.primitive_cube_add(location=(0,0,0)) Obj = bpy.context.active_object mod = Obj.modifiers.new("Bevel", 'BEVEL') mod.segments = 3 bpy.ops.object.shade_smooth() mod1 = Obj.modifiers.new("Array", 'ARRAY') mod1.count=20 mod2 = Obj.modifiers.new("Array", 'ARRAY') mod2.relative_offset_displace[0]=0 mod2.relative_offset_displace[1]=1 mod2.count=20 bpy.ops.object.modifier_apply(apply_as='DATA', modifier="Array.001") bpy.ops.object.modifier_apply(apply_as='DATA', modifier="Array") bpy.ops.object.editmode_toggle() bpy.ops.mesh.separate(type="LOOSE") bpy.ops.object.editmode_toggle() bpy.ops.object.randomize_transform(loc=(0, 0, 1)) |
This script creates a cube, adds a facet to it, reproduce it to 20×20 cubes and randomly raises each of them by Z axis in the range from 0 to 1. The result is a stylish tech background with cubes. Just assign material, set lighting, and start rendering.

Hi there, thanks for the great tutorial! I followed it and it works fine when you want to Run a single script with its internal functions. However, I have an issue concerning my modules. I wrote a bunch of script in PyCharm and then a main app script that calls functions from my different modules. It seemingly works on PyCharm however in Blender, using the Run script I get an error telling me my module does not exist. I managed to create an Addon containing my script and successfully imported it into Blender but it still does not work.. Do you have any suggestion regarding this problem? Thank you !
If you have multifile add-on, all files should be in the same directory and in this directory copied to the add-on’s folder of Blender.
What’s the meaning of this part? What is the
_BLENDER_PATH_exactly? Where can I find thepathanyway? Should I change blender’s path or just the .zip file’s path? I extracted my .zip file but have noppg.cmdin there. It’s really lack of explanation.At present, the best way to get the autocomplete files is to download them from here https://github.com/Korchy/blender_autocomplete or from the author’s GitHub (follow links in readme)
The pypregen wasn’t updated for 5 years and it was written for Blender 2.7x versions.
Anyway if you want to use it:
1. the _BLENDER_PATH_ is the path to the directory you installed Blender, for example, D:/Blender.
2. ppg.cmd file you need to create yourself like simple text file and fill it with the command, for example:
D:/Blender/blender.exe” -b -P “d:/pypredef_gen.py”
Thanks for the blender_autocomplete repo. FYI, the given bonus script would not run correctly under Blender 2.93. The following script produces the intended result. The main change is the syntax of the modifier_apply call.
Thank you for the addition for the 2.93 version!
Hi ^-^
For anyone interested I’ve released a plugin for PyCharm Professional/Community that helps the development of Blender Addons using the PyCharm IDE.
For anyone interested here is the GitHub Repository Link:
https://github.com/BlackStartx/PyCharm-Blender-Plugin
Hope it will help someone ^-^
P.S: If you are the author of this article and think this comment is inappropriate I will remove it instantly~
Hi!
I think that it is an interesting plugin. You can make a separate post on this site with your plugin description.
Hi, thanks for tutorial. Do you have newer API package (2.79)? I have problem to generated and PyCharm somehow ignoring od api.. :/
Thank you.
Hi!
You can get it here https://github.com/nutti/fake-bpy-module/tree/master/modules/2.79
Hi, thank you for this!
I am having some issues when running the bat file. I’m getting and Attribute error:
AttributError: ‘NoneType’ object has no attribute ‘keymaps’…
This is with a clean install of Blender 2.79 and Python 3.5.3
Hello!
I think there ara some issues with pypredef generator and the newes Blender version of API.
I found this ready API headers in internet, try to use them: https://www.dropbox.com/s/en2nznvc71o6h5t/API.zip?dl=0
That worked, thank you~!
Thanks for guide. Works great except for bmesh.ops and bmesh.types, any idea what the fix might be for this? Thanks in advance!
May be some issues in pypredef_gen? Its author updated it last time more than a year ago.
Try to use this bmesh.types https://www.dropbox.com/s/9o91lwzu4ckwawf/bmesh.types.py?dl=0
I do not have bmesh.ops too.
Thanks for your quick response. I will take a look in pypredef_gen and see if I can get it working.
If you will be successful in solving this problem, please write here your solution.
Hello. I’ve got a problem with the bpy module. Pycharm recognizes all other modules except the bpy module. Have you got any idea where the problem can come from ?
There can be many reasons. May be some error while pypredef exporting? Try this variant of bpy file https://www.dropbox.com/s/4x57a7b4ayfwqaq/bpy.py?dl=0
The formatting on this guide is really whack, makes it look a lot more complicated than it is. Perhaps consider removing all the nested lists.
Thank you for your comment! I corrected the most terrible lists, making them a little less indentation.
Please make sure that you equally update the directory or file path : d:/pypredef_gen.py to match your exact location of pypredef_gen.py as found in item 4.3. This gave me problems before I figured it out. However thanks so much.
Yes, you need the proper way to pypredef_gen.py in your cmd-file if it differs from example. Thank you for remark!